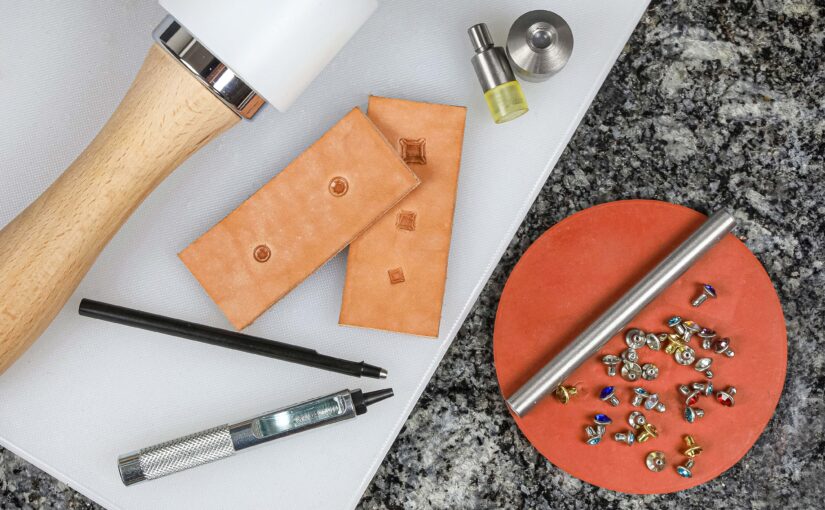
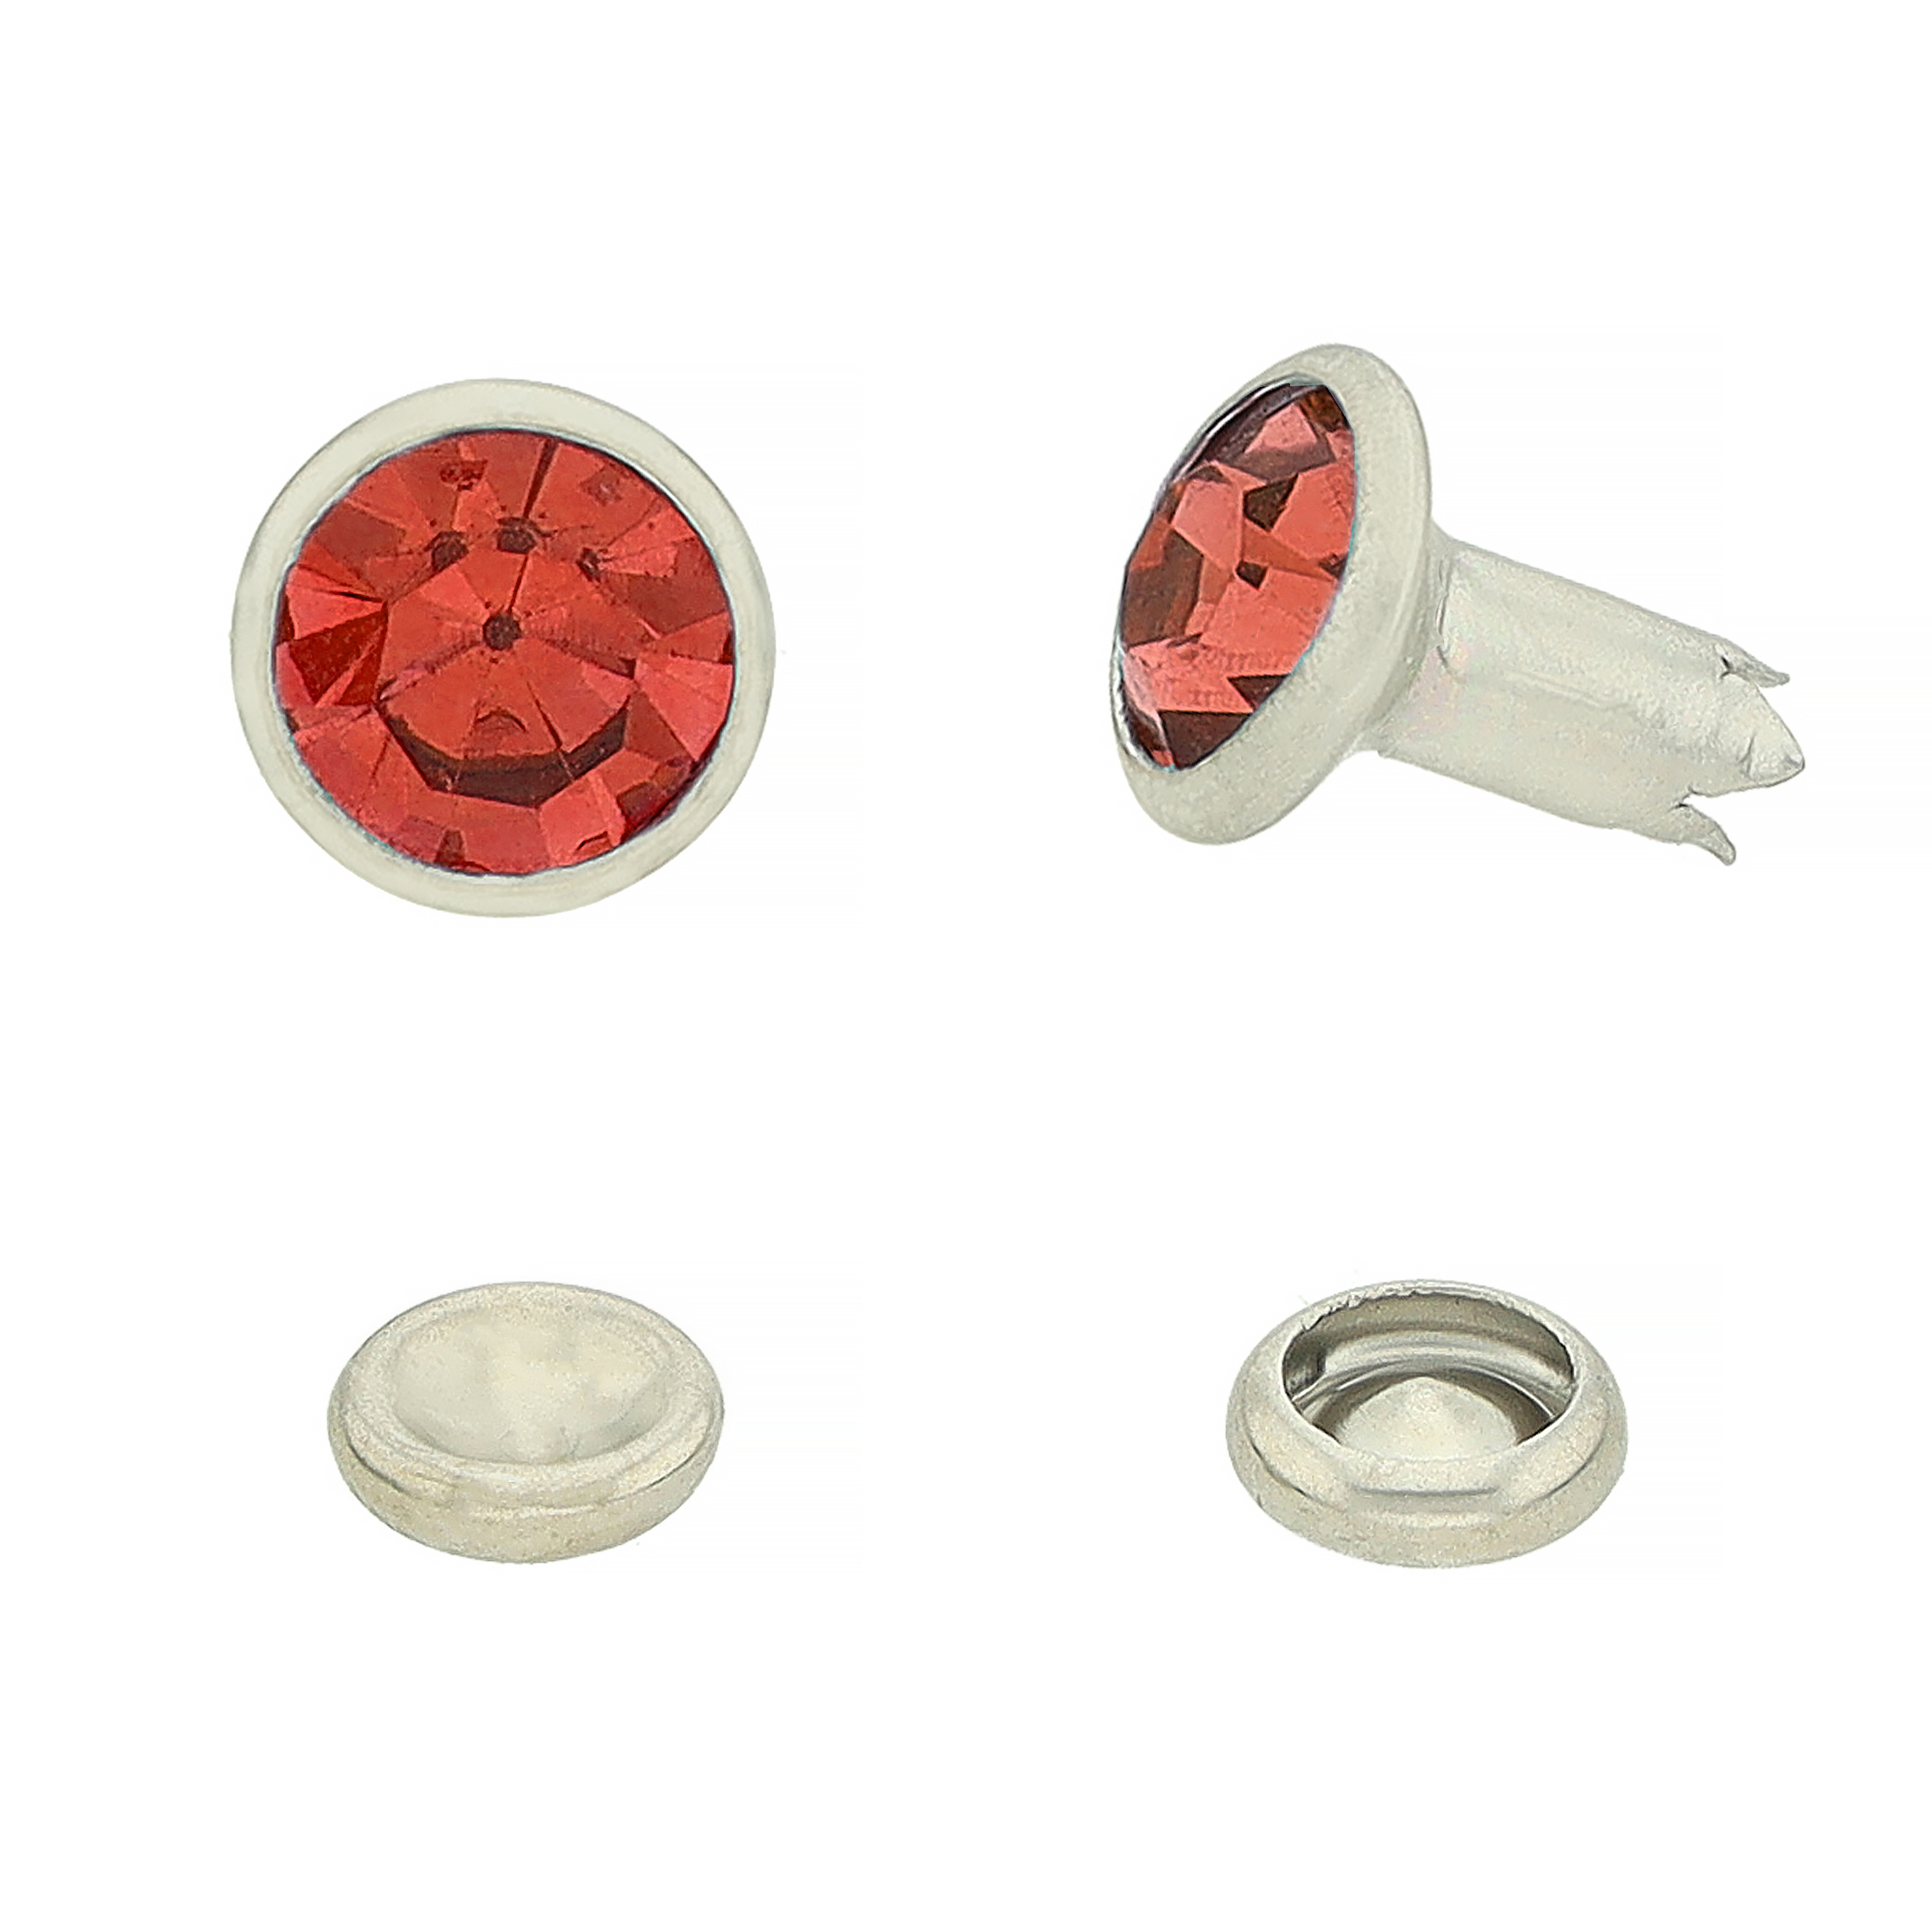
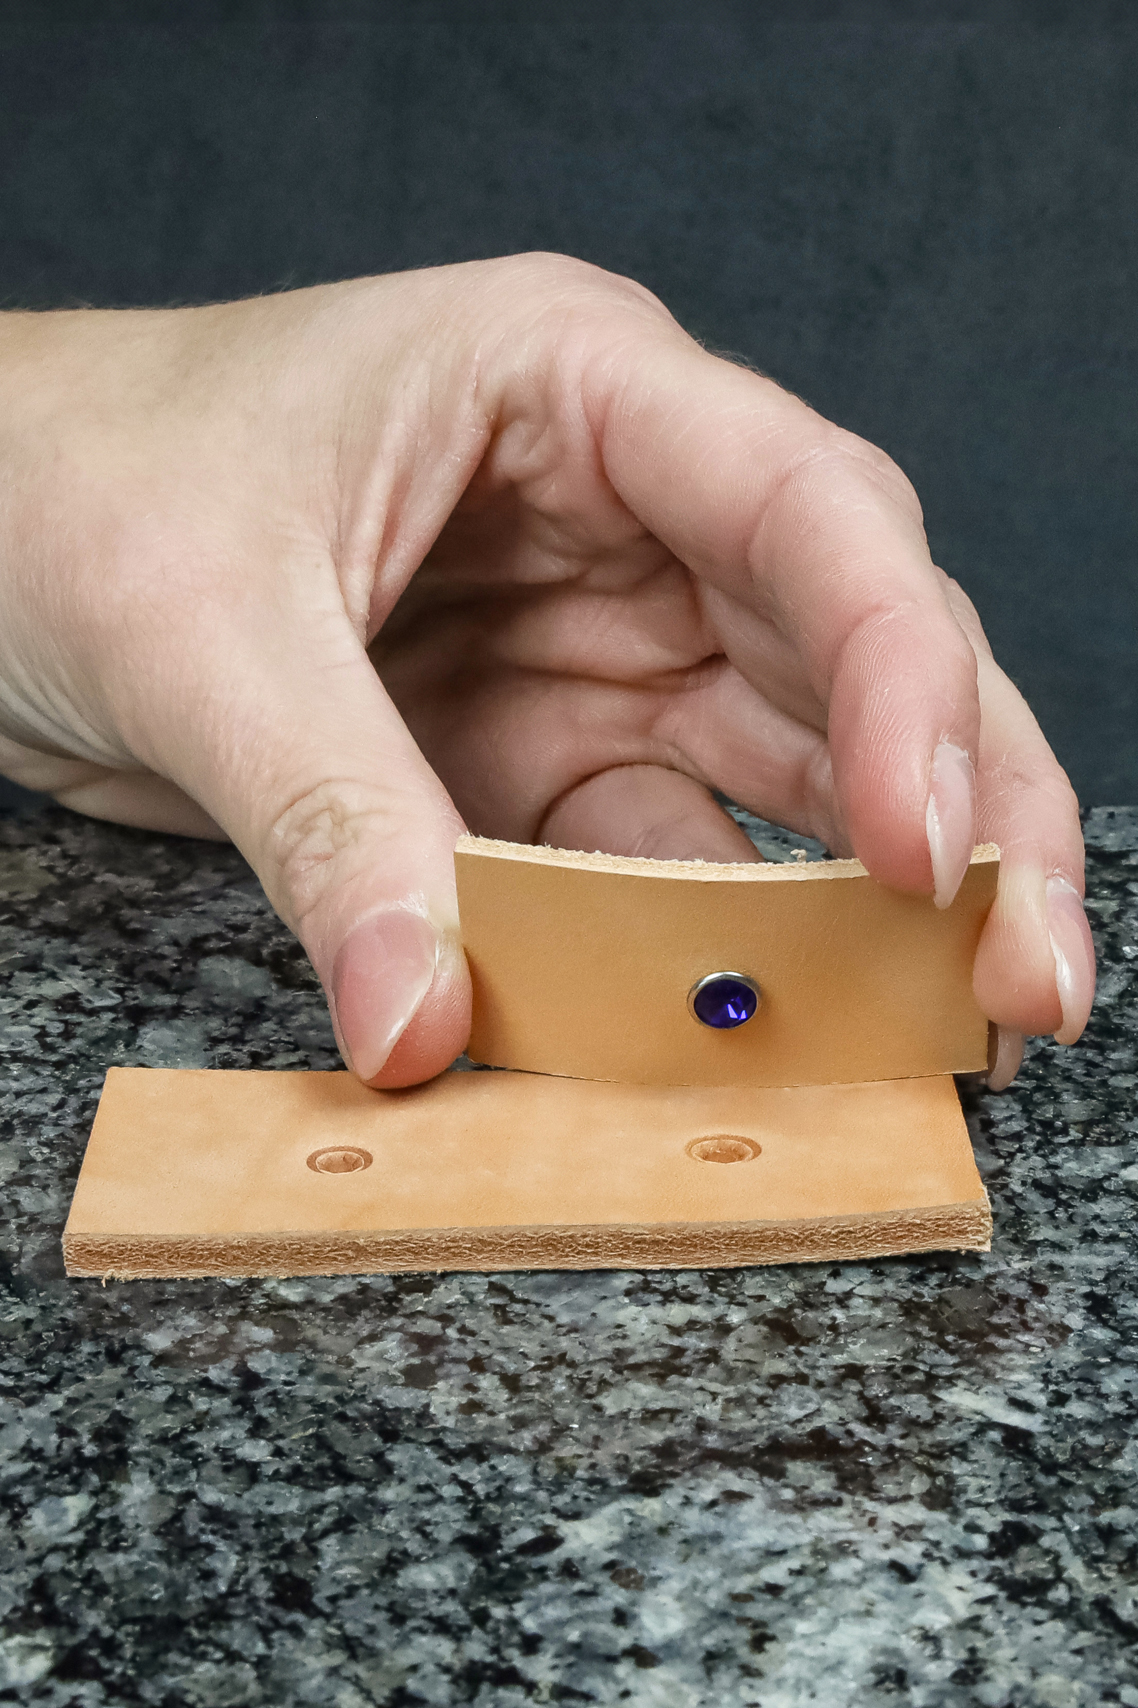
Rhinestone rivets? Little gemstone beauties. They’re not here to hold things together they’re here to look fabulous. They consist of two parts: the sparkly rhinestone top and the bottom piece (let’s call it the “head”), placed from behind. If you’re expecting these to fasten a buckle onto horse harnesses, you might want to reconsider. This is jewelry, not structural hardware.
Rhinestones are facet cut which is essentially jewelry magic turning an ordinary stone into a disco ball. The light reflects off them like sunrise on a lake’s surface, shimmering and sparkling with deep color. Plus, glass rhinestones are sturdy they don’t scratch, dull, or age like plastic imitations.
Uses and Types of Rhinestone Rivets


Rhinestone rivets have found their place wherever style matters. Dog collars, leashes, or jackets? Sure. But also handbags, shoes, belts, even coats or jackets craving a little sparkle. Simply put if something needs to look good and stand out, rhinestones are your best bet.
Rhinestone rivets pair beautifully with other flashy accessories:
- Rhinestone-decorated snap hooks
- Rhinestone buckles for collars
- Collar charms
- Slide charms
- Decorative rivets
Rhinestone rivets aren’t tough guys their strength is beauty, not load bearing capacity. Don’t try hooking a buckle or D-ring to them. This even applies to mini Chihuahua collars those tiny furballs also deserve a reliable connection.
What You’ll Need for Riveting Rhinestone Rivets
1. Rhinestone Rivets
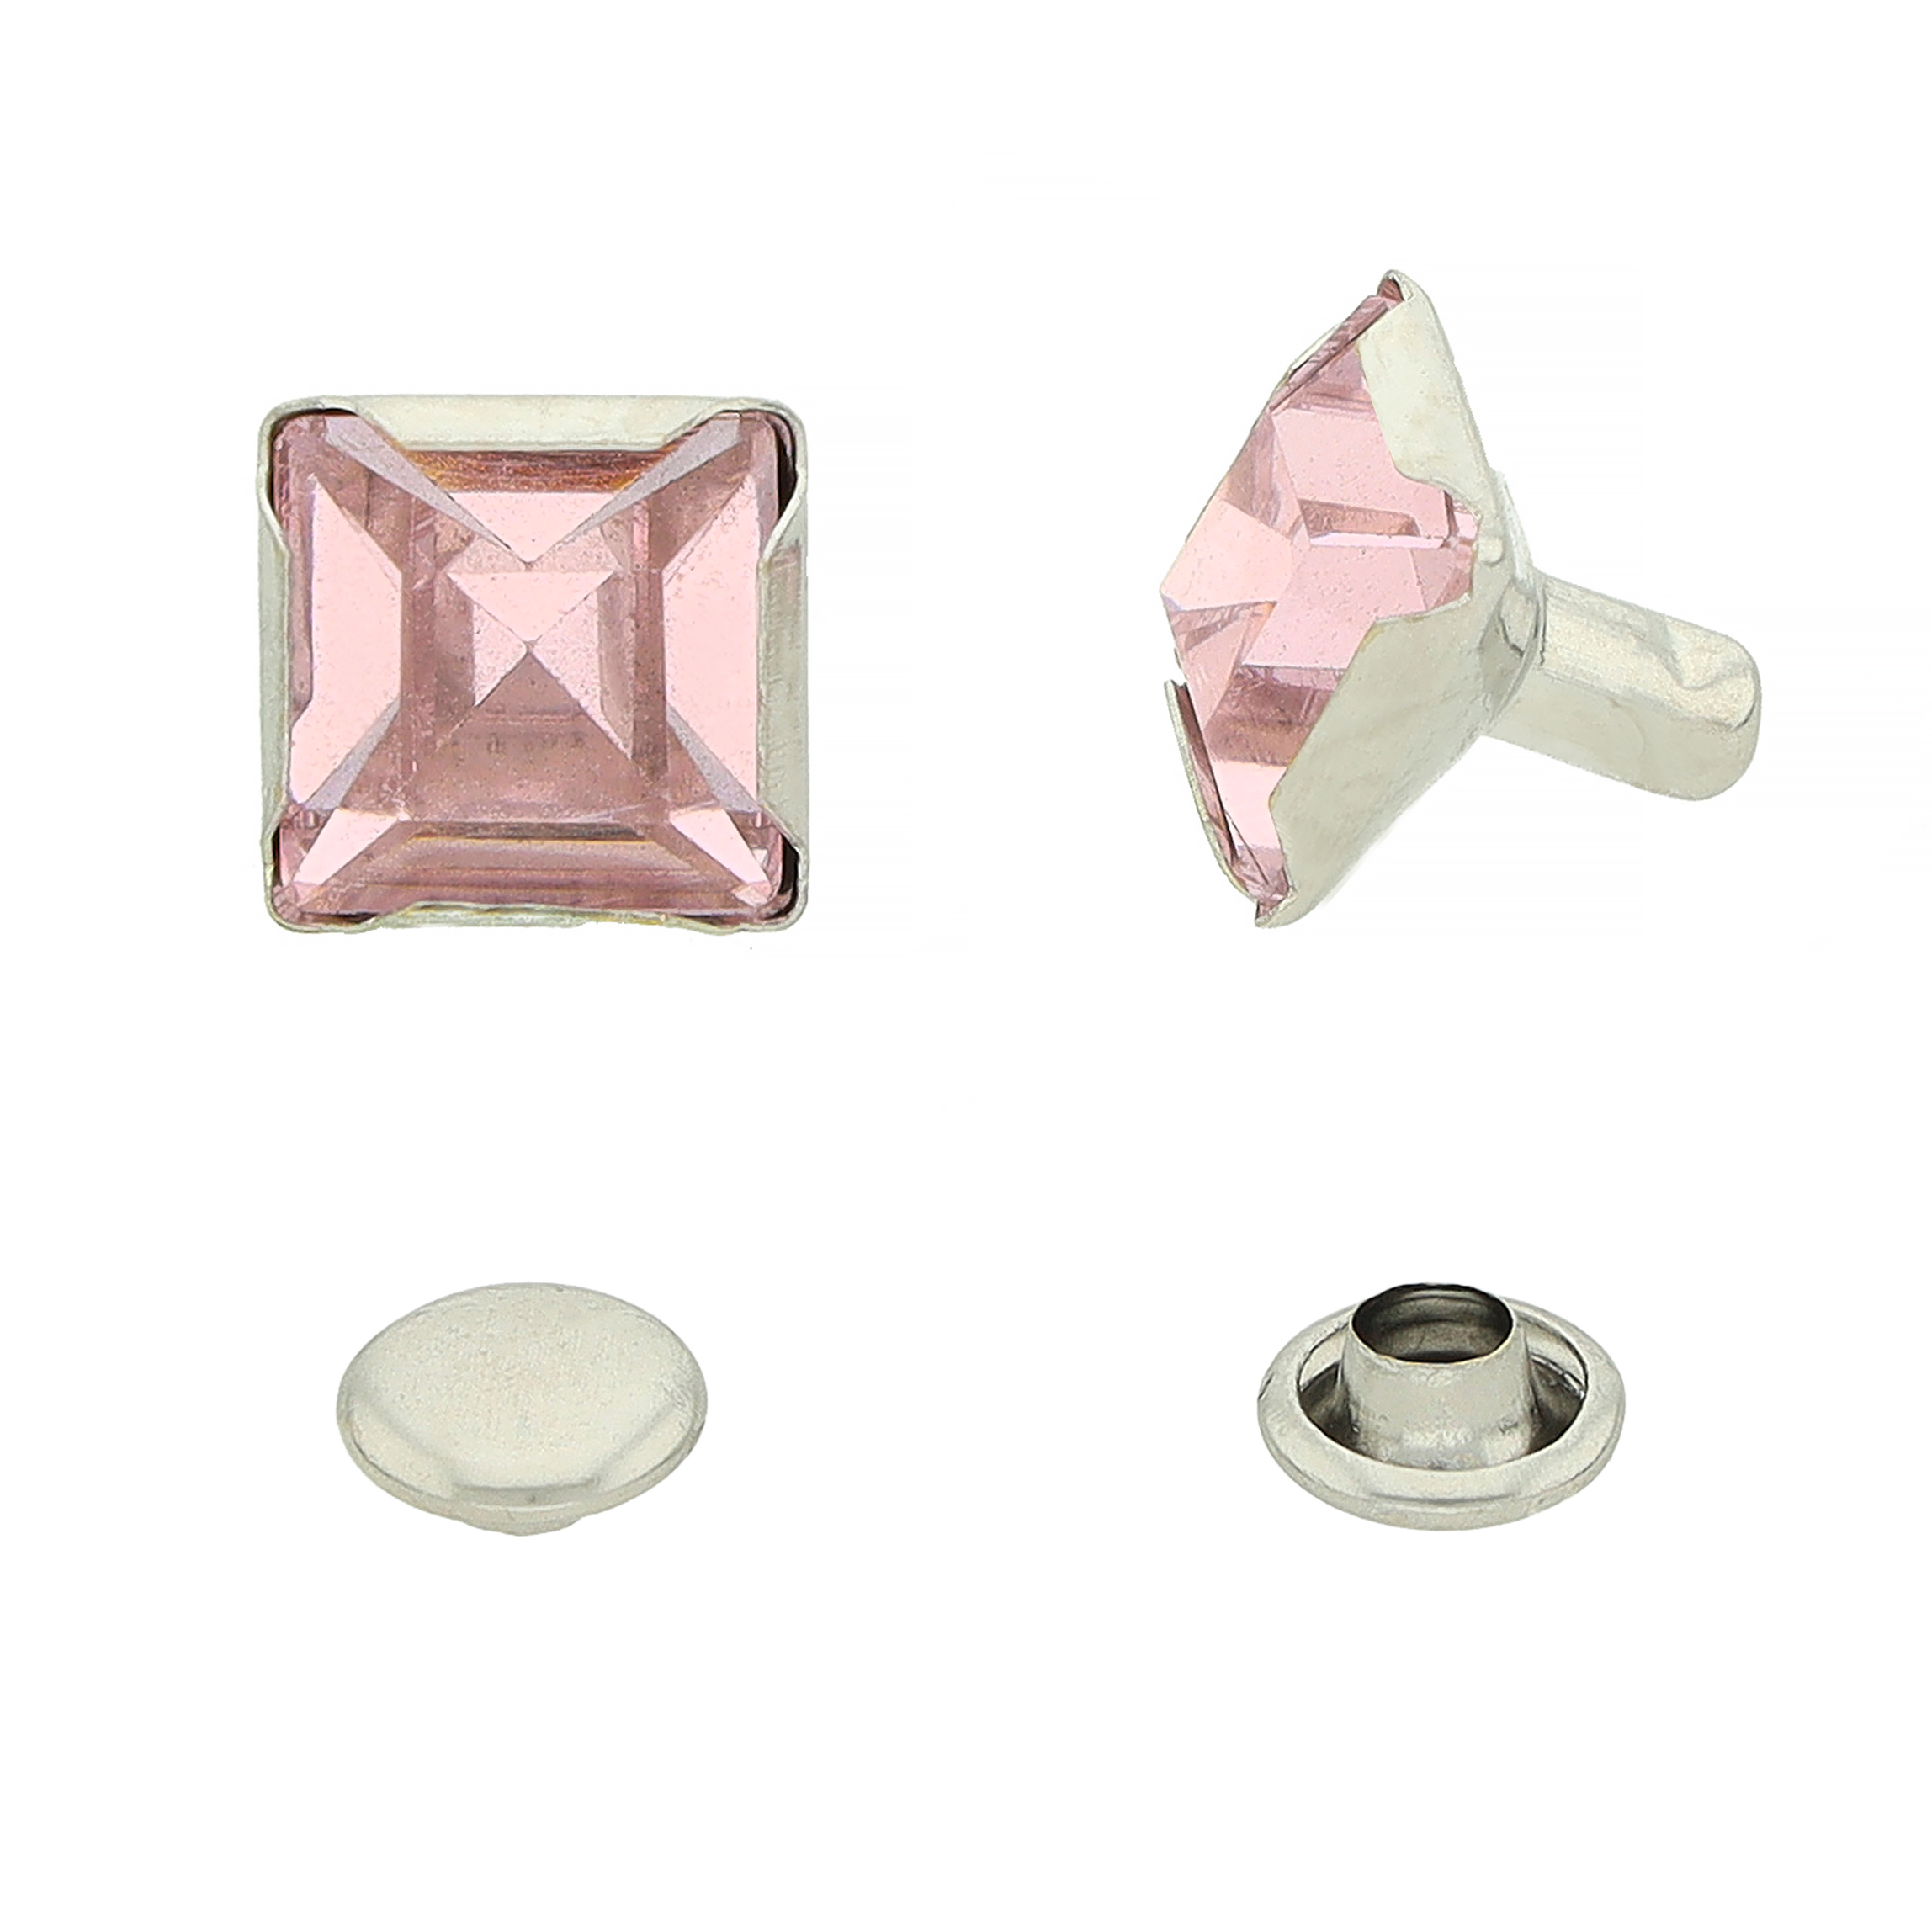
Pick your favorite shape and color of rhinestone rivets. They’re available with various shaft lengths just remember: the shaft should be about 1–2 mm longer than the thickness of all layers you’re riveting. Otherwise, it won’t hold or press securely.
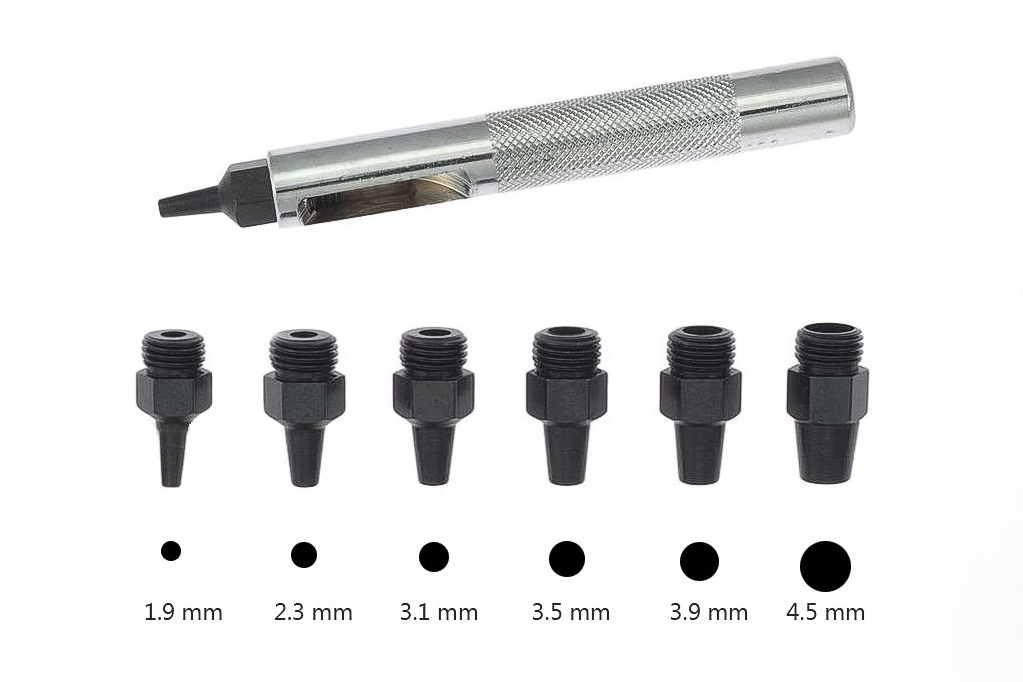
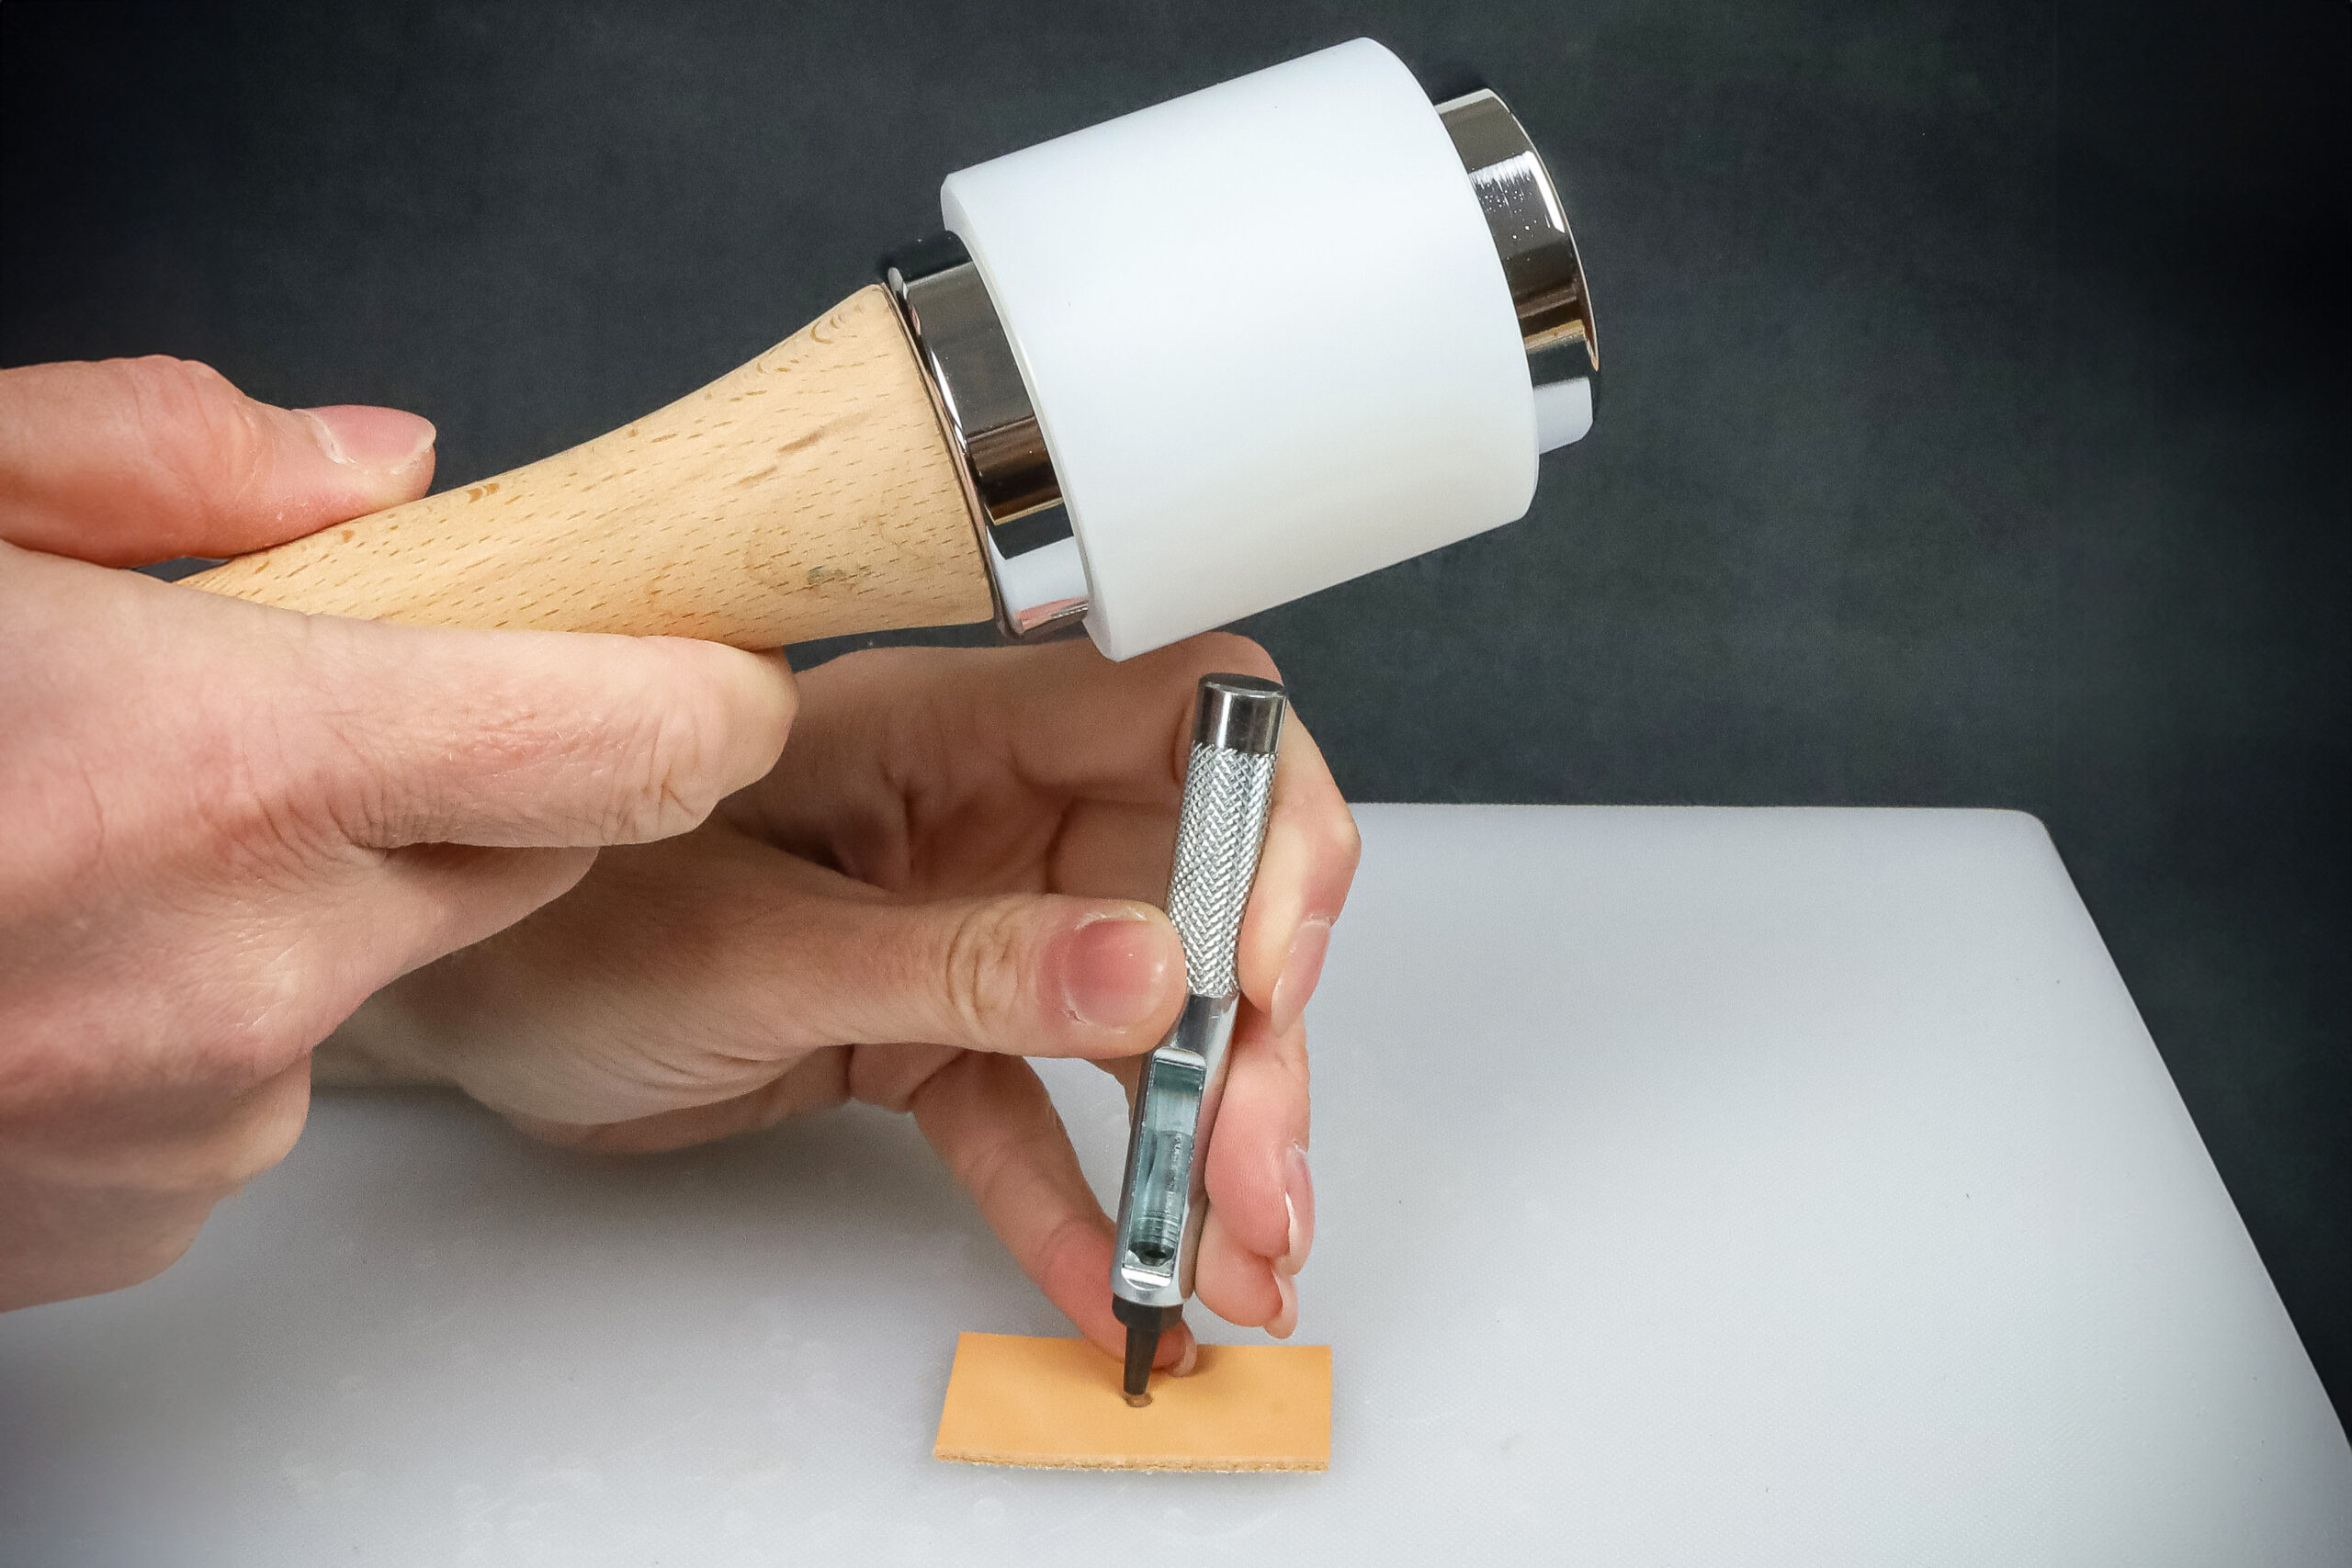
2. Punch Tool
Before the rhinestone settles into its new home, you’ll need to punch a hole-ideally with a round punch. You can use a standalone punch, a set with interchangeable punches, or a punch attachment fixed into a press using a special adapter. Don’t worry, a 2.5 mm hole usually suffices-no need to buy the whole set right away.
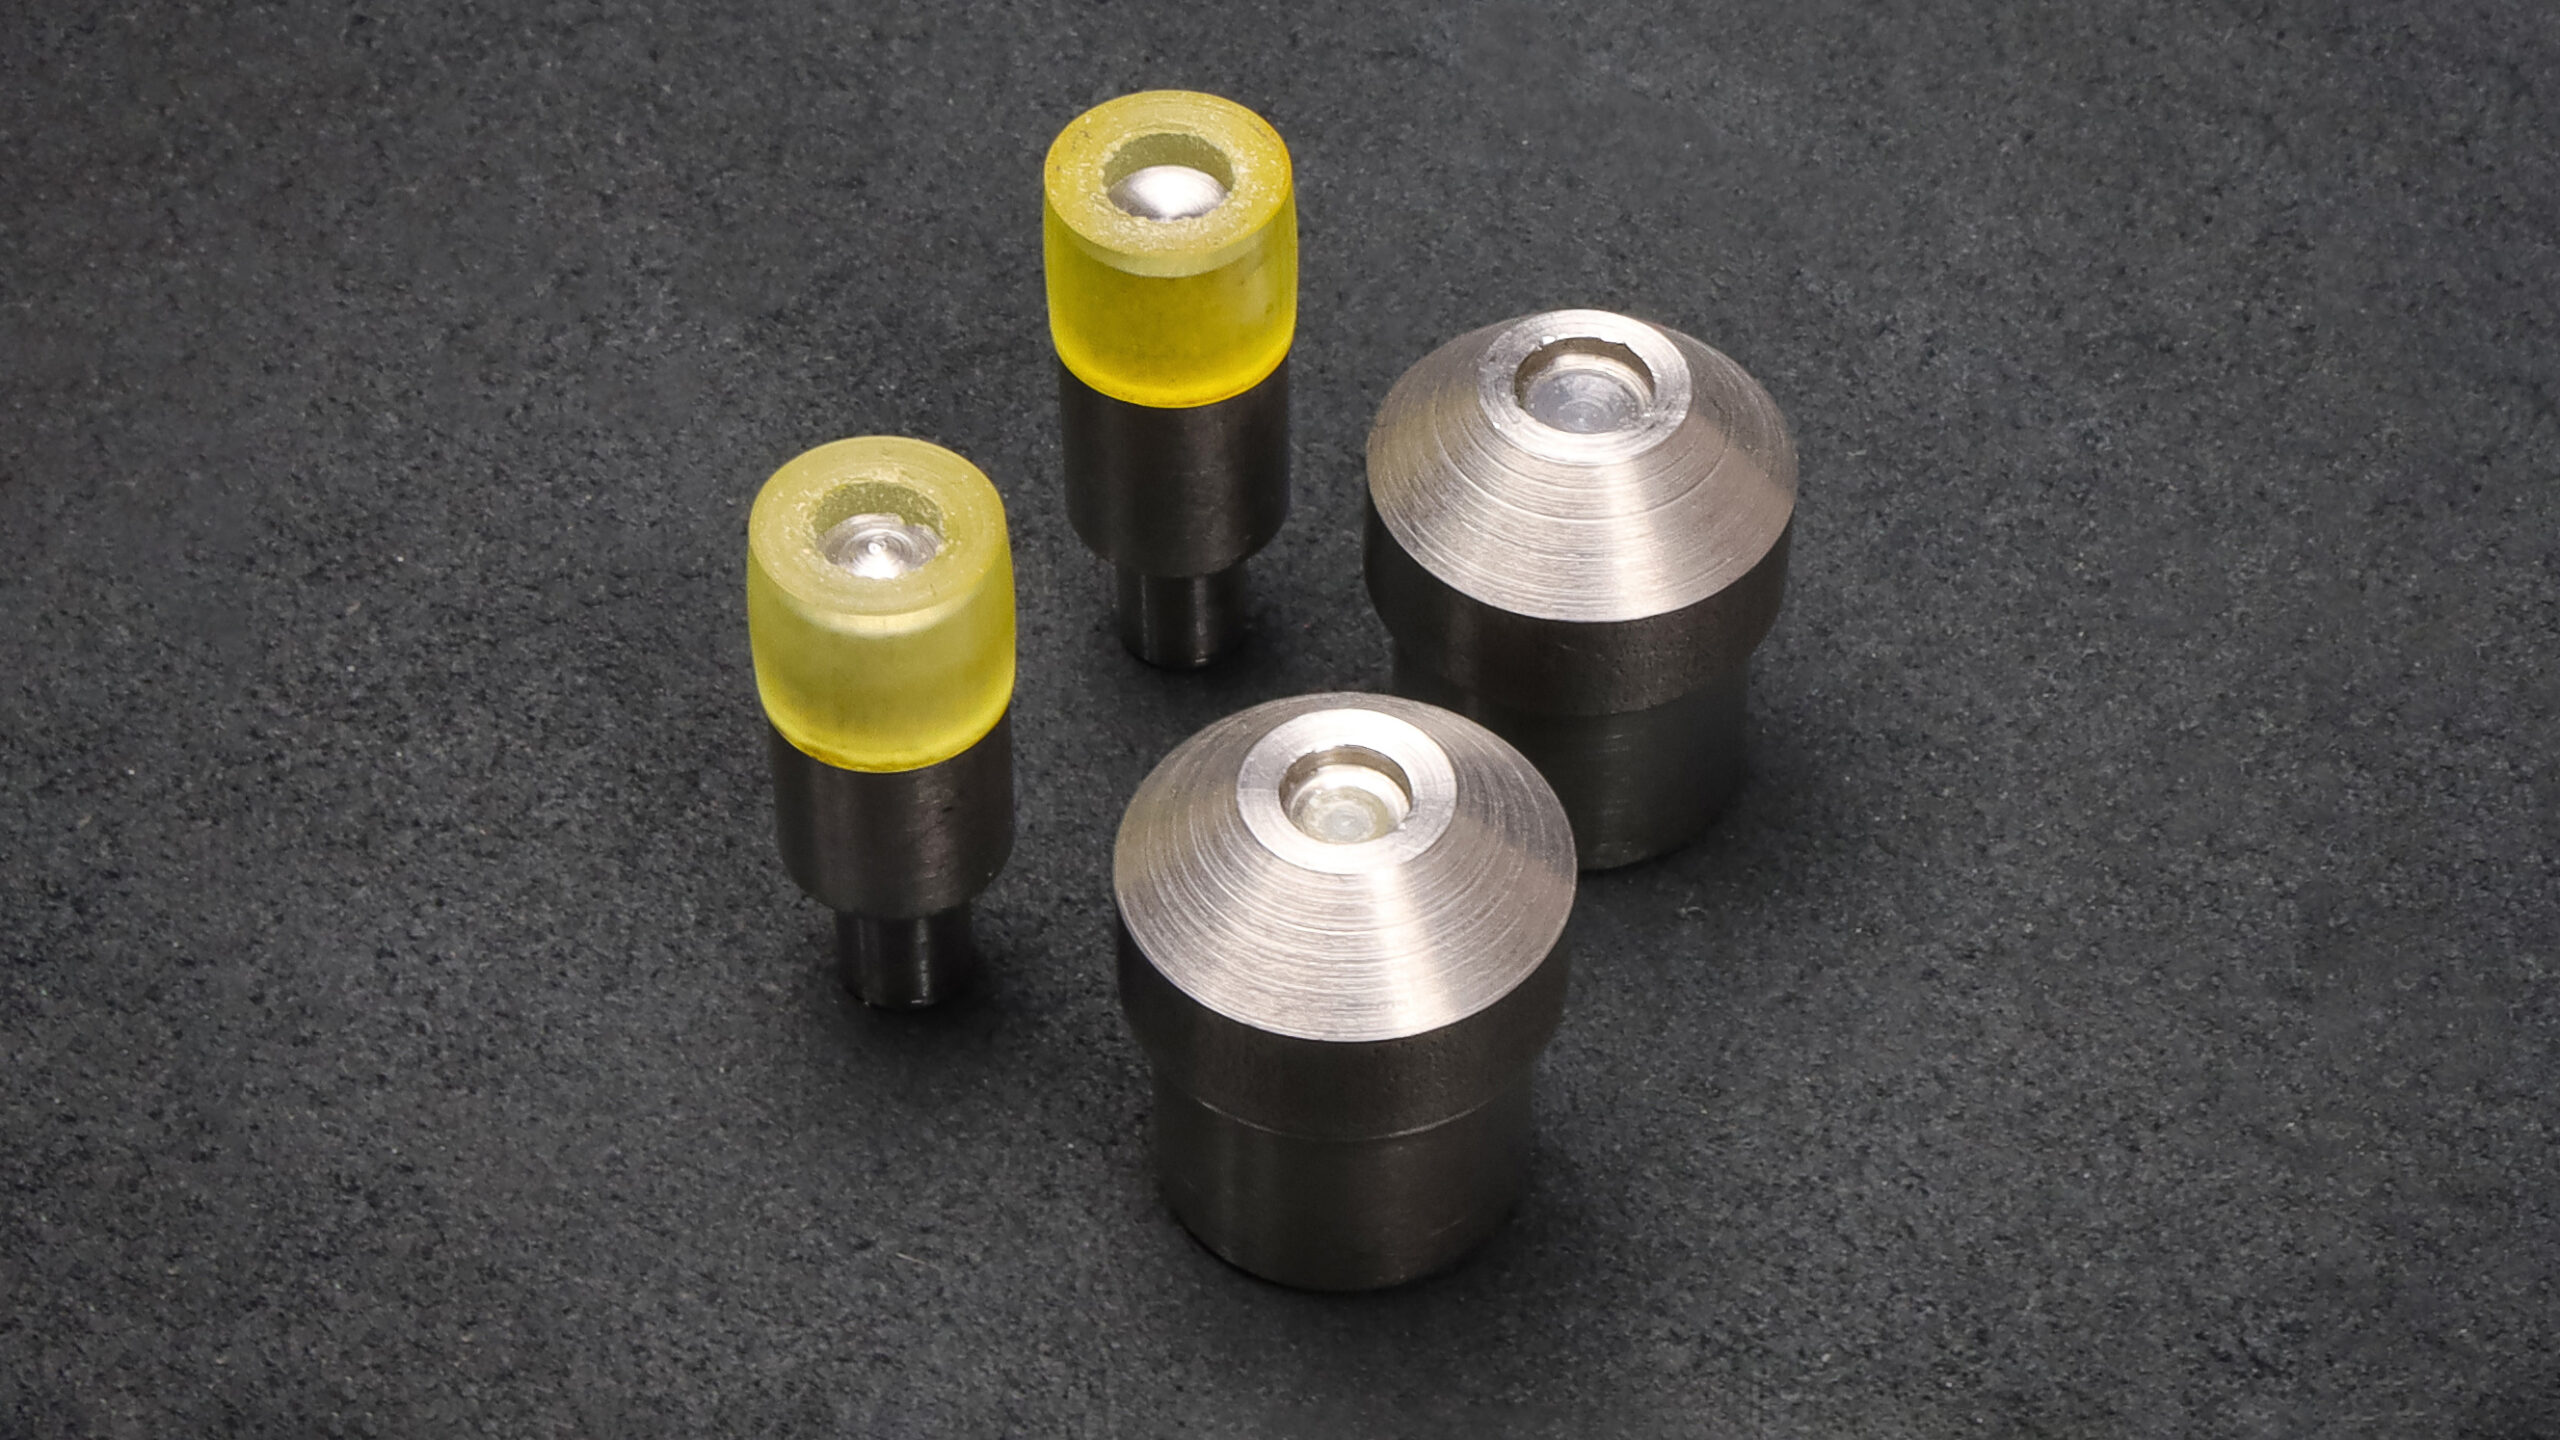
3. Tools for Setting Rhinestone Rivets
How to safely set your rhinestone rivet without casualties? You’ve got options-and none are wrong. It depends on what you have at hand, what you’re making, and your material. Here’s a quick overview:
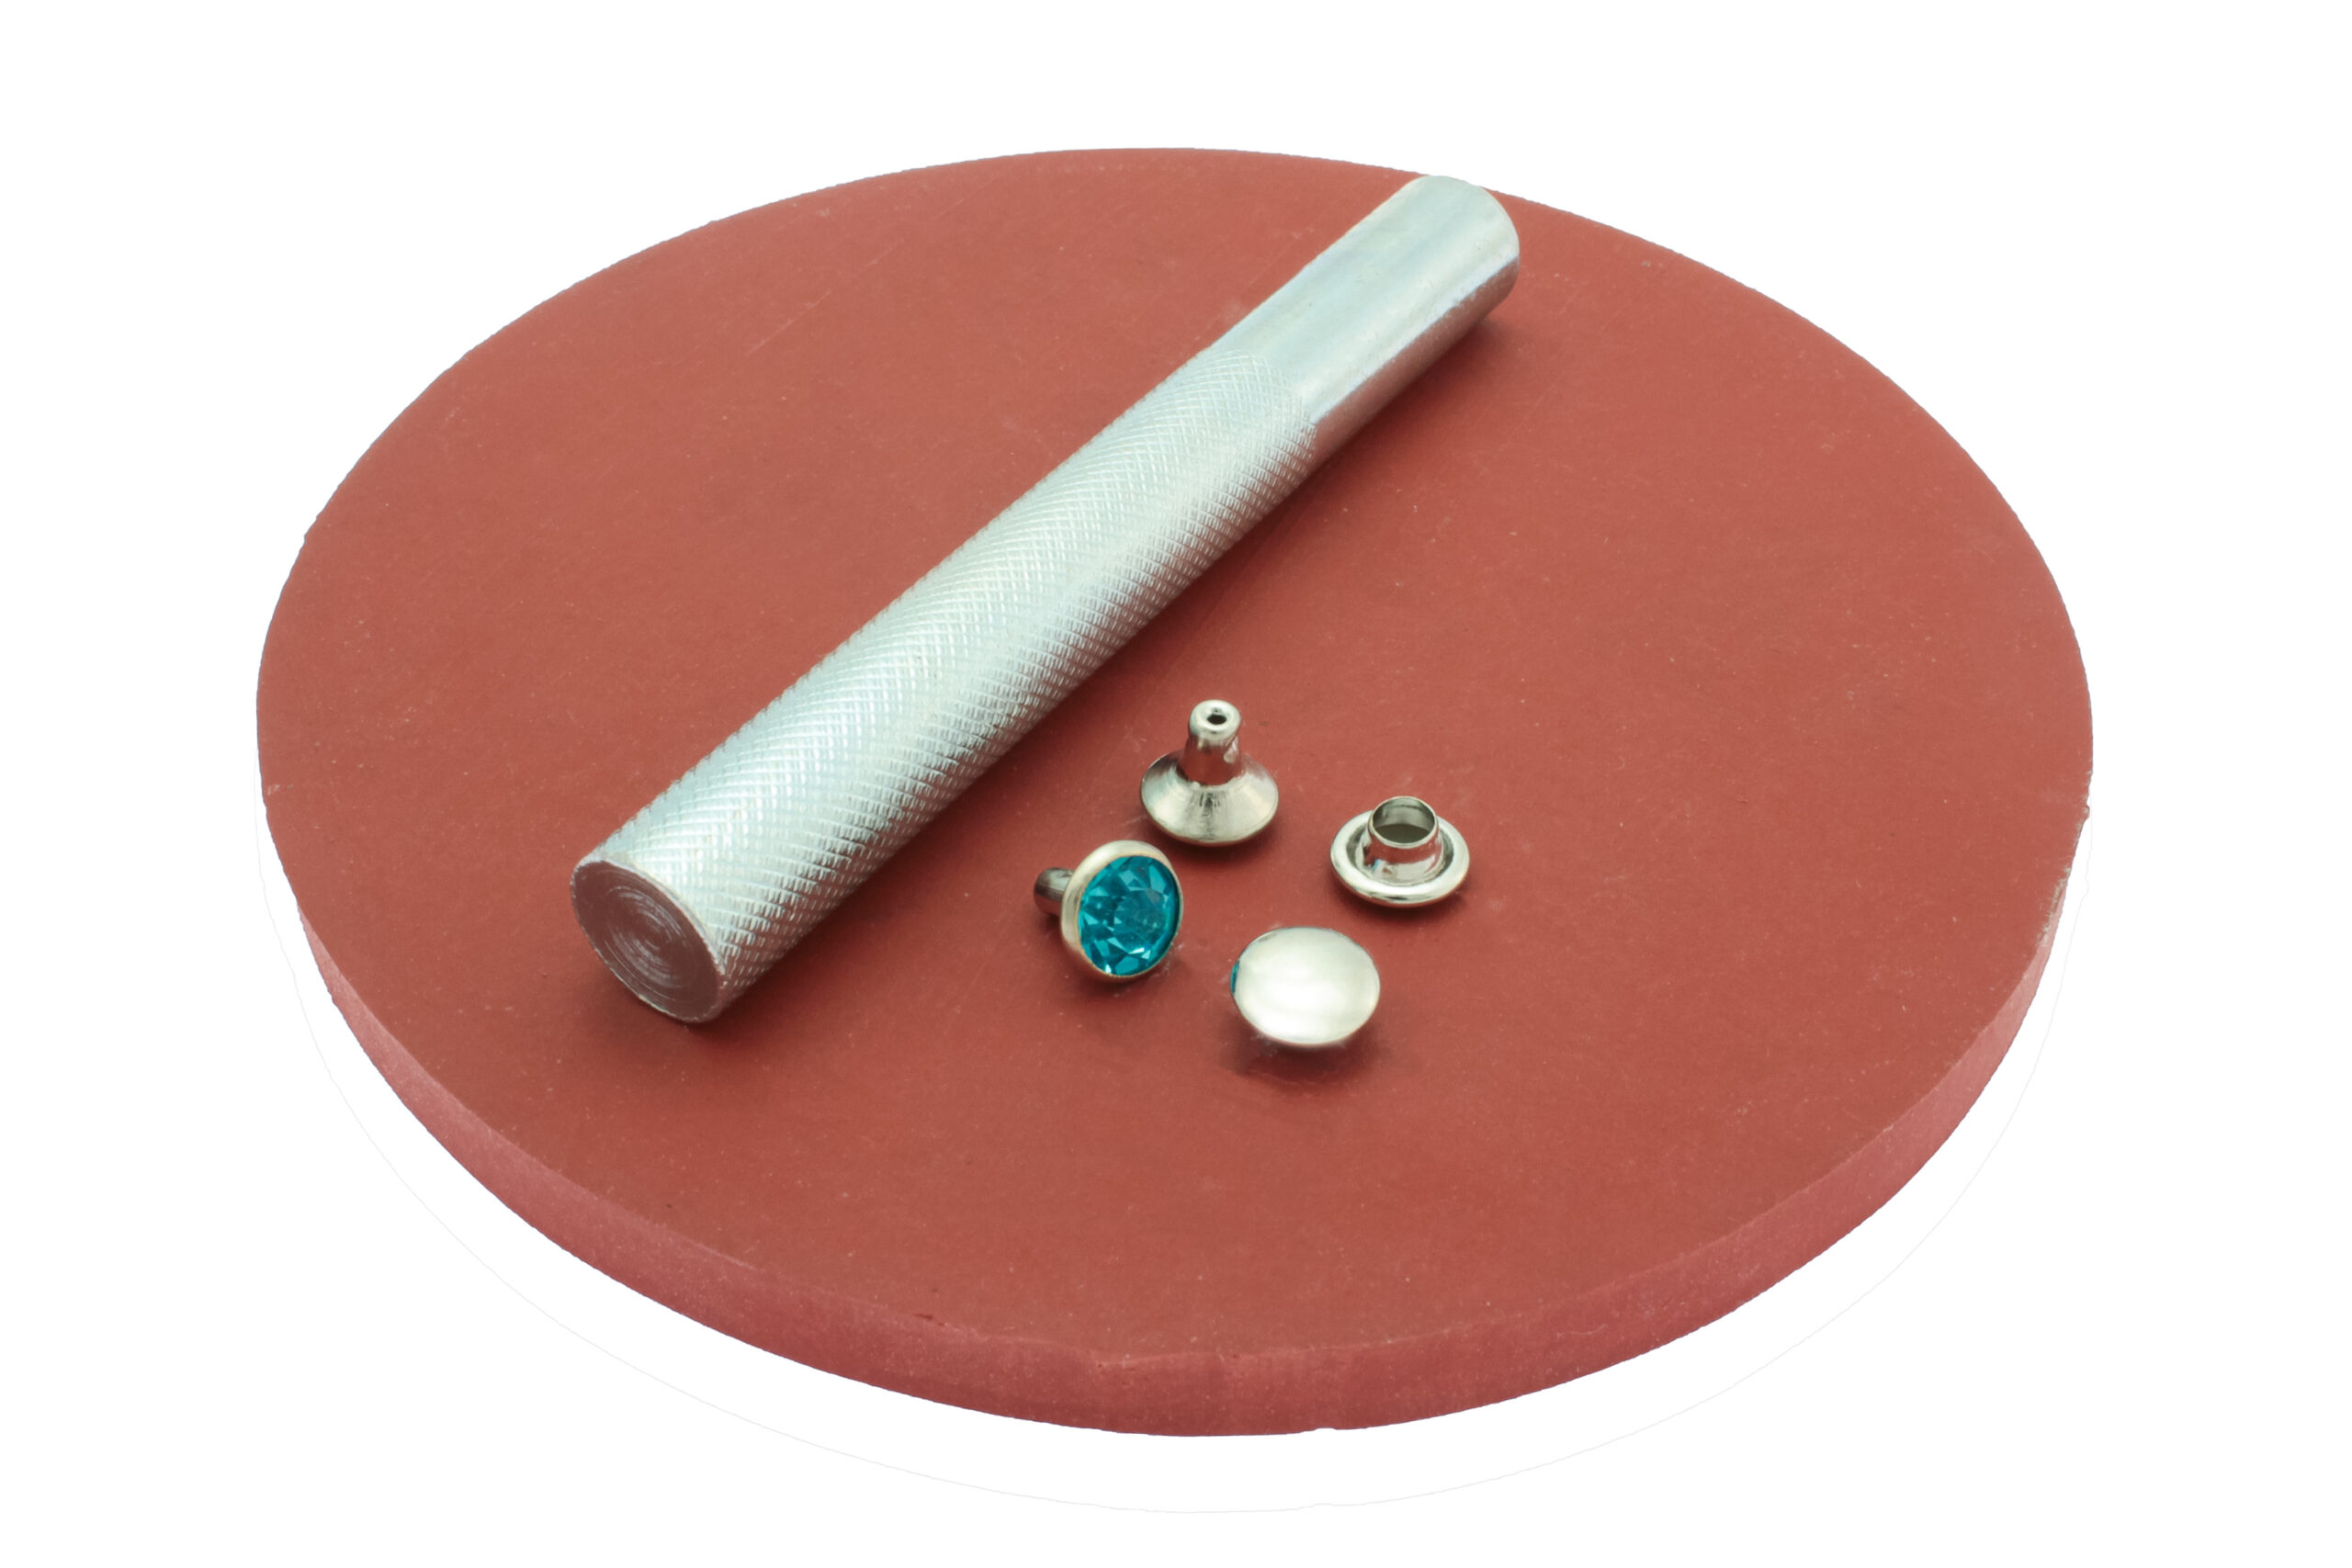
a) Manual riveting kit with a rubber pad-ideal for DIY enthusiasts and small workshops. Simple, affordable, effective. Nothing complicated here.
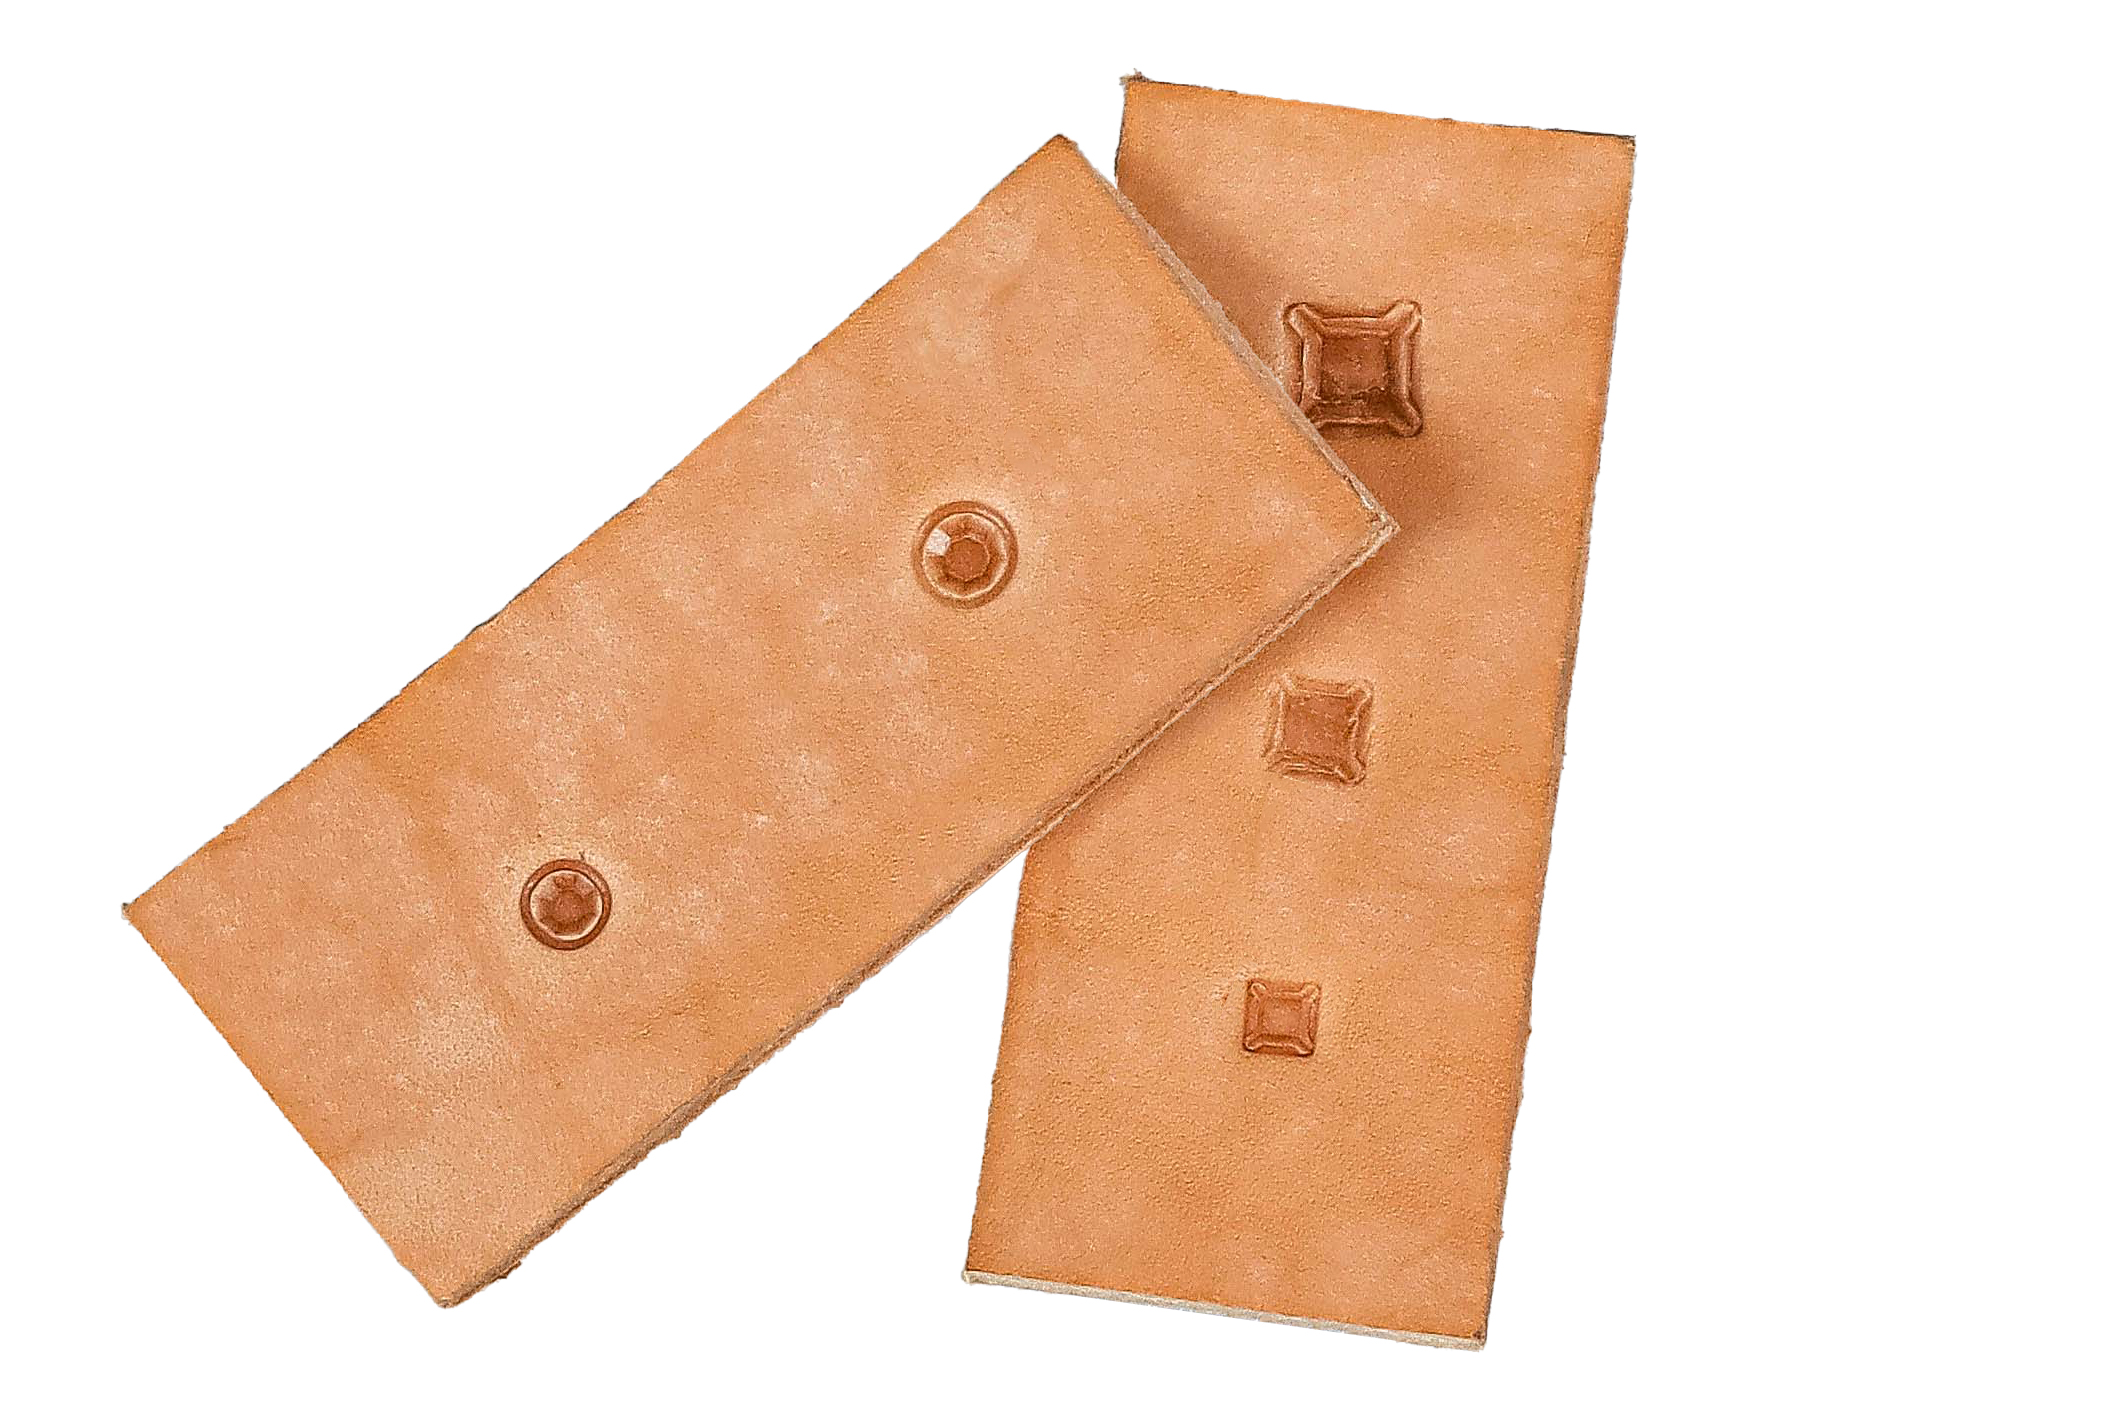
b) Custom leather die-perfect for square rhinestones or when you don’t have the right setter. The leather die holds the stone securely and prevents cracking. Smart and gentle.
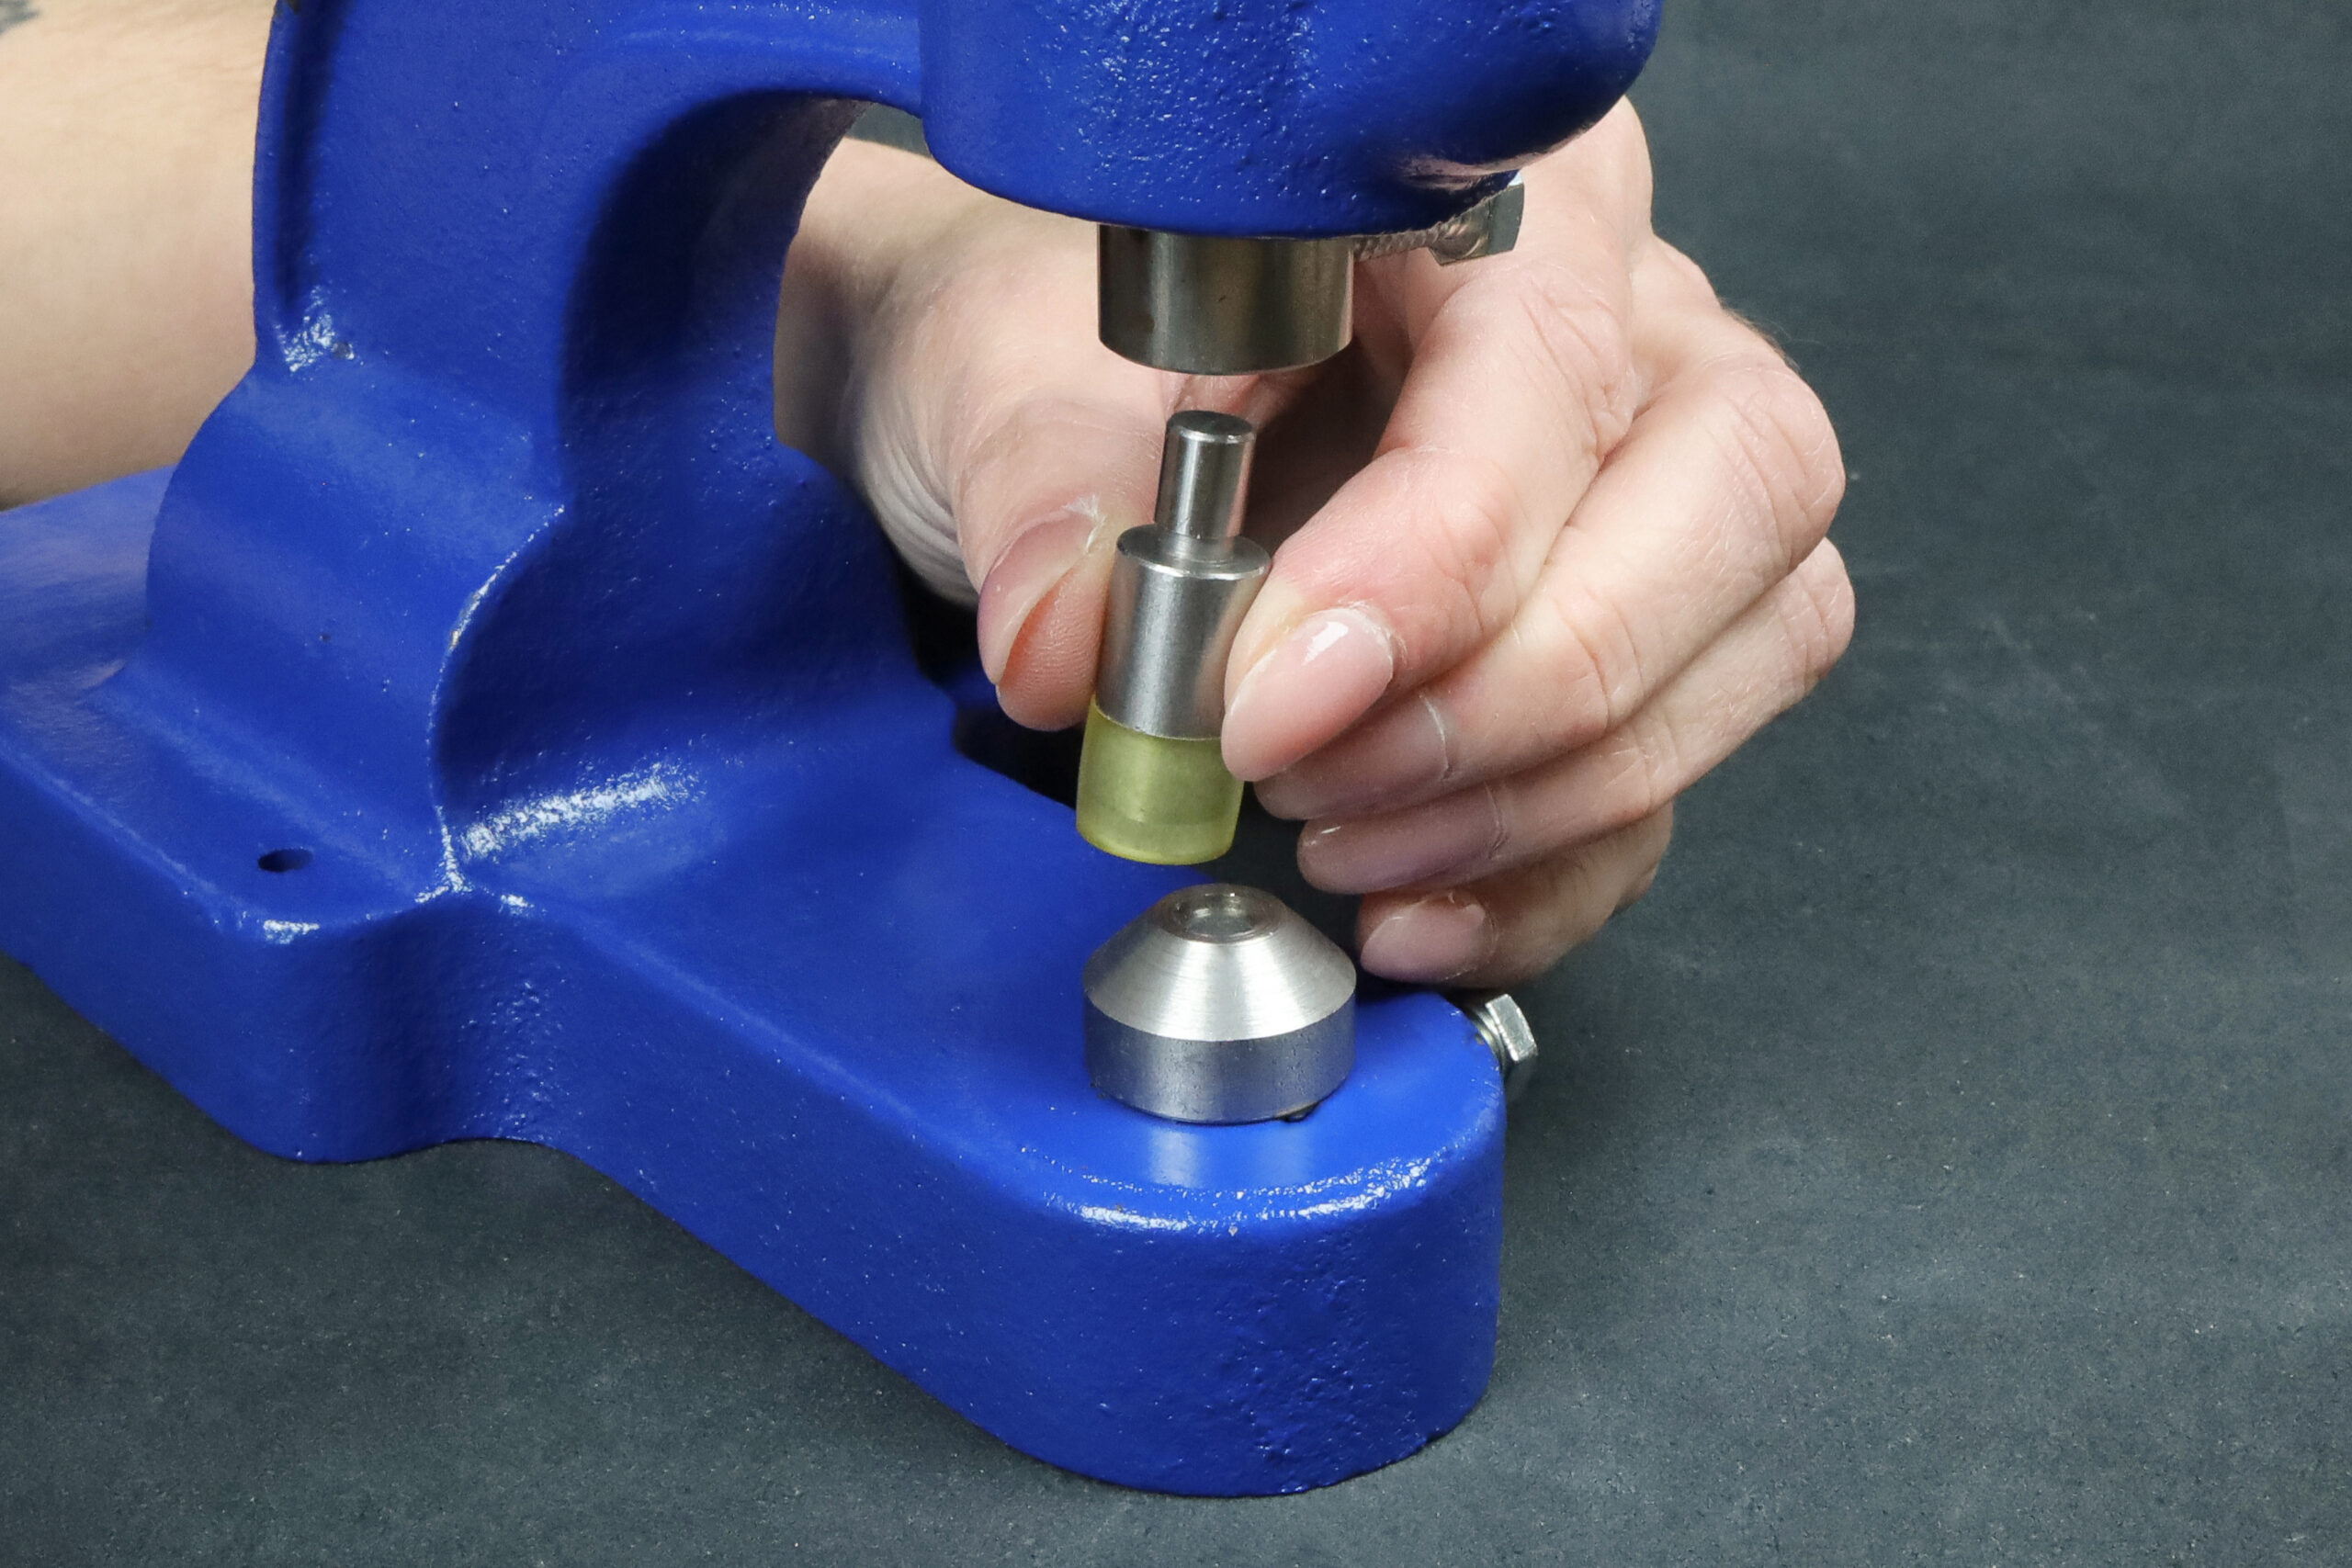
c) Manual press with a die set if you’re serious and rivet often, a press is your friend. Precise, repeatable, elegant. Your hands will thank you.
How to Use a Riveting Kit: Manual Yet Stylish
Steps
- Start by punching a hole into your material the diameter matching the rivet shaft.
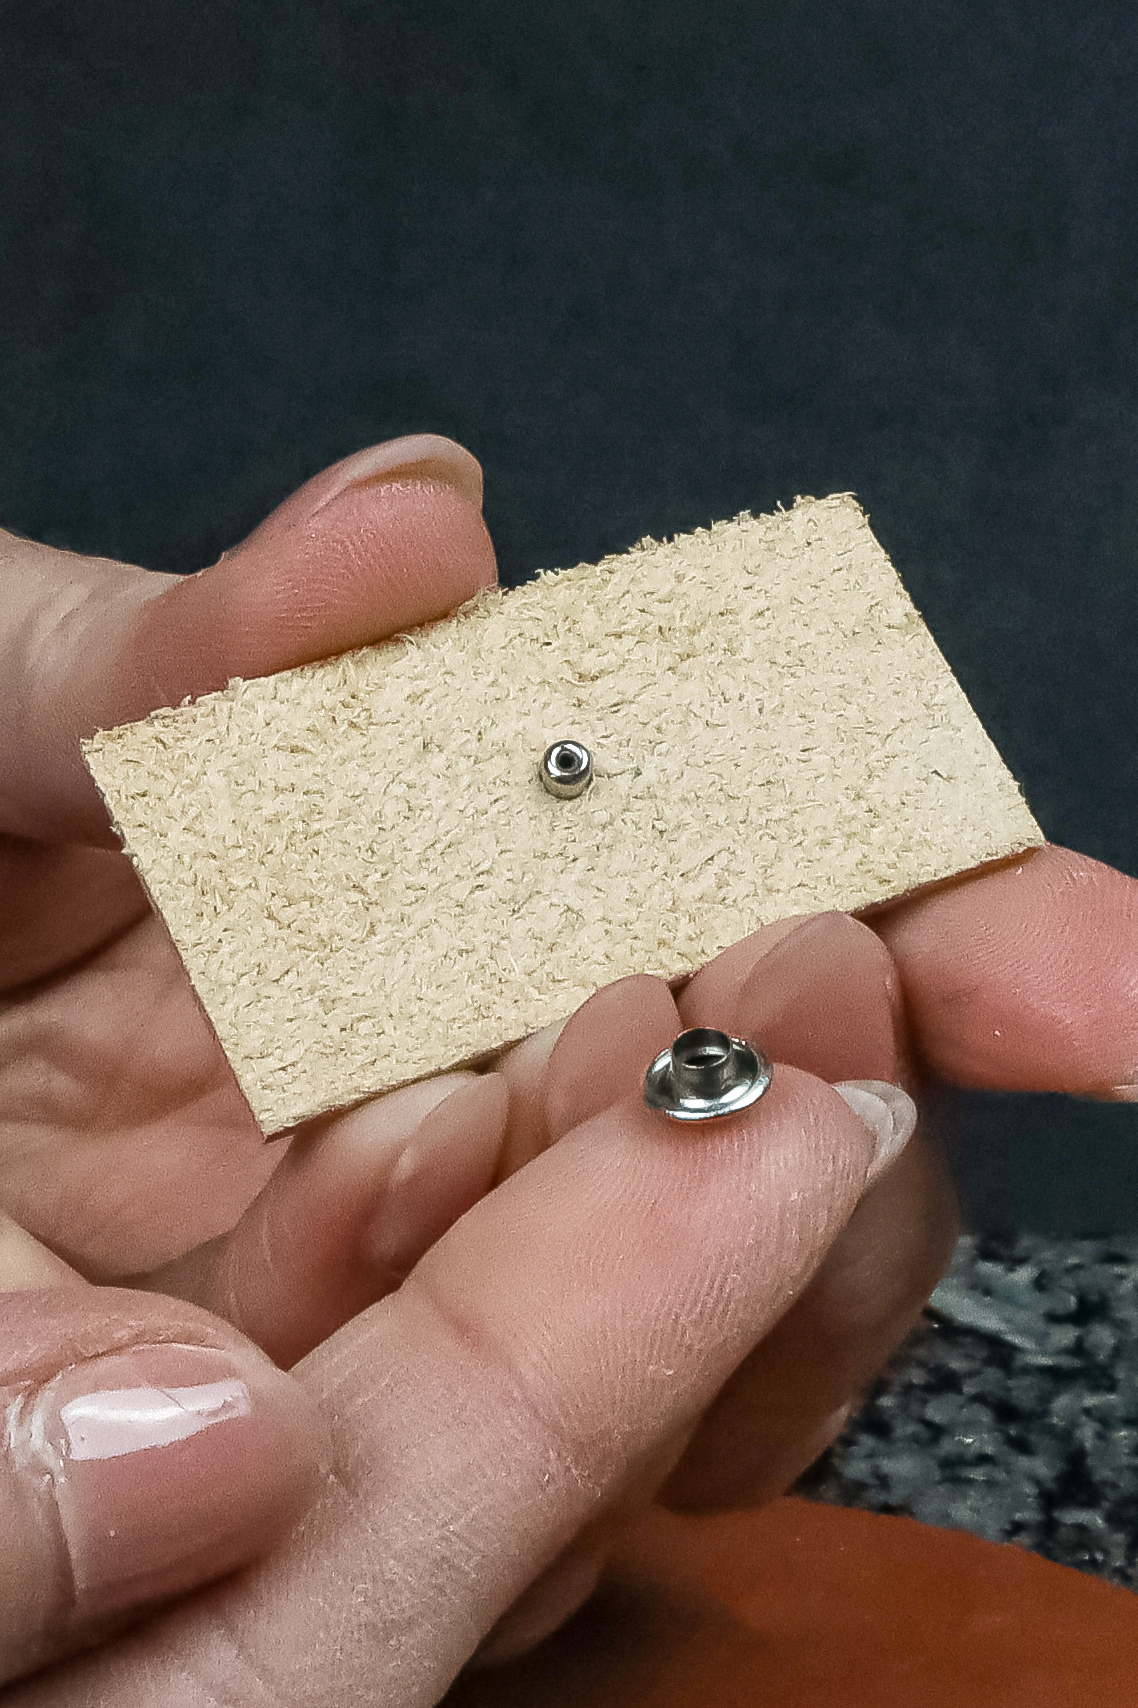
- Insert the rhinestone top from the front stone nicely centered in the hole.
- Add the bottom piece (“head”) from behind.

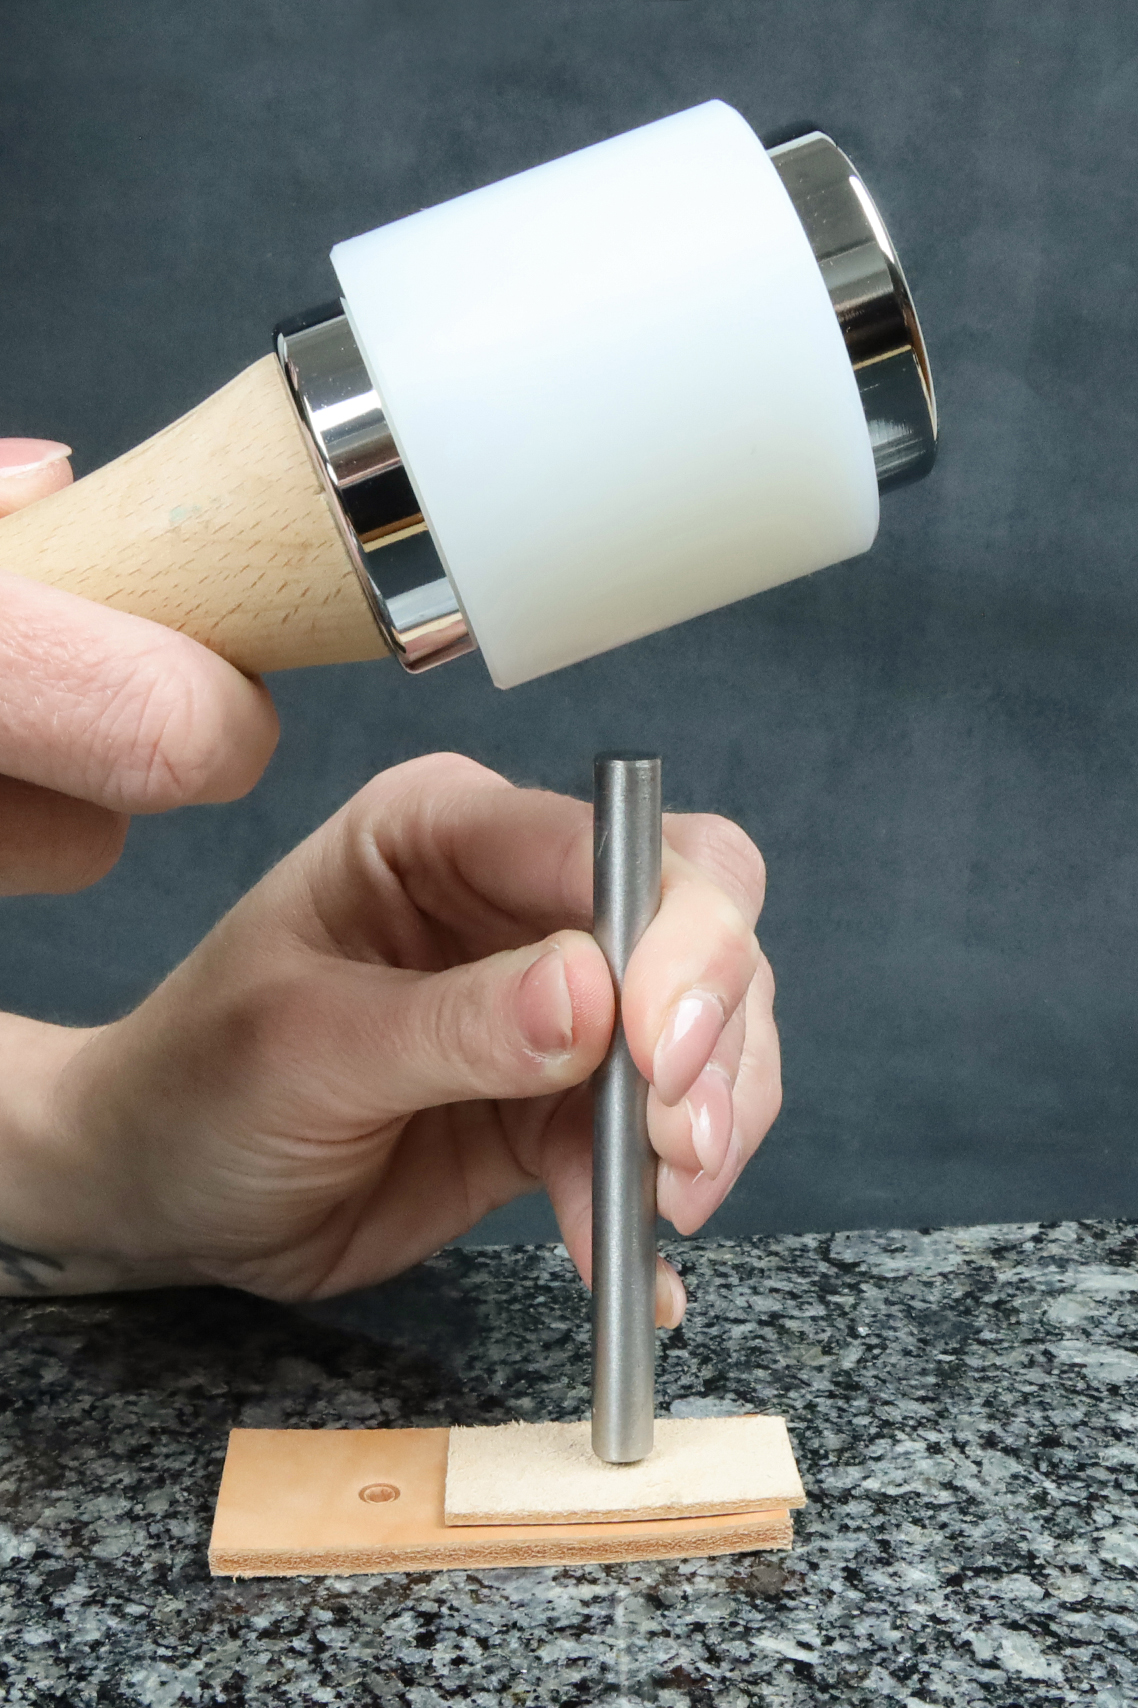
- Place the assembly on the rubber pad stone side down, straight, no tilting.
- Put the setter on the head and rivet with a few small yet confident hammer strikes. The pad keeps the stone intact.
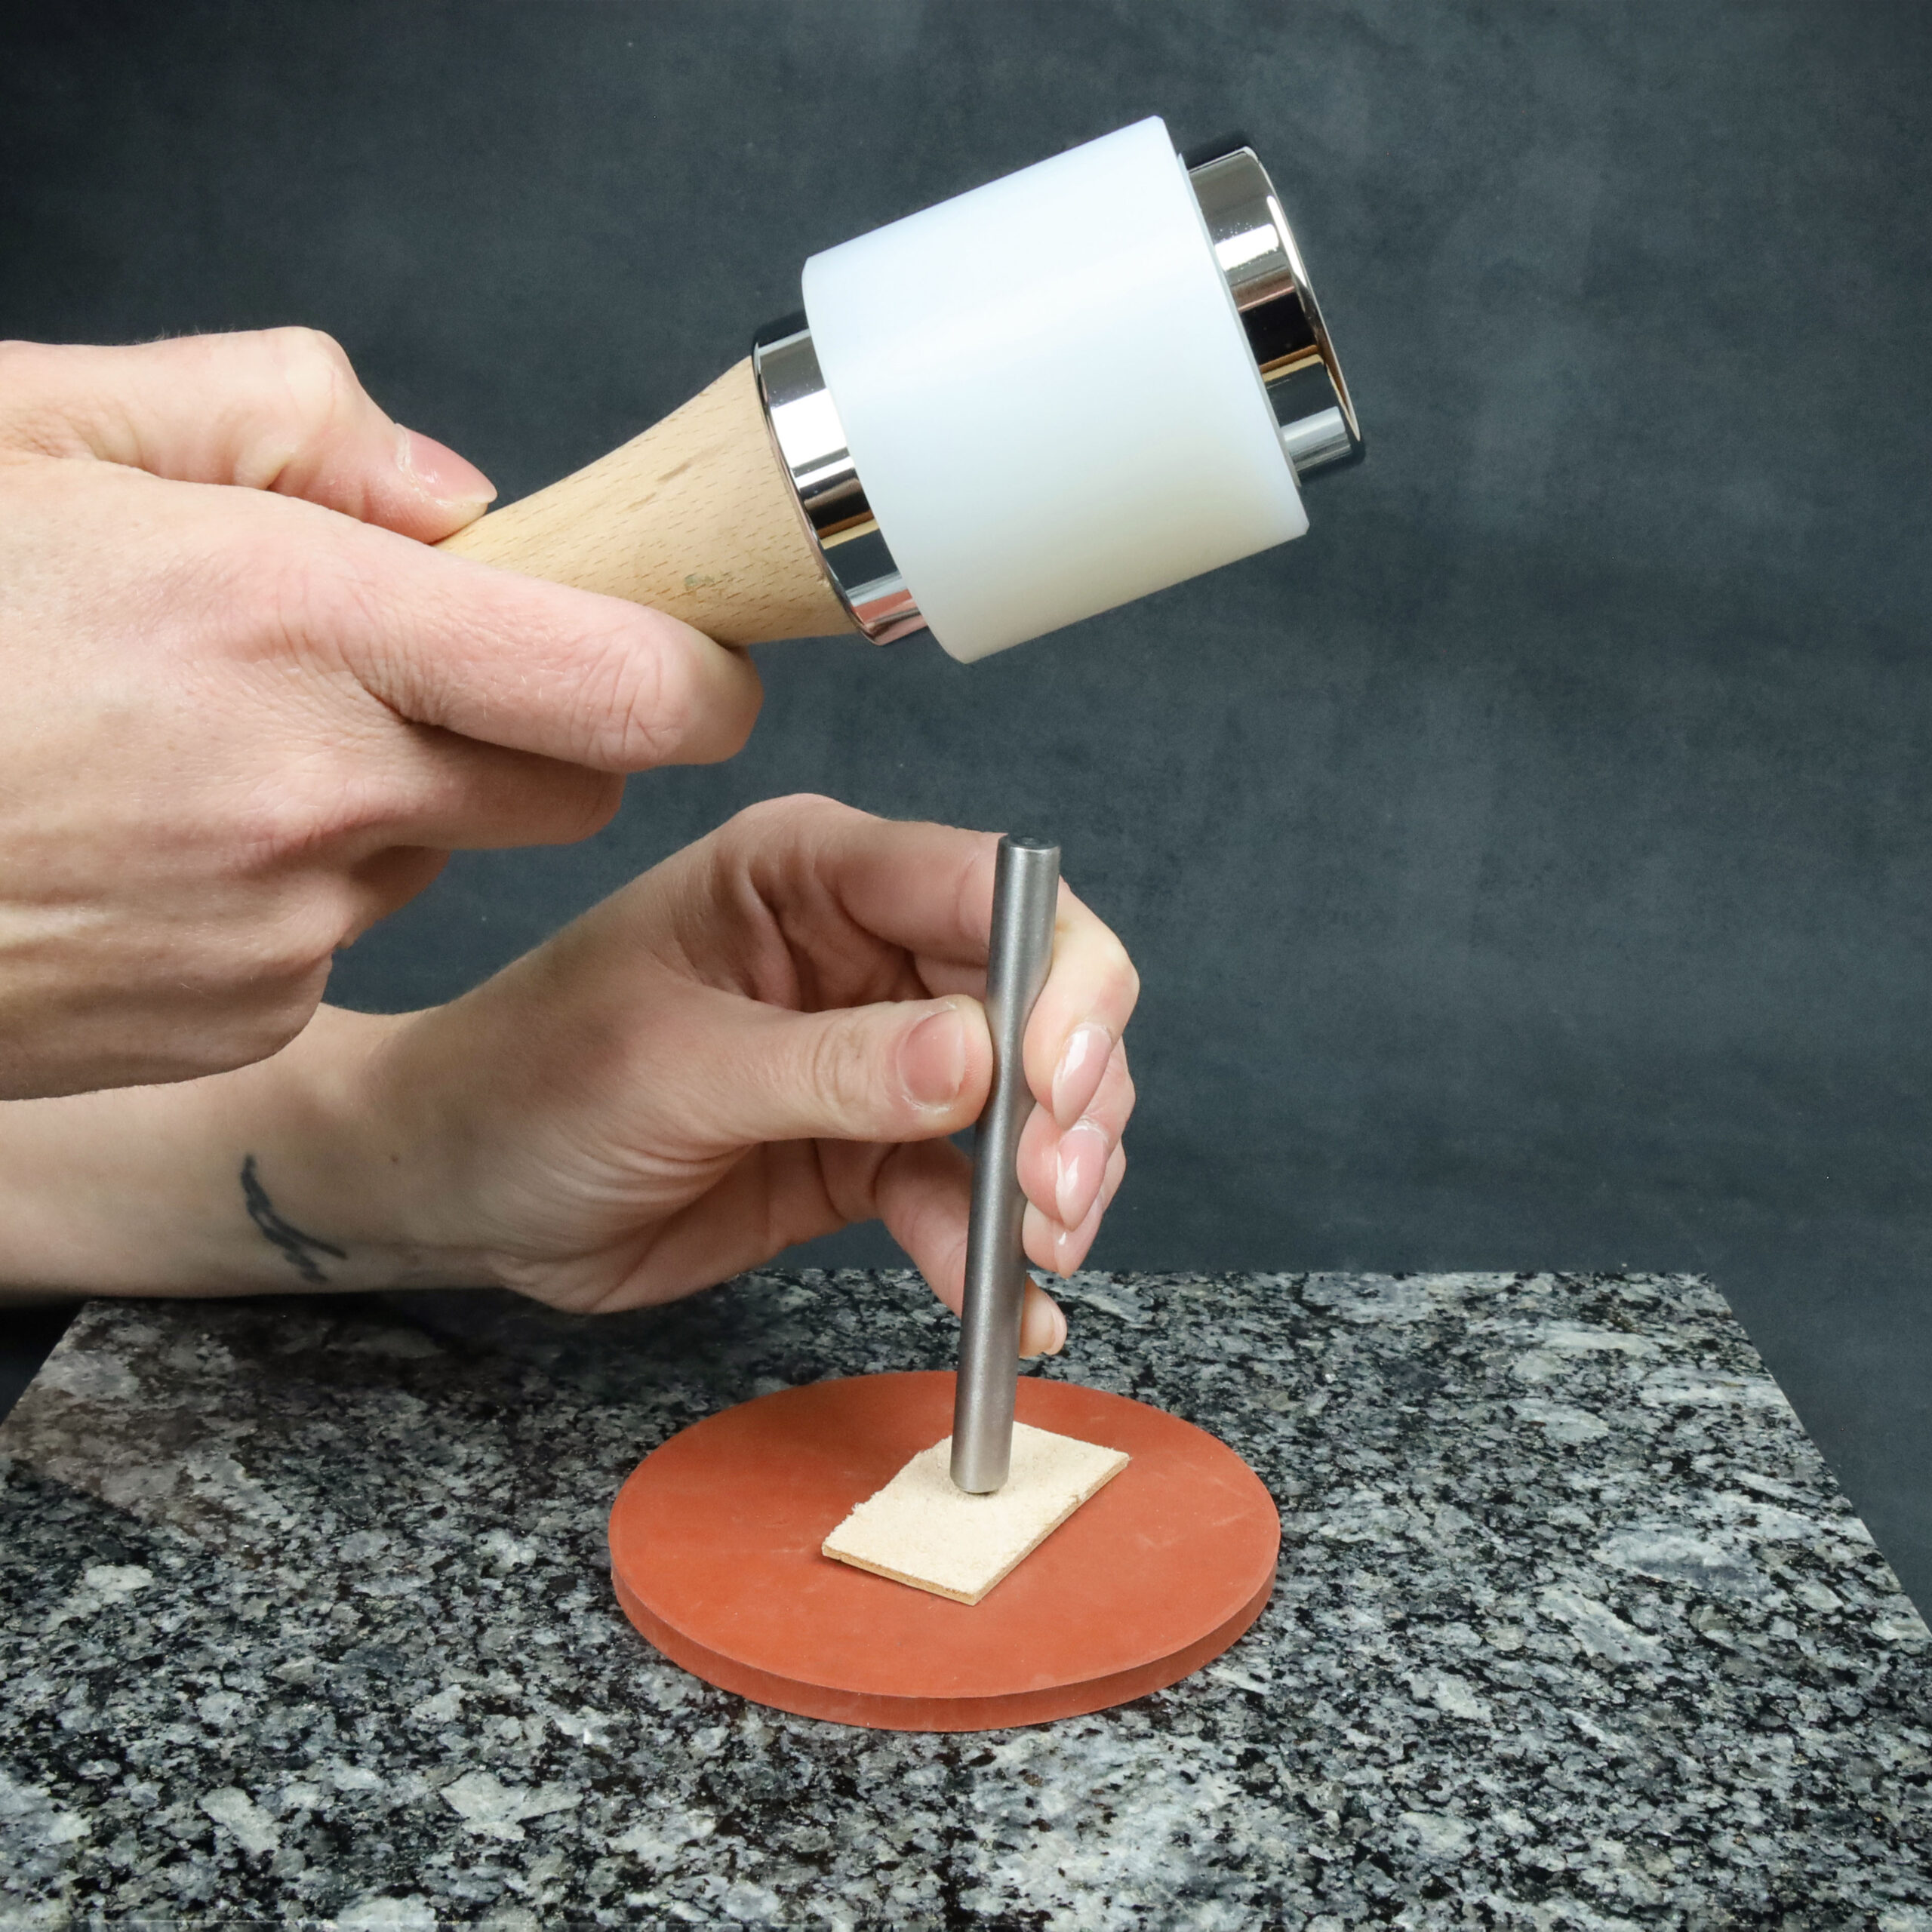
Hard pads? Better forget those. Wood or plastic can cause more harm than good the glass stone easily cracks, and the rivet won’t set evenly. The best choice is rubber with a hardness of 30–50 shorea. Your rhinestone will thank you.
Tame Your Rhinestones with a DIY Leather Die – Easy and Clever
Do your stones keep cracking? You’re not alone. Often, the culprit is a hard or uneven surface. Rhinestones might be pretty, but they’re sensitive they prefer soft, smooth surroundings.
Help your rhinestones survive riveting vegetable-tanned cowhide (4 mm thickness) makes an excellent homemade die. Anyone can create it and you’ll immediately notice the difference.
- Soak the leather in warm or hot water and gently press the rhinestone into it a shallow cavity forms, holding the stone safely during riveting.
- When the leather dries and hardens, it maintains its shape perfectly.
- Then rivet using a hammer or gently press with a heavy-duty press.
If rubber doesn’t suit you, a leather die is a smart, stylish alternative. It works, holds shape, and keeps your stone cozy during riveting.
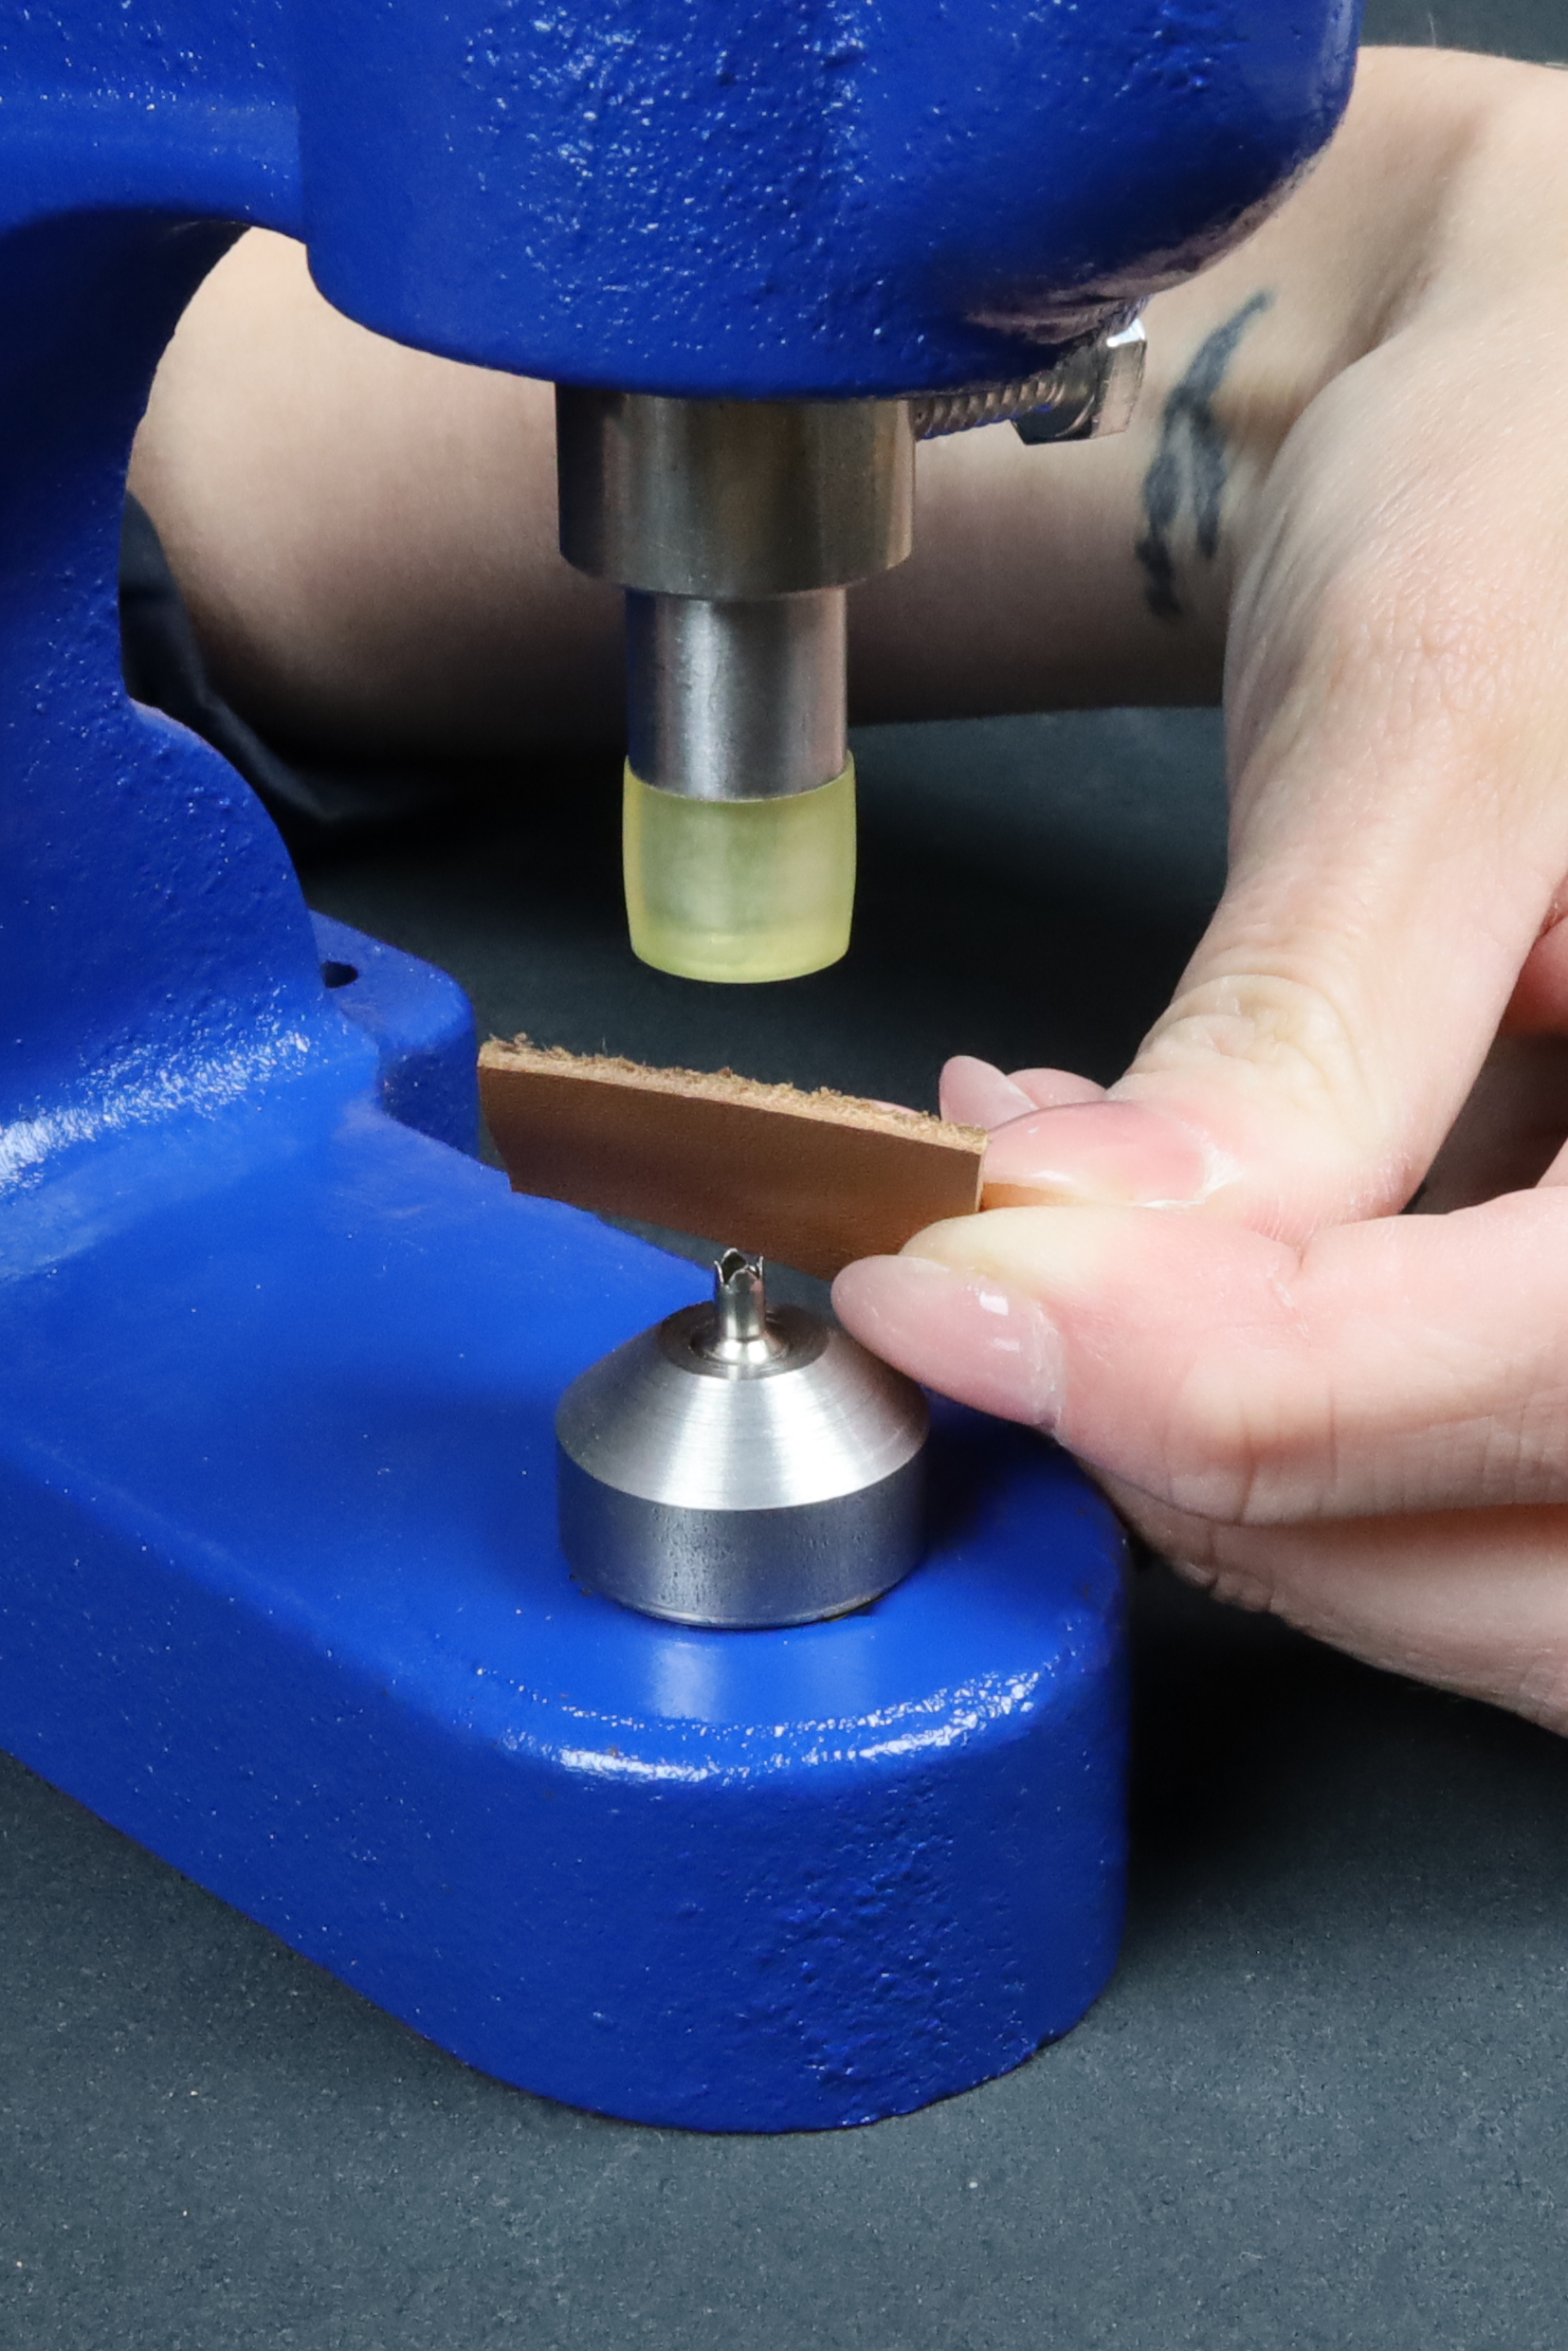
Riveting with a Manual Press
a. Closed Rhinestone Rivets
Planning frequent or large-scale riveting? It’s time to pull out the manual press and matching dies. Each rhinestone rivet has its own specific die set by size and shape. One die for everything? Unfortunately, not.
Manual press? That’s another league. Riveting becomes precise, smooth, and easier on your muscles especially when you have lots to do. And if you’ll use it regularly, bolt it down to your workbench.
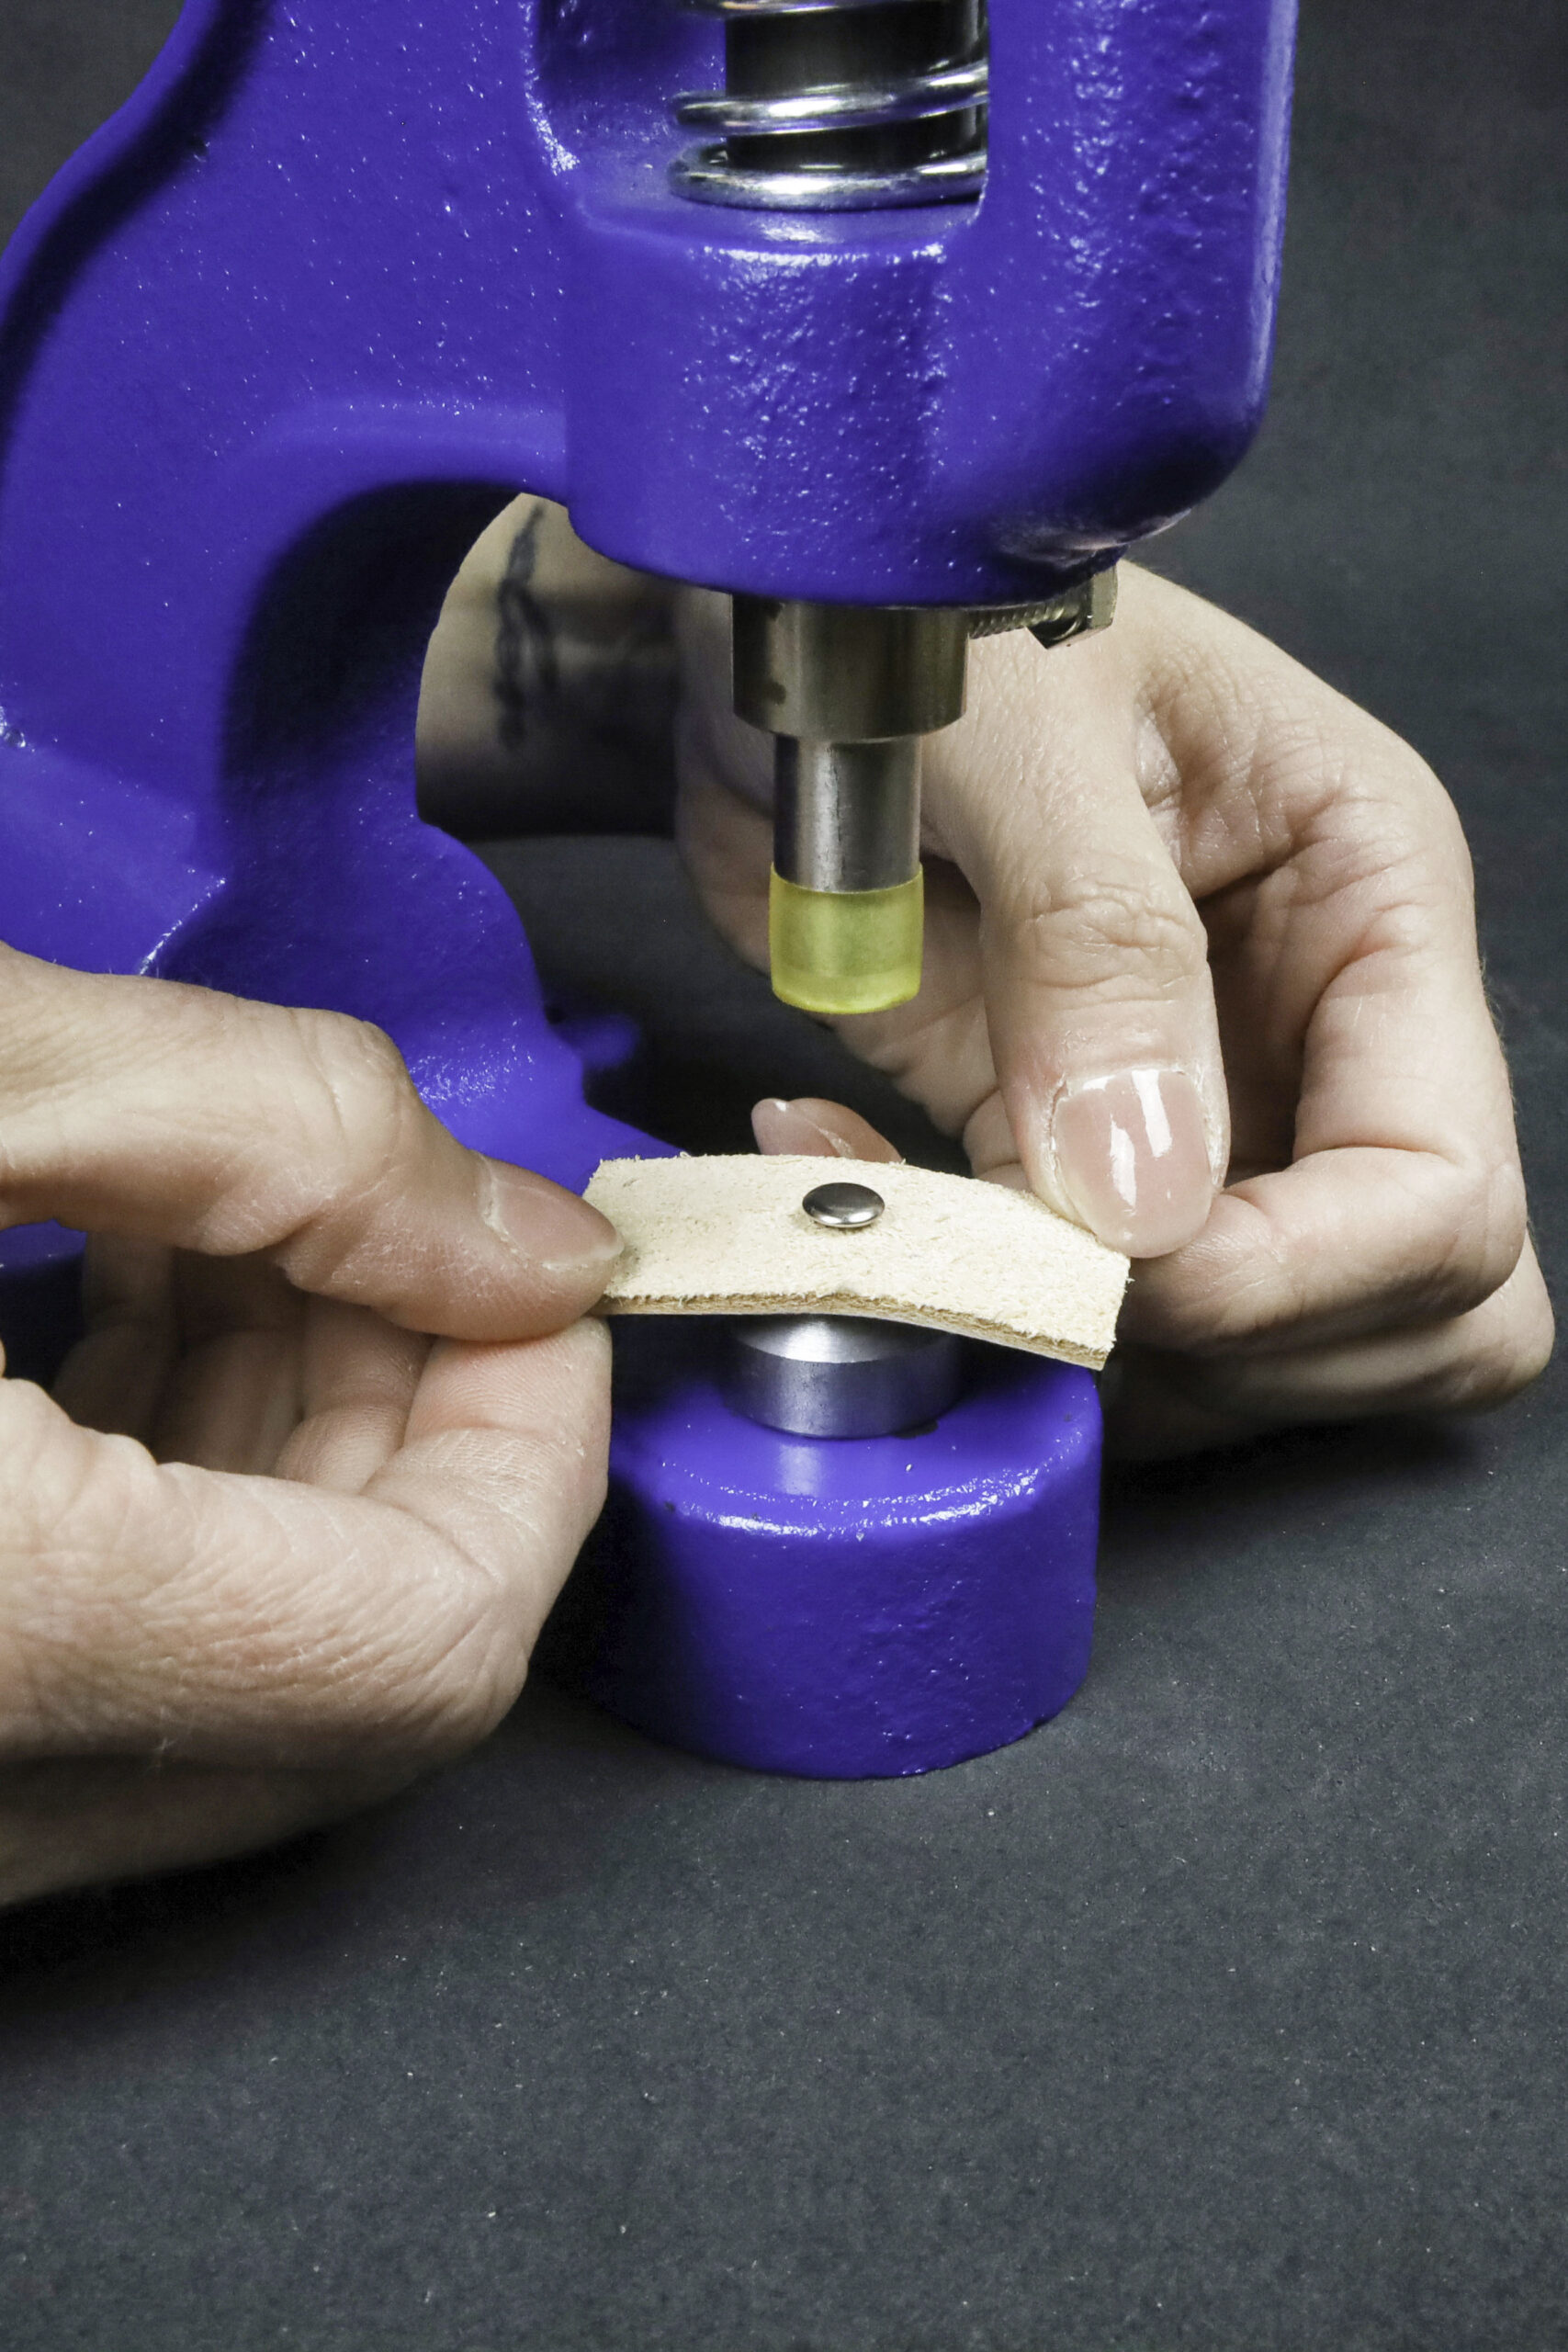
Riveting Steps:
- Install suitable dies into the press and tighten the screws.
- Punch an appropriate hole in the material.
- Place the rhinestone top through the front of the material.
- Add the bottom piece (“head”) from behind.
- Position in the press and pull the lever to rivet.
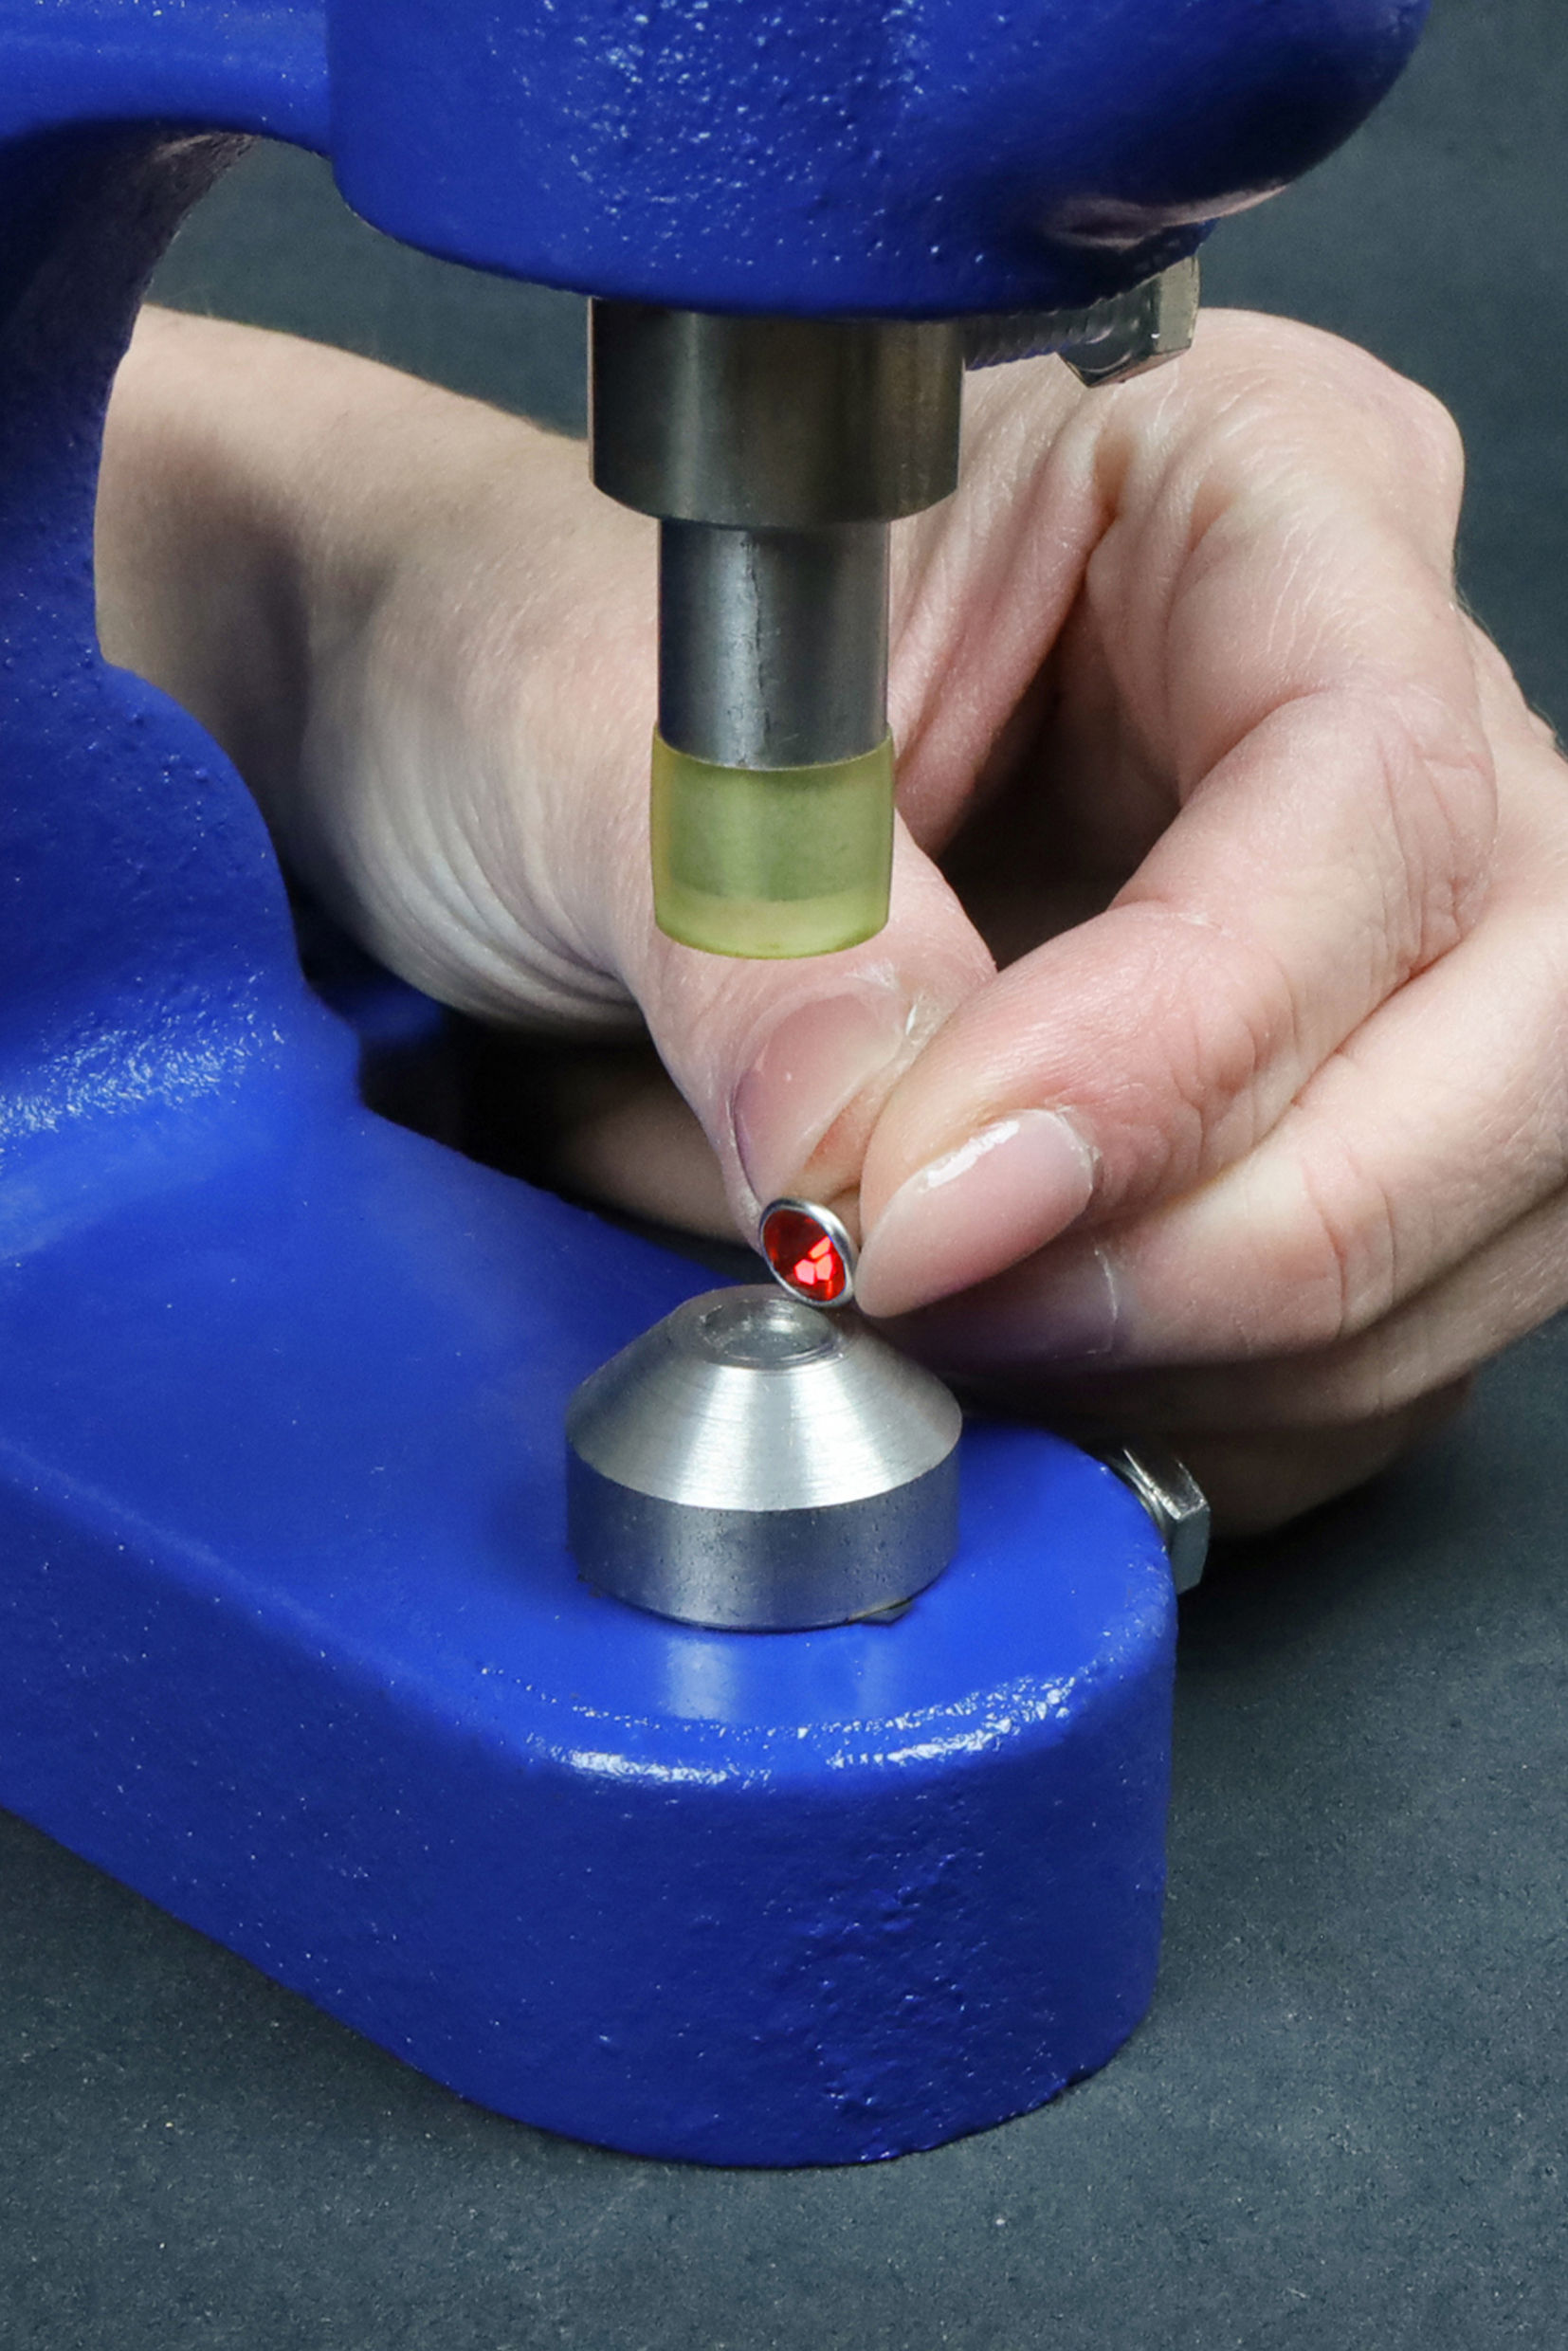
A smart alternative like with self-cutting rivets
- Place rhinestone top directly into the bottom die.
- Place the head into the upper die. Everything should fit nicely.
- Position material between the dies and pull the lever done! Rivet secure, rhinestone shining.
b. Self-Cutting Rhinestone Rivets
Self-cutting rhinestones have teeth on the shaft they’ll pierce thinner materials without punching a hole first. Ideal for fine leathers, textiles, or faux leather. But for thicker or harder materials (like waterproof webbing), it’s best to pre-punch a hole.
Riveting Steps:
- Prepare your press install and tighten dies made for self-cutting rivets.
- Put rhinestone top in the bottom die.
- Insert the head into the top die.
- Place material between the dies and press firmly. The teeth will pierce through.
- Now slowly press down on the lever. Thanks to the sharp teeth, the rivet will easily cut its way through.


Warning: When you hide the rhinestone in the bottom die, you can't see exactly where it lands. If pinpoint precision matters, mark your spot clearly on the front side of the material. This saves you surprises and extra riveting.
Self-cutting rivets can only be set using a manual press and suitable dies.
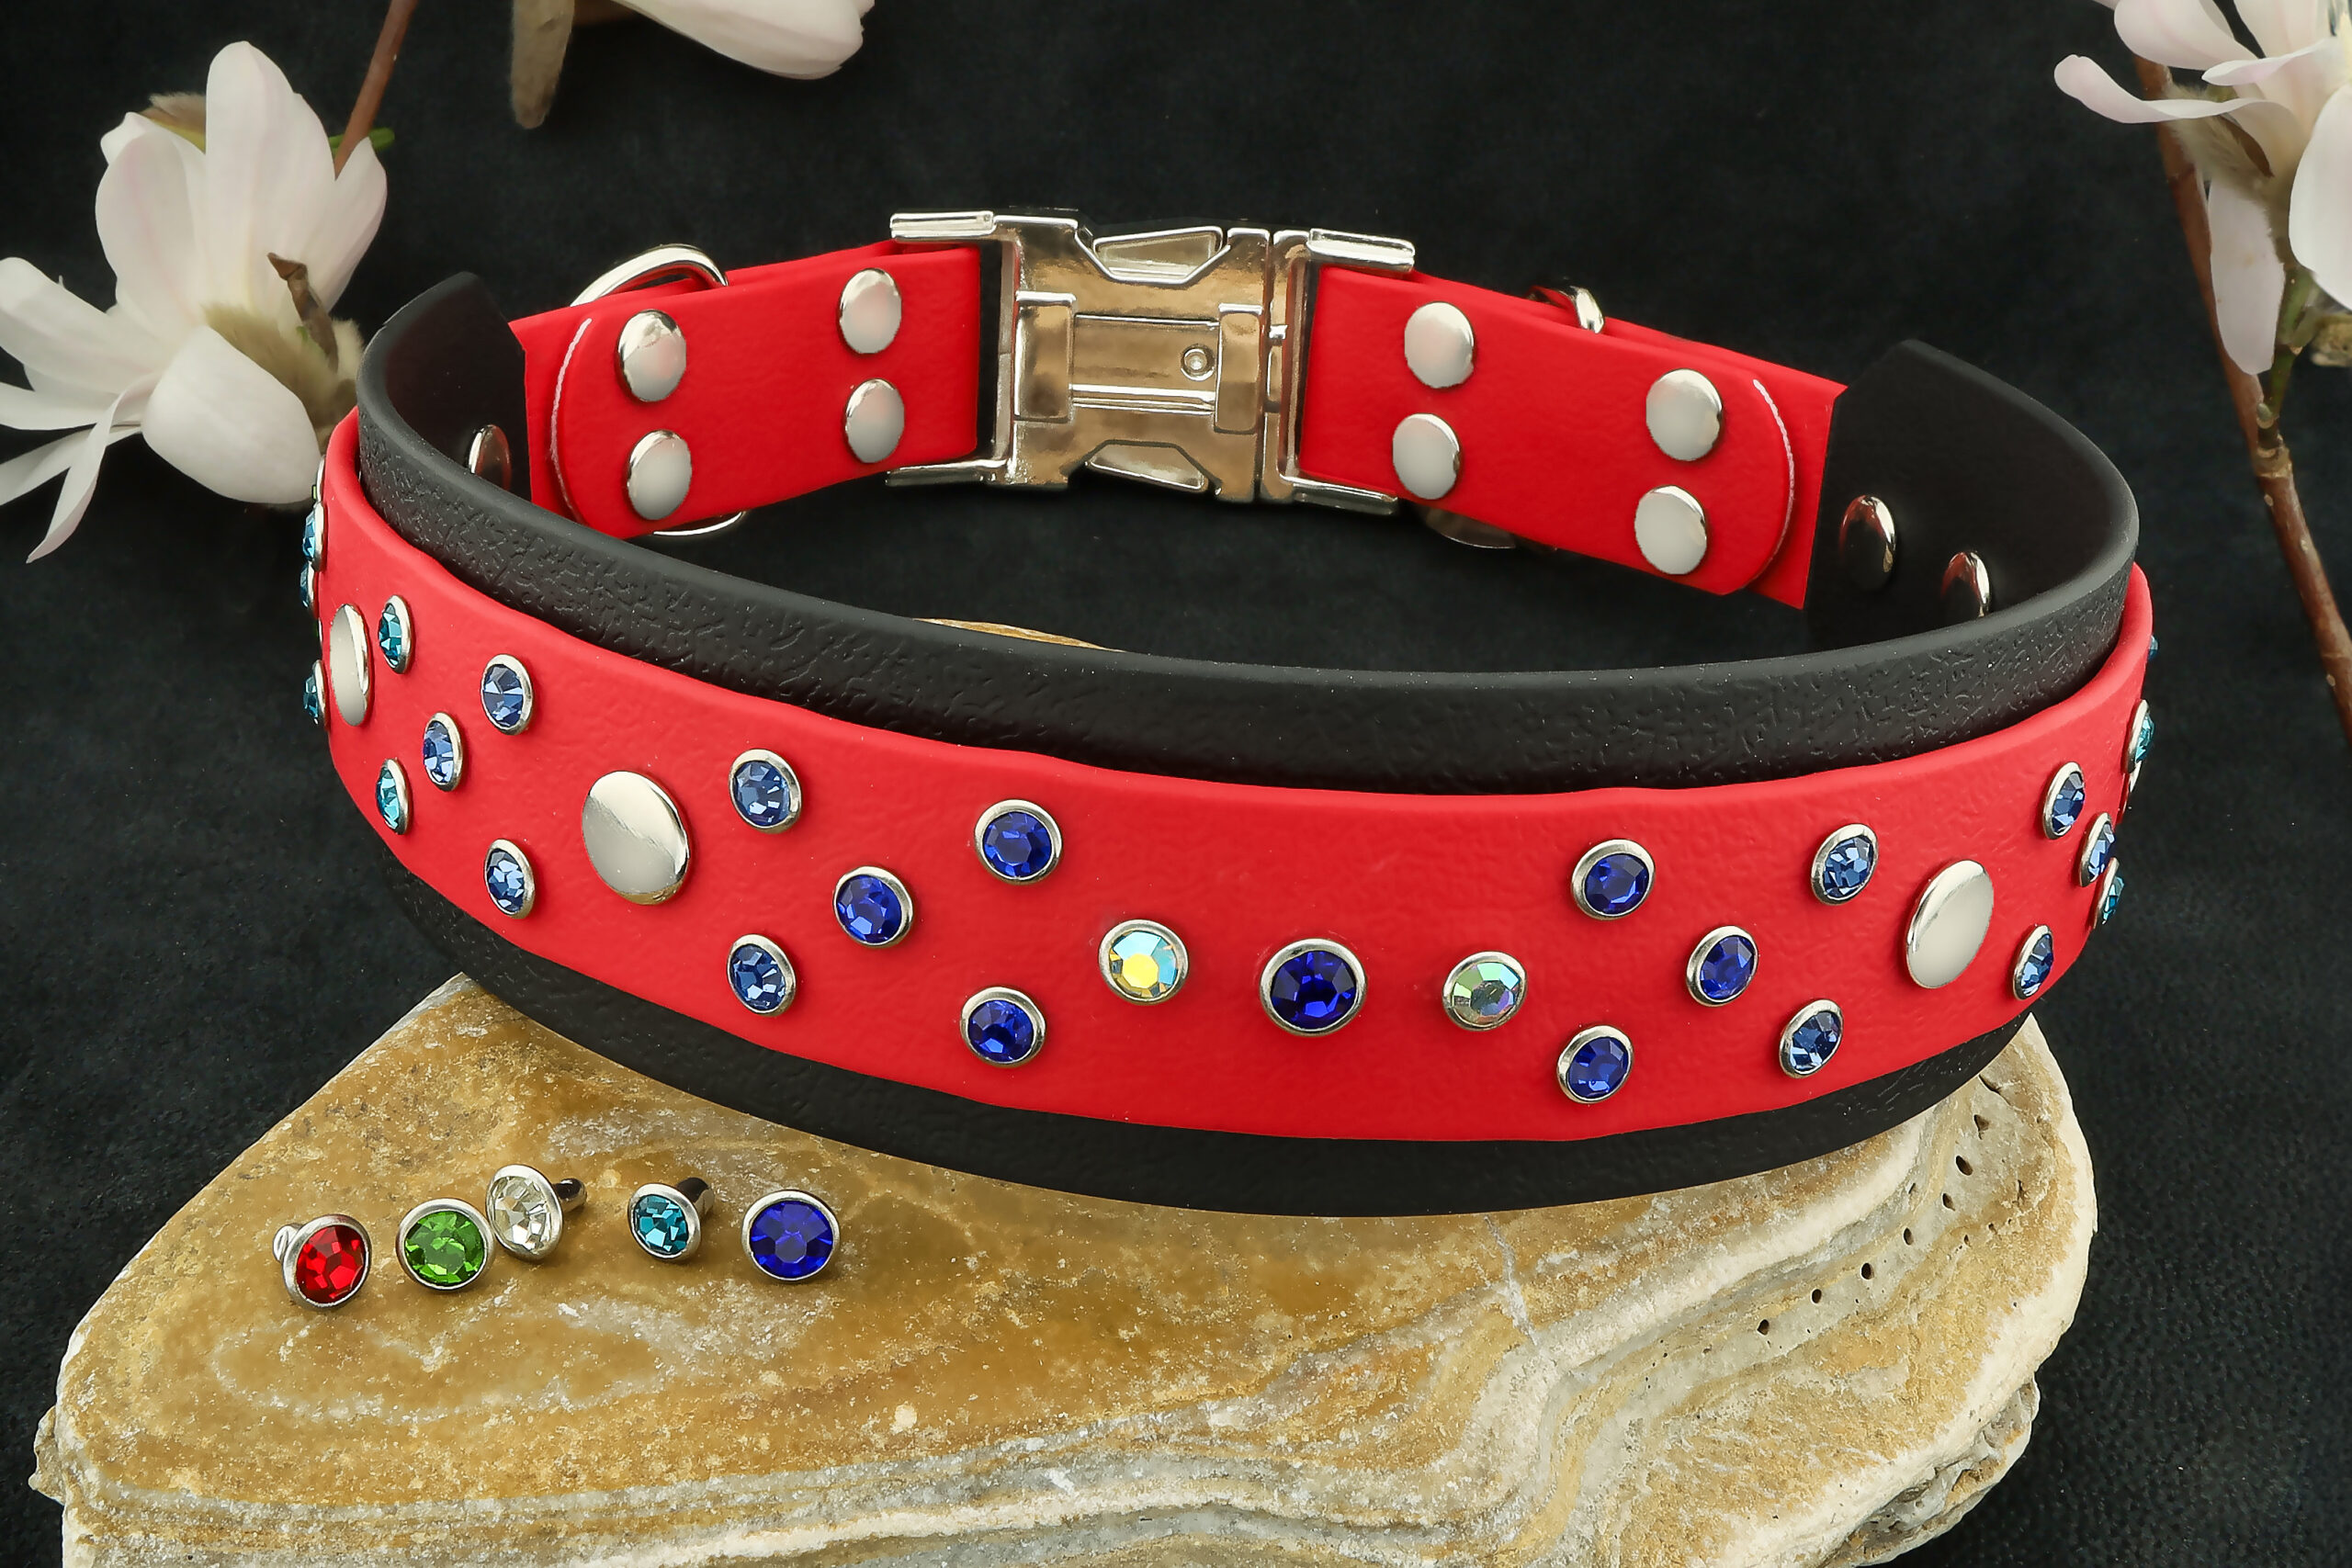
TIP: Combine rhinestone rivets with waterproof webbing. The contrast between durable material and sparkling glass creates unexpectedly elegant results. Whether you’re making a collar, bag, or camera strap, rhinestones add flair and personality to your creation.
So, are you going for it? Rhinestone rivets might seem like a small detail, but they pack a lot of visual punch. They refresh, highlight, and add style and most importantly, they bring individuality to your products. Don’t be afraid to experiment a bit. Grab your hammer or set up your press, pick out the perfect rhinestone… and let your products shine anew.
Pethardware.com
The only shop you’ll ever need for crafting collars and leashes.
Visit Pethardware.com