In today’s photo-guide you will use all the skills that you have learned from our previous articles on polypropylene ropes. We will talk about how to easily, quickly and inexpensively make a rope leash for your four-legged friend.
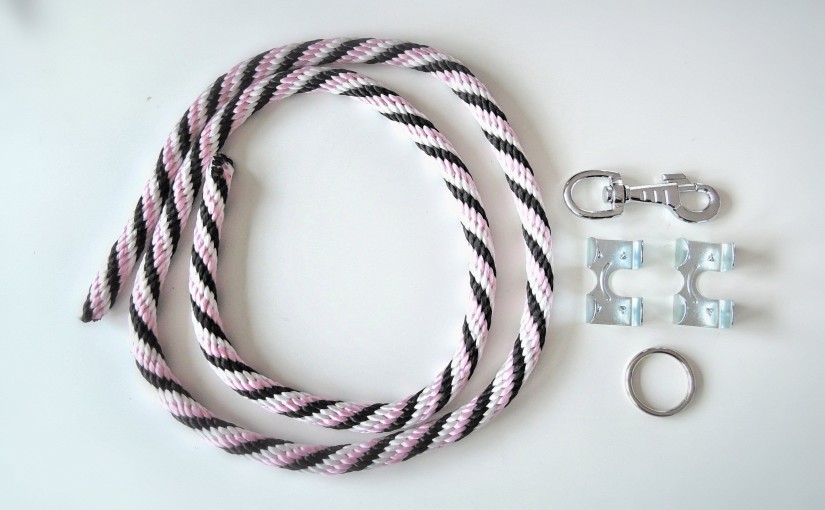
What Do We Need to Make a Leash
- Polypropylene rope – more on attributes and classification of ropes can be found in the article Polypropylene Spliced Ropes. Choose the rope diameter as per the dog’s weight.
- Metal rope clamps or plastic rope clamps – clamp size should be appropriate to the chosen rope diameter.
- Snap-hook – you may choose from snap-hooks for small, medium and big dog breeds, or from special snap-hooks for lunges or horses. For their firmness, we recommend to use stainless or brass snap-hooks when making a dog leash.
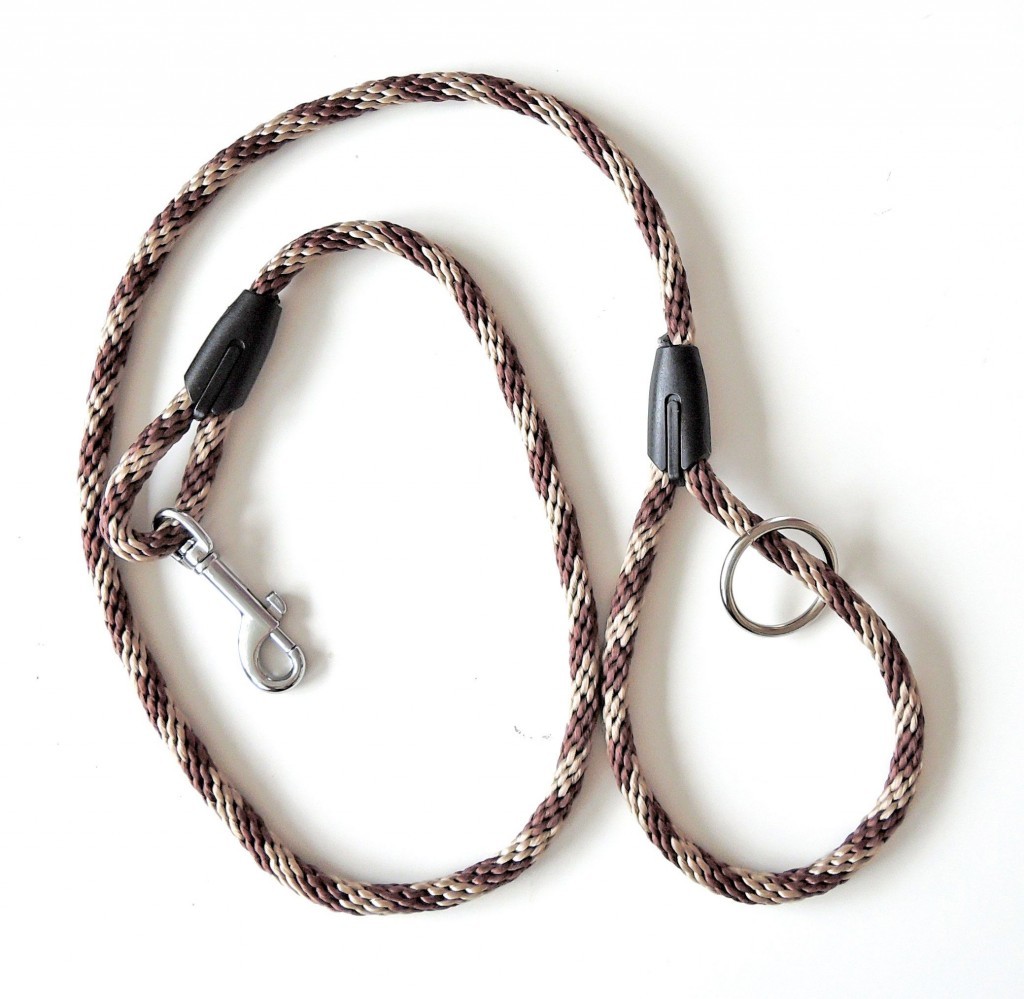
- Closed ring – enables to shorten your leash by half, or easy carrying over the shoulder.
Process of Making a Leash
All the measures we use may be adjusted as per your own needs and requirements.
For 150 cm (60 inches) standardized leash length we will need a 185 cm (73 inches) long rope. It is necessary to add the extra 35 cm (13 inches) for:
- Bending at the snap-hook lug [5 cm (2 inches) for clamp and 5 cm (2 inches) for snap-hook lug],
- Lug for handle 25 cm (10 inches) [5 cm (2 inches) for clamp and 20 cm (8 inches) to thread arm through].
Leash with Plastic Clamps
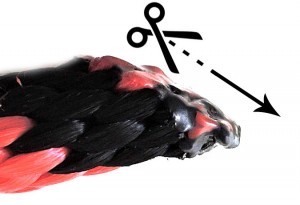
- Cut the rope to the required length of 185 cm (60 inches). Note: Never cut the rope using scissors.
- First, thread two plastic clamps on the rope (with the narrower ends together). Snap-hook on one side of the rope, closed ring on the other.
- Weld the lug with the snap-hook at the rope end. Ropes may be welded using solder or fuse pistol. On a work surface, mark where the weld will be performed. Weld on the rope should always be a bit smaller that the clamp size. Carry out this work task also on the other rope end.
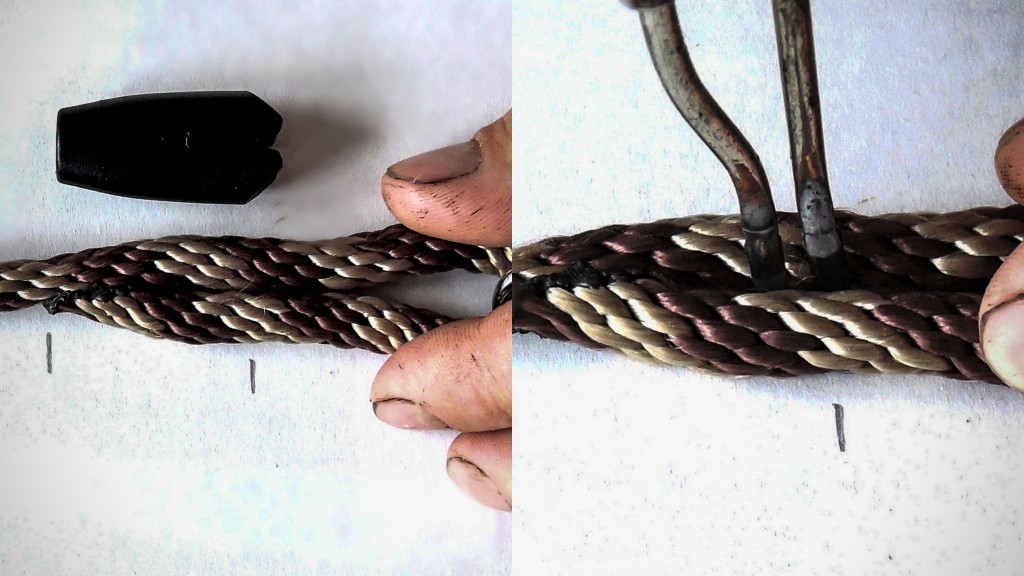
- Thread the plastic clamp on the cooled weld joint. Try to place it as close as possible to the weld tip. To secure the clamp on the rope, secure it by stapes. Thread the stapes from the narrower clamp part. Insert the spikes on both ends to openings in the clamp and press them in using your fingers.
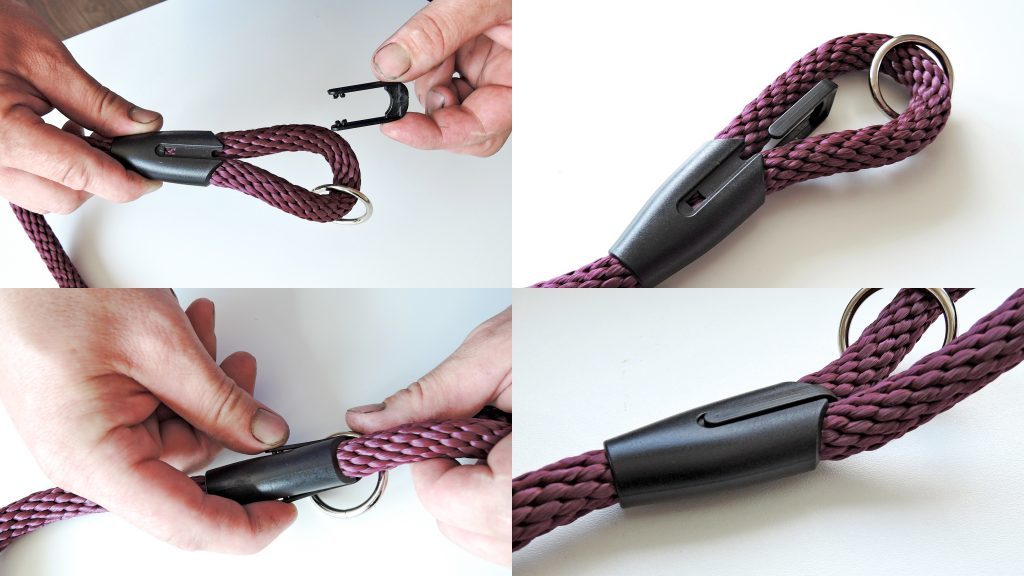
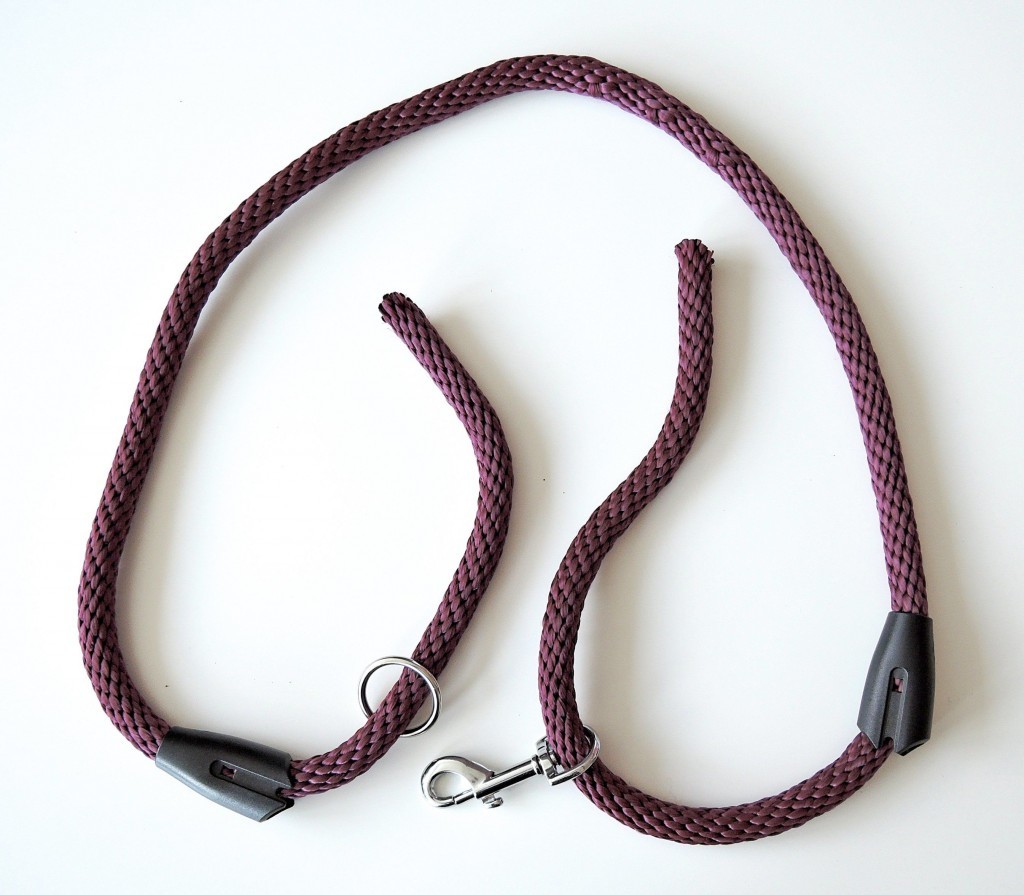
- The whole leash assembly is done.
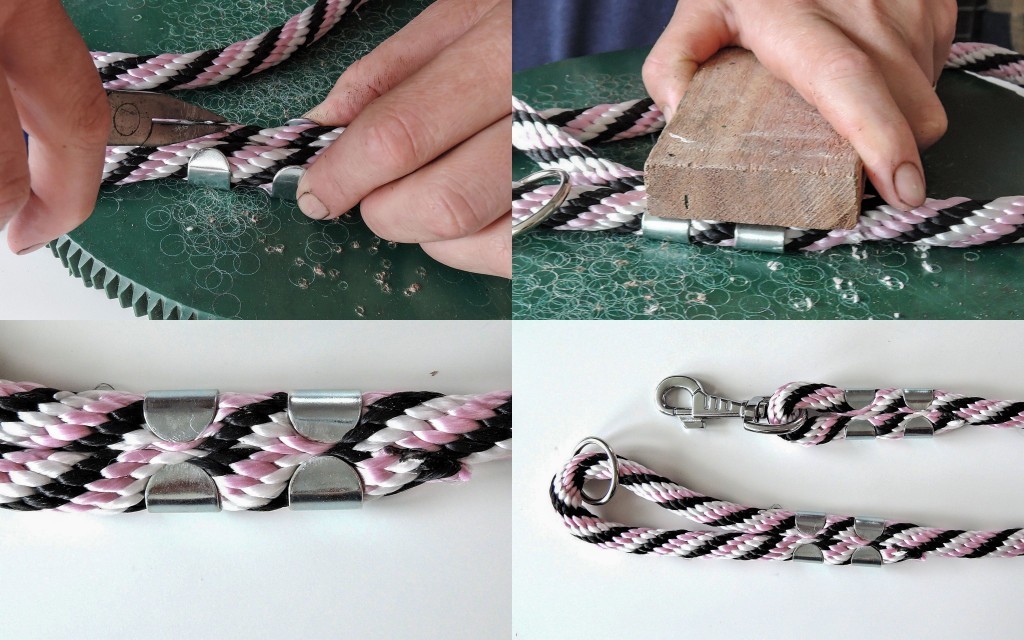
Leash with Metal Clamps
The process is identical and differs only in the procedure of attaching the clamp to the leash.
Metal clamps are suitable for leashes meant for big dog breeds. Leash firmness is secured not only by the weld, but also by the metal clamp. Attachment of metal clamps may be done in two ways.
A. Manual attachment of metal clamp
- Place the clamp with its level side on a working surface. Insert the rope to the clamp. Width of rope clamps is the same on both ends.
- Tighten the clamp to the rope as firmly as possible. To ease this, you may use pliers. Grasp the clamp using pliers and bend it towards the rope.
- Bend each part of the clamp separately so that the clamp fits to the rope as closely as possible.
- Finally, compress the clamp by several taps over a wooden board using a small hammer.
This procedure is more time-consuming than in case of a plastic clamp, however the joint is stronger.
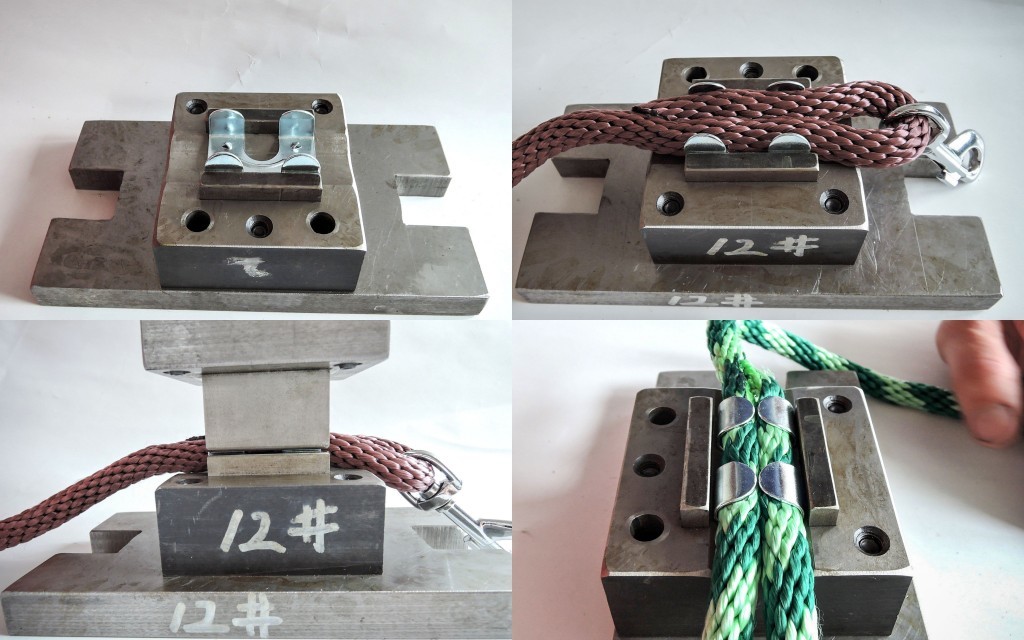
B. Machine attachment of metal clamp
Manual method of metal clamp application is suitable for home-made small-scale-production. In case of bigger series of leashes press with special tooling for closing of metal clamps would pay off.
Work with press is quick a not physically demanding. Clamp is always closed and thus the biggest possible firmness of leash is assured.
Hi
Where buy this press