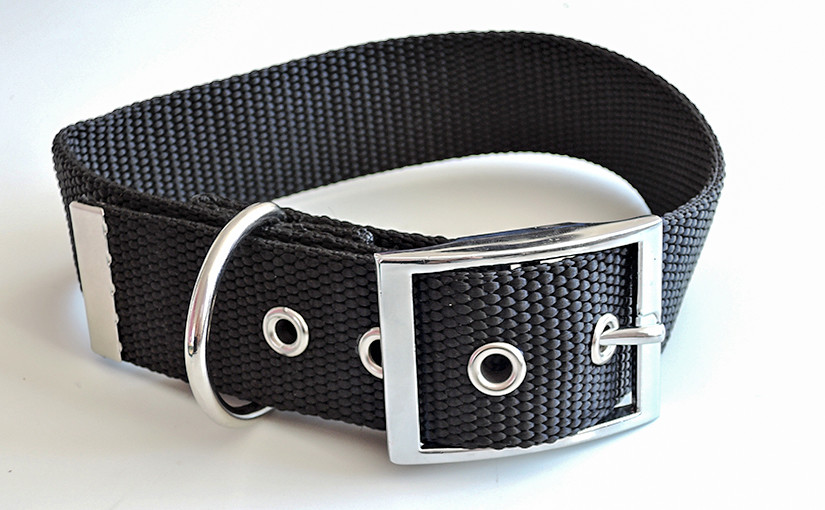
In saddlery products, such as harnesses, leashes, collars or halters for horses, leather can be replaced with polypropylene webbing. In today’s photo guide, we have prepared for you a guide on how to make a collar without sewing using polypropylene webbing, rivets and a solder with a tip.
To make the collar we will need
- Polypropylene webbing of 40 mm
- Double cap rivets
- Collar buckle of 40 mm
- Eyelets 6×5 mm
- D ring 40 mm
- A solder with a tip
- Webbing ending
- A hand press or manual tools for rivets and eyelets

The production process of the collar
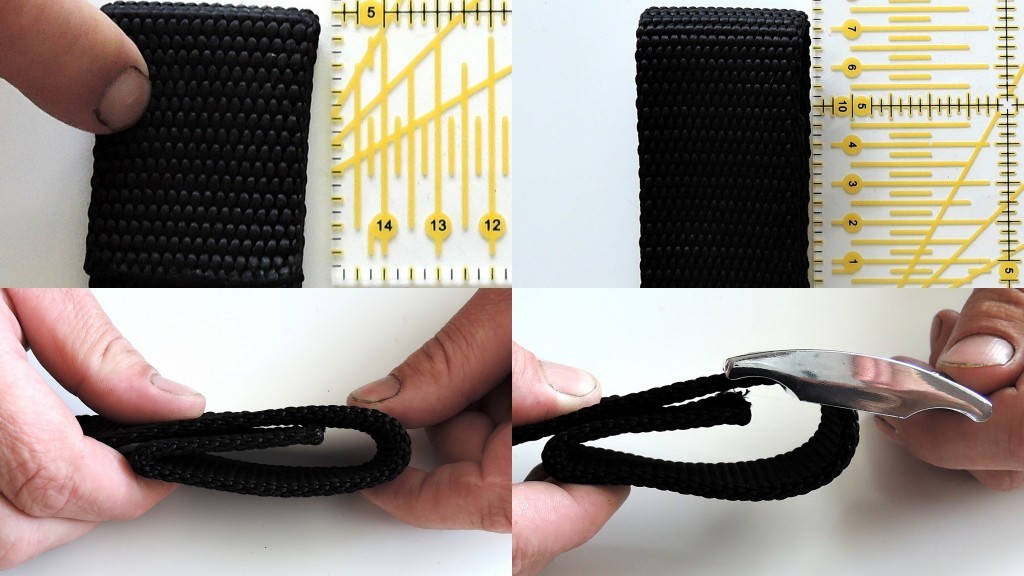
1. Measuring and cutting the webbing
We are making a dog collar for a dog with a neck circumference of 30 cm – which is the distance from the pin to the middle hole of the collar. Collars are normally made with 5 holes at 2.5 cm apart. For attaching the buckle on the collar, we will need a 12-cm webbing. From the middle hole to the end of the collar a minimum distance is required of 15 cm. The length of the collar from the last hole should be large enough to slide the webbing behind the D ring. Otherwise, the end of the collar will “dangle”. The total length of the collar is therefore 57 cm (30+12+15).
With sharp scissors cut the required length of the webbing.
2. Passing the webbing through buckle
The collar buckle is special as it has two middle rungs. On one there is a thorn and through the second we can bend the webbing. We do not need make an oval hole into the webbing for the thorn so the webbing will not lose its strength.
In the buckle we must fold twice the webbing on the collar. The longer fold should be 7 cm. The bend is quite long because we must place the D ring under it. The inner should be 5 cm long.
3. Marking holes for rivets
For harnesses, longes, leashes and collars we use a double cap rivet. We fix the D ring using two pairs of rivets spaced in the middle of a rivet 2.5 cm. The distance of the rivet from the edge of the webbing must be at least 1 cm. The rivet head must be a distance of 3-6 mm from the edge, depending on the size of the rivet head and the width of the webbing. From the bend of the webbing end to the end of the webbing, the rivet must be distanced at least 1 cm.
If is the rivet placed closer to the edges, it could cause stress and break the rivet off from the webbing.
Mark the places for rivets on the webbing. The webbing will be perforated with the solder. If we used a puncher we could break the webbing structure and not create a hole large enough to rivet in the process. It is better to mark the points on all the layers of the webbing and perforate each part separately.

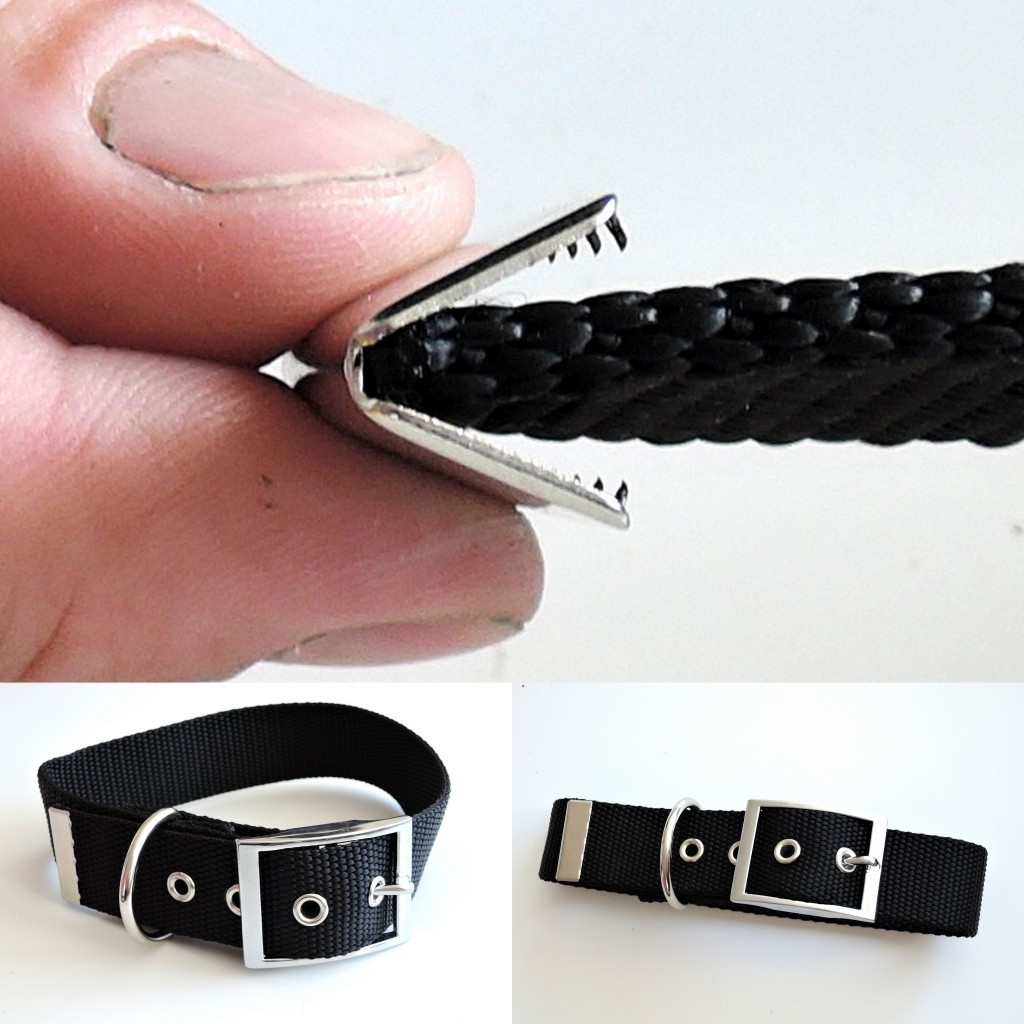
4. Perforation of the webbing using a solder
Heat the solder to its operating temperature. Depending on the power of the solder, tips have an operating temperature ranging from 400 to 500 ° C. This temperature allows us to quickly perforate the webbing without damaging the surrounding material. For thick webbings, we recommend removing the excess molten material from the hole using a snap-off blade knife and immediately remove the material from the blade with a piece of cloth or paper. We recommend to perforate webbing on a piece of wood or an old chopping board.
We place the tip of the solder on the marked point and we perforate the webbing while applying pressure. During perforation, the edges of the hole will seal. The tip is narrow. If you need a larger diameter, turn around the pin inside the hole and thereby magnify its diameter.
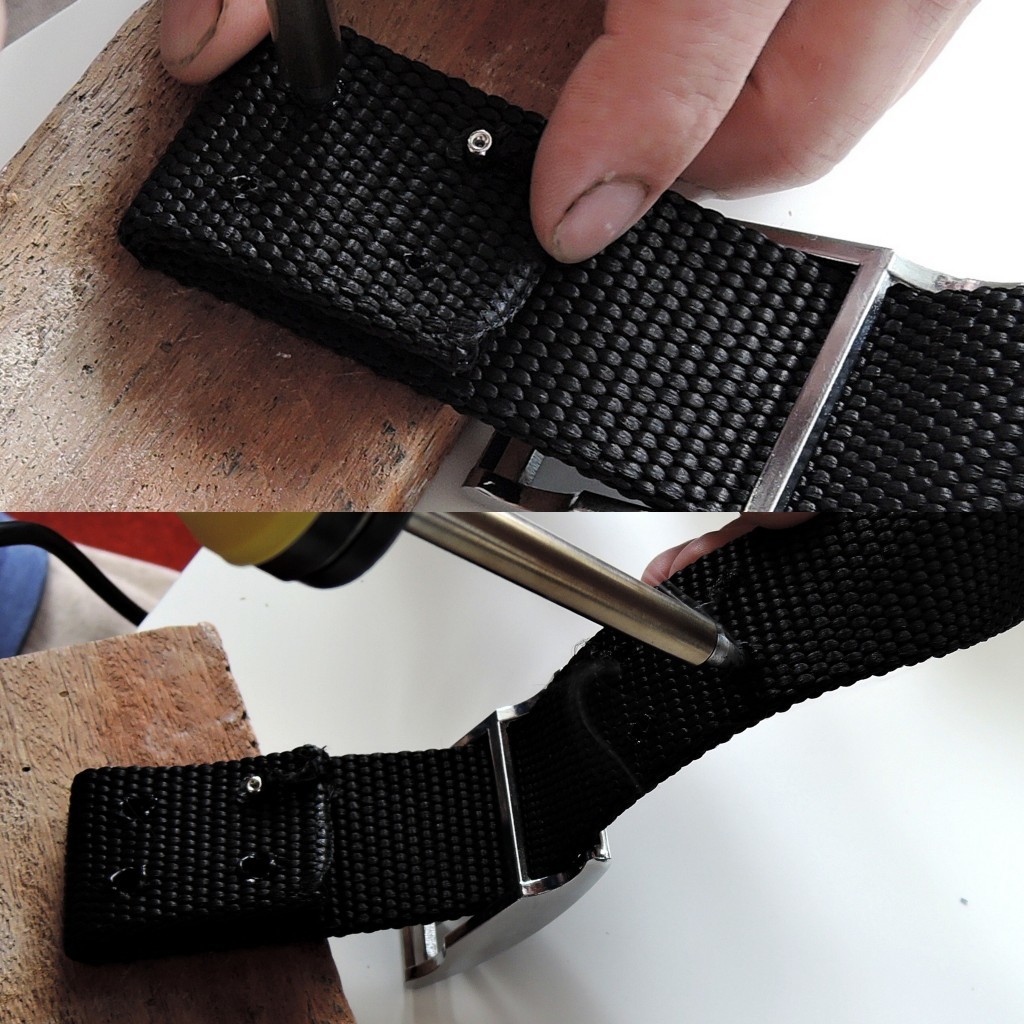
5. Fixing buckles and D rings with rivets
Put the buckle on the webbing, connect the D ring with webbing using rivets. How you can read how to properly secure rivets using a hand application tool in the article How to do manual riveting. Alternatively, you can use a hand press. You can find the guide in the article Riveting using a hand press.

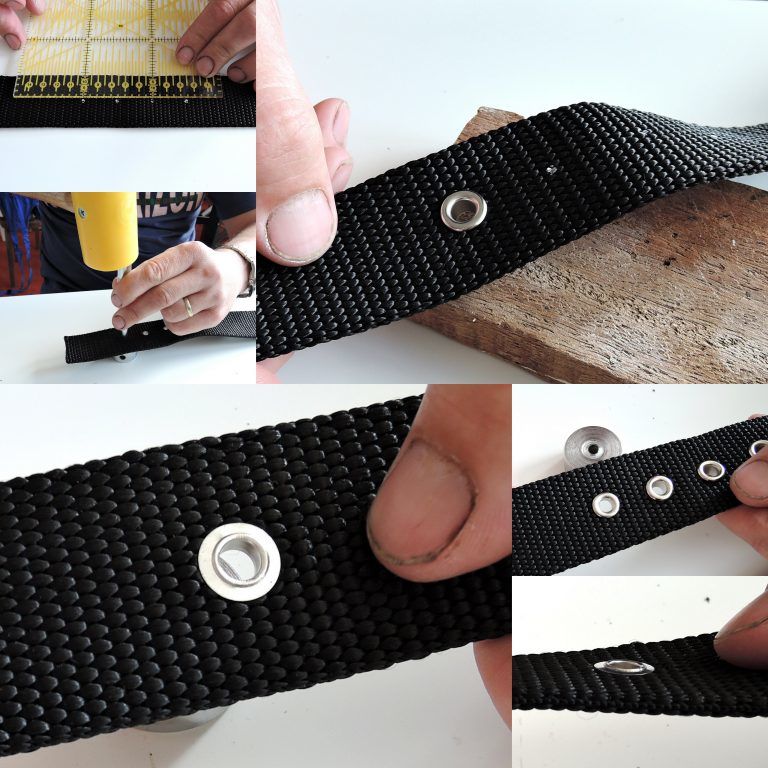
6. Perforation of holes and the application of eyelets
On the other side of the webbing, mark points for the eyelets. The first eyelet is spaced 10 cm from the edge. The others will be 2.5 cm apart. Perforate the webbing using a solder again. The procedure is identical, only holes for the eyelets should have a larger diameter.
To learn how to properly secure eyelets, read the article How to rivet eyelets. The lower part of the eyelets must be properly secured to be flat. Otherwise, you risk injuring an animal!
7. Attaching the webbing ending
The last step in the production of the collar is finishing by using the webbing ending. Before we place the ending on the webbing, we can seal the end of the webbing with a solder, lighter, matches or burner.
Insert the ending horizontally on the edge of the webbing, place it on a solid surface and preferably through a wooden block gavel knock. The force should not be too strong as to not mechanically damage the ending.
Then your collar is ready.
Pethardware.com
The only shop you’ll ever need for crafting collars and leashes.
Visit Pethardware.com