
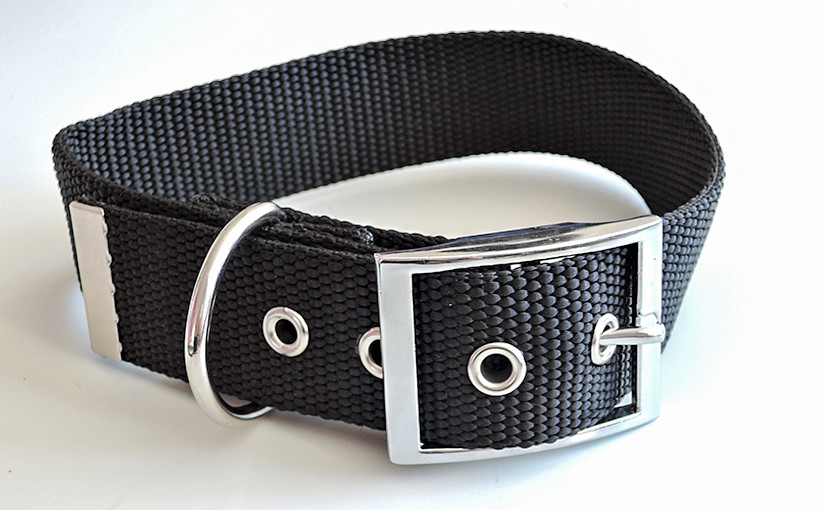
For saddlery products such as harnesses, leashes, collars or horse halters, you can use polypropylene webbing instead of leather. In this photo guide, we show you how to make a dog collar without sewing, using polypropylene webbing, rivets and a soldering iron with a pointed tip.
What you need to make a dog collar
- 40 mm polypropylene webbing,
- double cap rivets (choose a post 2–3 mm longer than the total thickness of all layers; the webbing is 2 mm thick),
- a 40 mm collar buckle,
- 6×5 mm grommets,
- a 40 mm D-ring,
- a soldering iron with a pointed tip,
- a webbing end tip,
- a hand press, or hand rivet setters and grommet setters.

How to make the collar step by step
1. Measuring and cutting the webbing
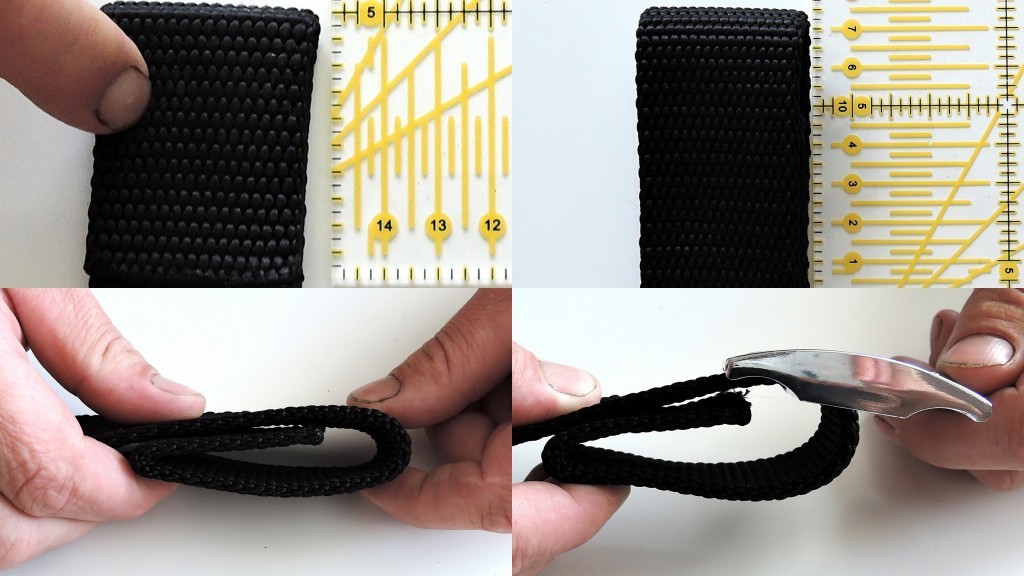
We are making the collar for a dog with a 30 cm neck circumference, which is the distance from the buckle tongue to the middle hole of the collar. Collars are usually made with 5 holes spaced 2.5 cm apart. Attaching the buckle takes 12 cm of webbing. From the middle hole to the end of the collar, you need at least 15 cm. The length beyond the last hole must be long enough to tuck the webbing under the D-ring. Otherwise the end of the collar will flap loose. The total length of our collar is therefore 57 cm (30 + 12 + 15).
Use sharp scissors to cut the webbing to length.
2. Threading the webbing through the buckle
A collar buckle is special because it has two center bars. The tongue sits on one of them, and you can fold the webbing over the other. You do not need to make an oval slot in the webbing for the tongue, so the webbing keeps its strength.
Fold the webbing over twice at the buckle. The longer fold is 7 cm. It is fairly long because the D-ring has to sit under it. The inner fold is 5 cm long.
3. Marking the rivet positions
For harnesses, lunge lines, leashes and collars, use double cap rivets. Secure the D-ring with two pairs of rivets spaced 2.5 cm apart, measured center to center. The center of each rivet must be at least 1 cm from the edge of the webbing. The rivet cap must be 3–6 mm from the edge, depending on the cap size and the webbing width. Each rivet must also be at least 1 cm from the fold and from the end of the folded webbing.
If a rivet sits closer to the edges, it can tear out of the webbing under load.
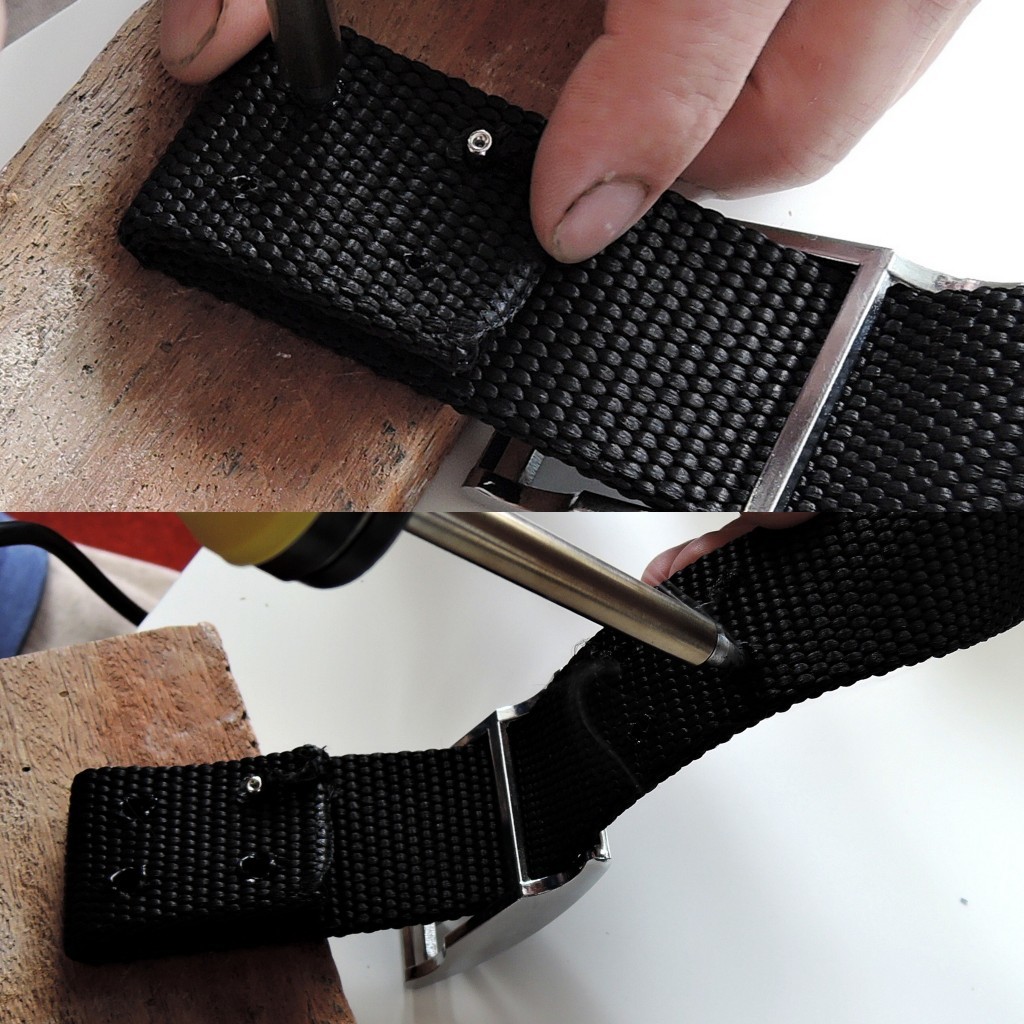
Mark the rivet positions on the webbing. You will perforate the webbing with a soldering iron. For polypropylene webbing, we recommend a soldering iron because the melted edge of the hole reinforces the webbing and keeps it from fraying. For an overview of hole punches, see our comparison of hole punching tools. It is best to mark the points on every layer of webbing and perforate each layer separately.

4. Perforating the webbing with a soldering iron
Let the soldering iron heat up to its working temperature. Depending on the power of the iron, the tip reaches a working temperature of 400–500 °C. This lets you perforate the webbing quickly without damaging the surrounding material. Work in a well-ventilated room and wear gloves (leather ones are best): the tip and the molten material cause burns, and melting polypropylene gives off unpleasant fumes. On thick webbing, we recommend cutting the excess melted material out of the hole with a snap-off utility knife and wiping it off the blade right away with a piece of cloth or paper. Perforate the webbing on a piece of wood or an old board.
Place the tip of the soldering iron on the marked point and press it through the webbing. As the tip goes through, it also seals the edges of the hole. The tip is fairly narrow. If you need a larger diameter, rotate the tip inside the hole to widen it.
5. Securing the buckle and D-ring with rivets
Put the buckle and the D-ring on the webbing and join the layers with rivets. To learn how to set rivets with hand tools, read How to Set Rivets by Hand. You can also use a hand press, as described in Riveting with a Hand Press.

6. Perforating the holes and setting the grommets
On the other end of the collar, mark the points for the grommets. The first grommet will be 10 cm from the end. Space the others 2.5 cm apart. Perforate the webbing with the soldering iron again. The process is the same, except that the grommets need a hole with a larger diameter.
To learn how to set grommets correctly, read How to Set Grommets by Hand and with a Press. The back part of the grommet must be set flat. Otherwise it can injure the animal.

7. Attaching the webbing end tip
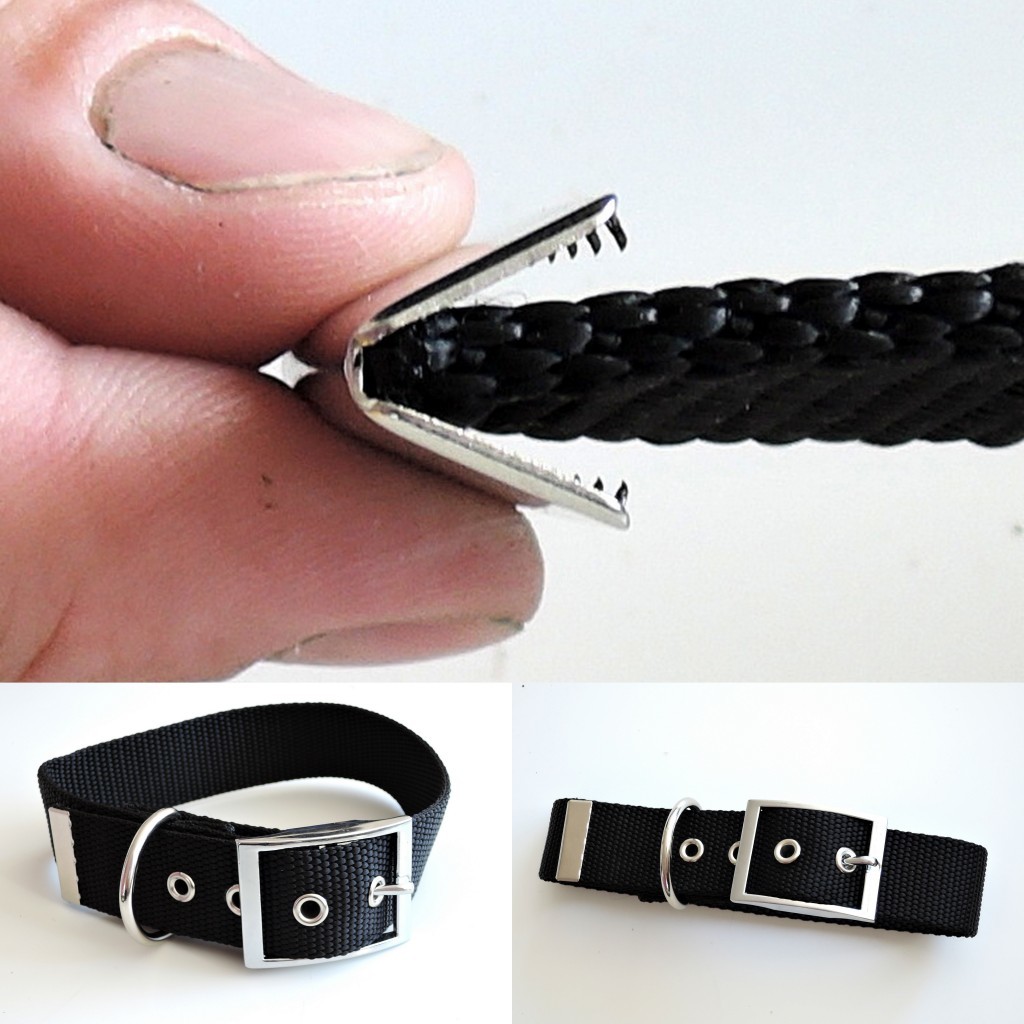
The last step in making the collar is finishing the end with a webbing end tip. Before you put the tip on, you can seal the end of the webbing with the soldering iron, a lighter, a match or a torch.
Slide the end tip on level with the edge of the webbing, place it on a solid surface and tap it with a hammer, preferably through a small wooden block. Do not hit too hard, or you will damage the end tip.
And your collar is finished. Before you hand it over, go through our checklist of common collar-making mistakes. Want a collar made from waterproof webbing? See How to Make a Dog Collar from Waterproof Webbing.
Pethardware.com
The only shop you’ll ever need for crafting collars and leashes.
Visit Pethardware.com