Four-piece riveting snap fasteners have been used for over a century. Although their look and function haven’t changed much, they remain incredibly practical. They let you quickly and securely join different materials — from thinner fabrics to thicker leathers.
Types of snap fasteners
You’ll most often encounter two types:
- Snap Button
- Heavy-Duty Snap Fastener (Auto Moto, sometimes also Sport & Camping).
At first glance they look similar, but their properties and uses differ.
Snap Buttons
- Close smoothly and open just as easily.
- Ideal for textiles and places where the snap is used frequently — jackets, vests, backpacks.
- The joint is reliable, yet doesn’t require too much force.
Heavy-Duty Snap Fasteners (Auto Moto / Sport & Camping)
- When you need something to hold like it’s bolted down.
- To open them? Let’s just say you’ll have to give it some effort.
- Great for bags, gear, tarps or technical textiles where security matters most.
? In short:
For style and everyday use, choose a Snap Button.
For strength and durability, choose a Heavy-Duty Snap Fastener.
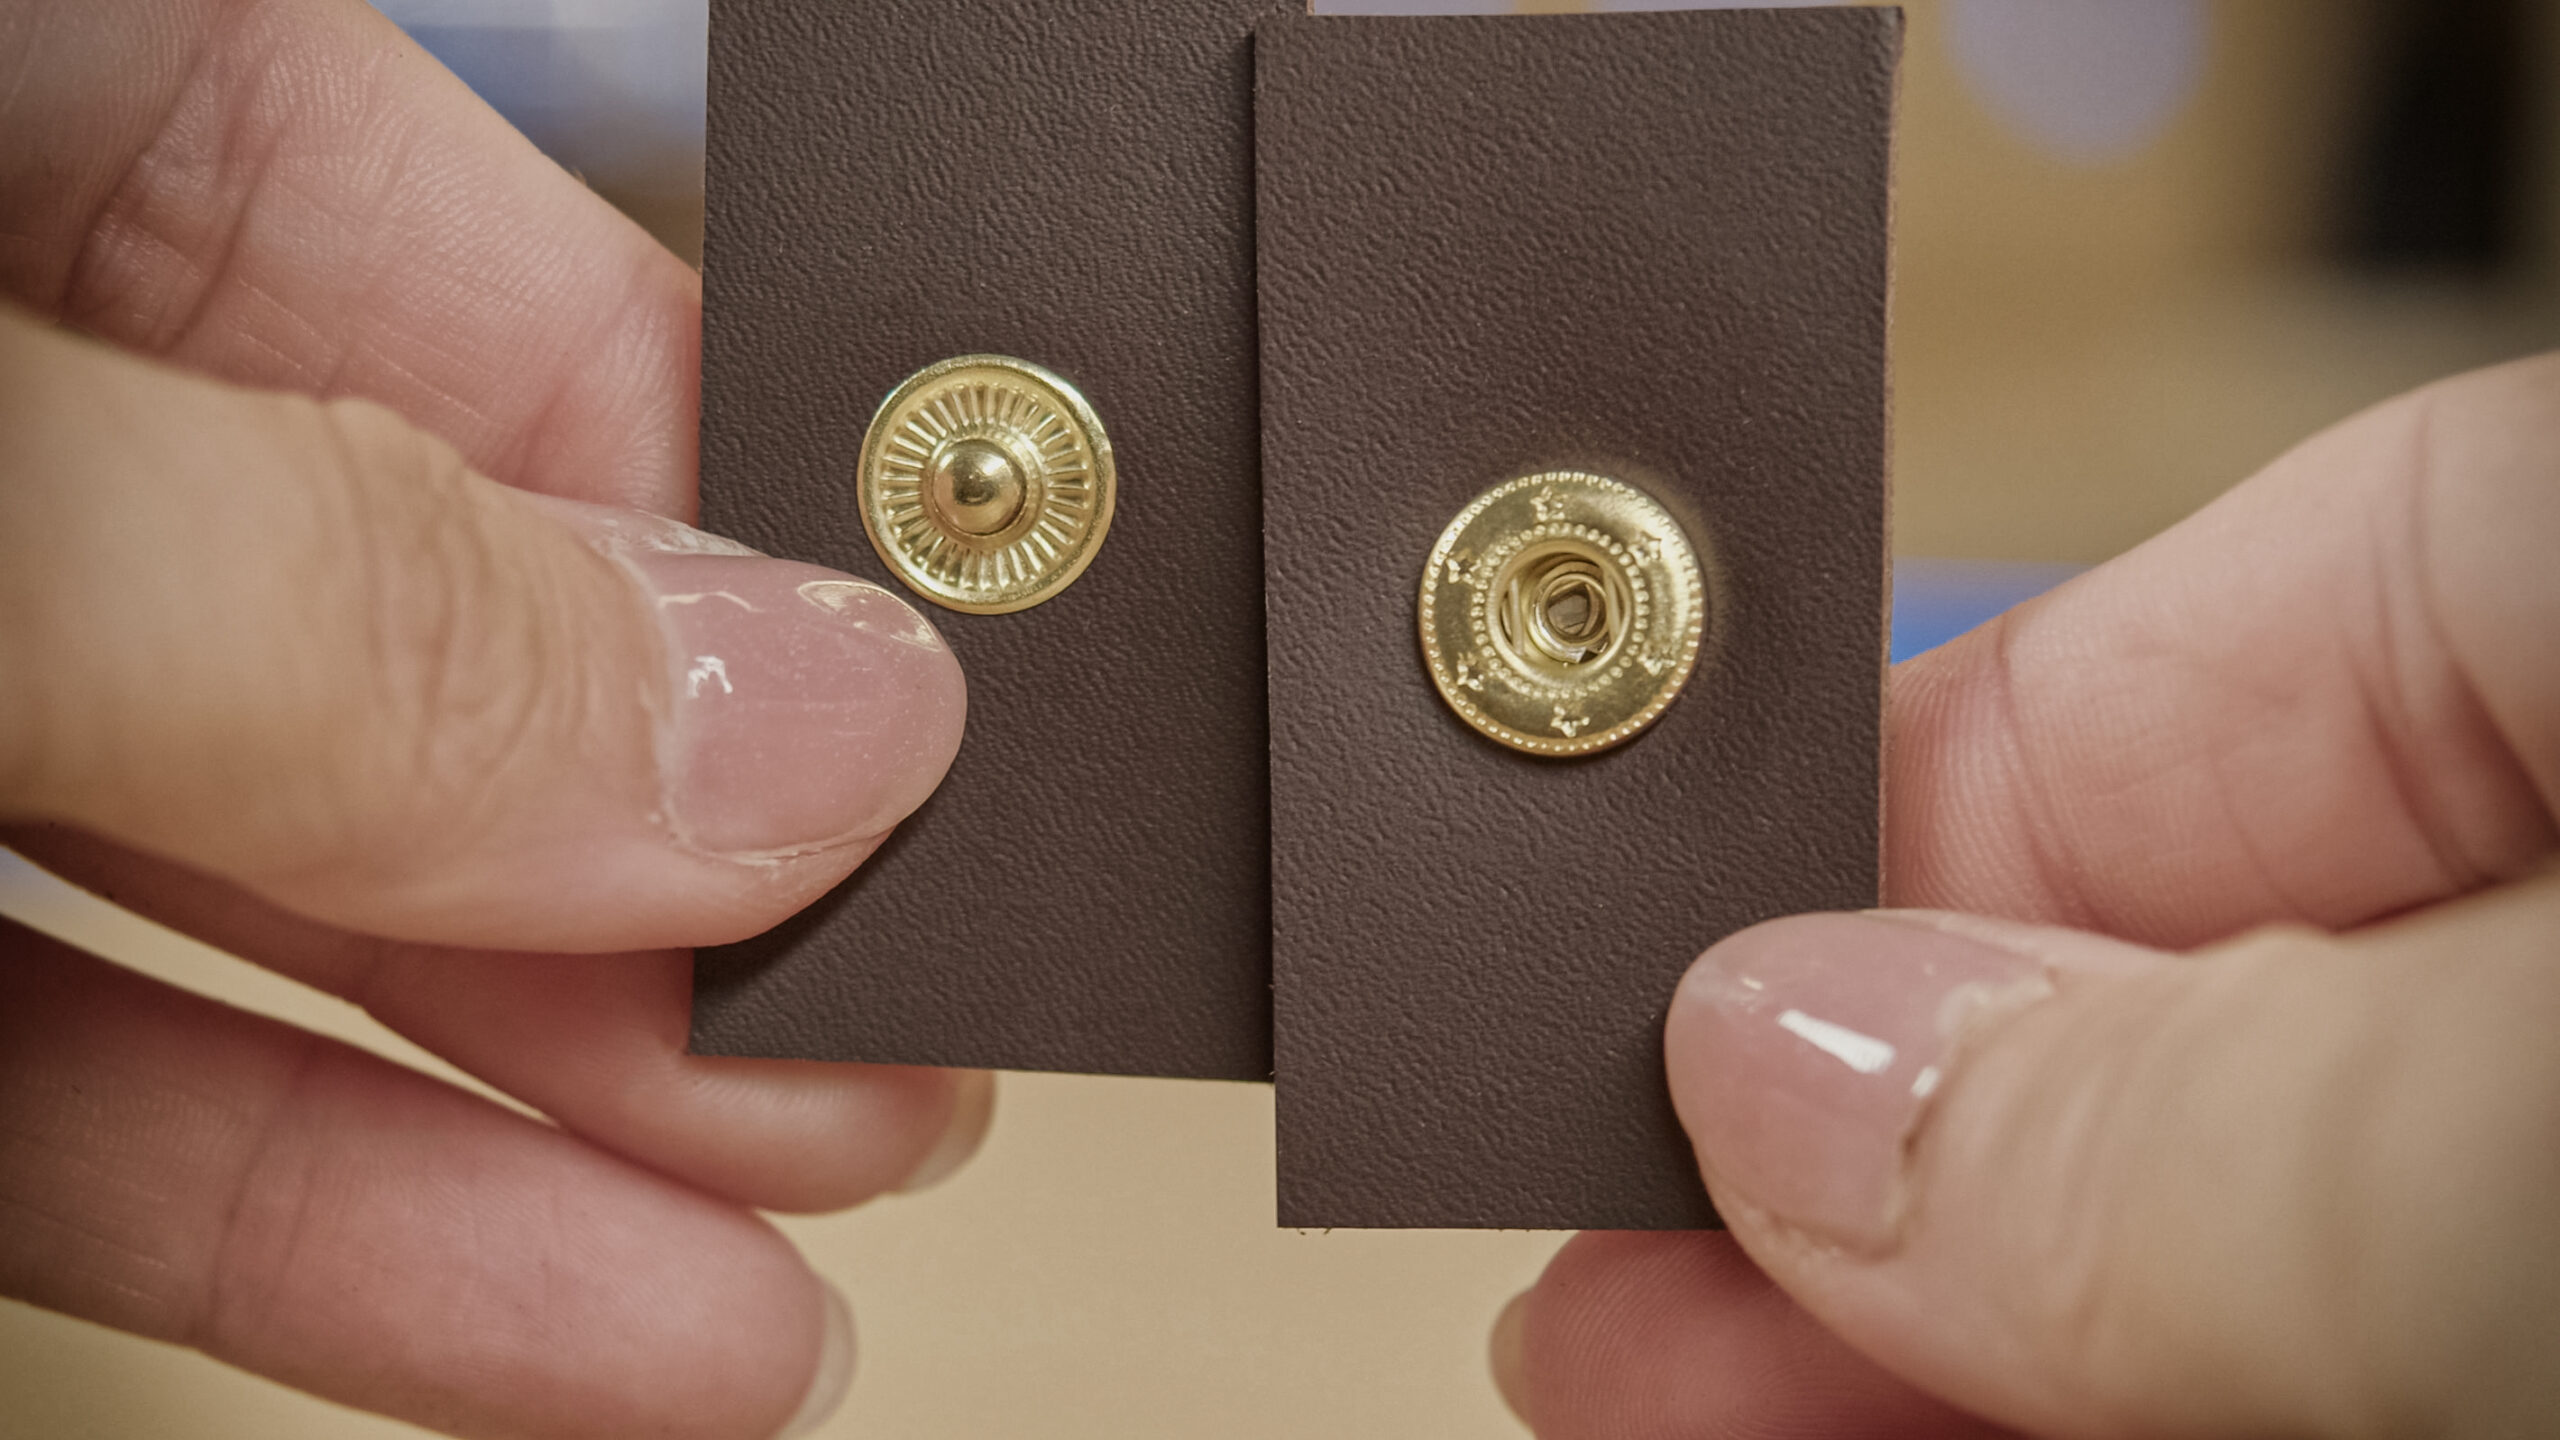
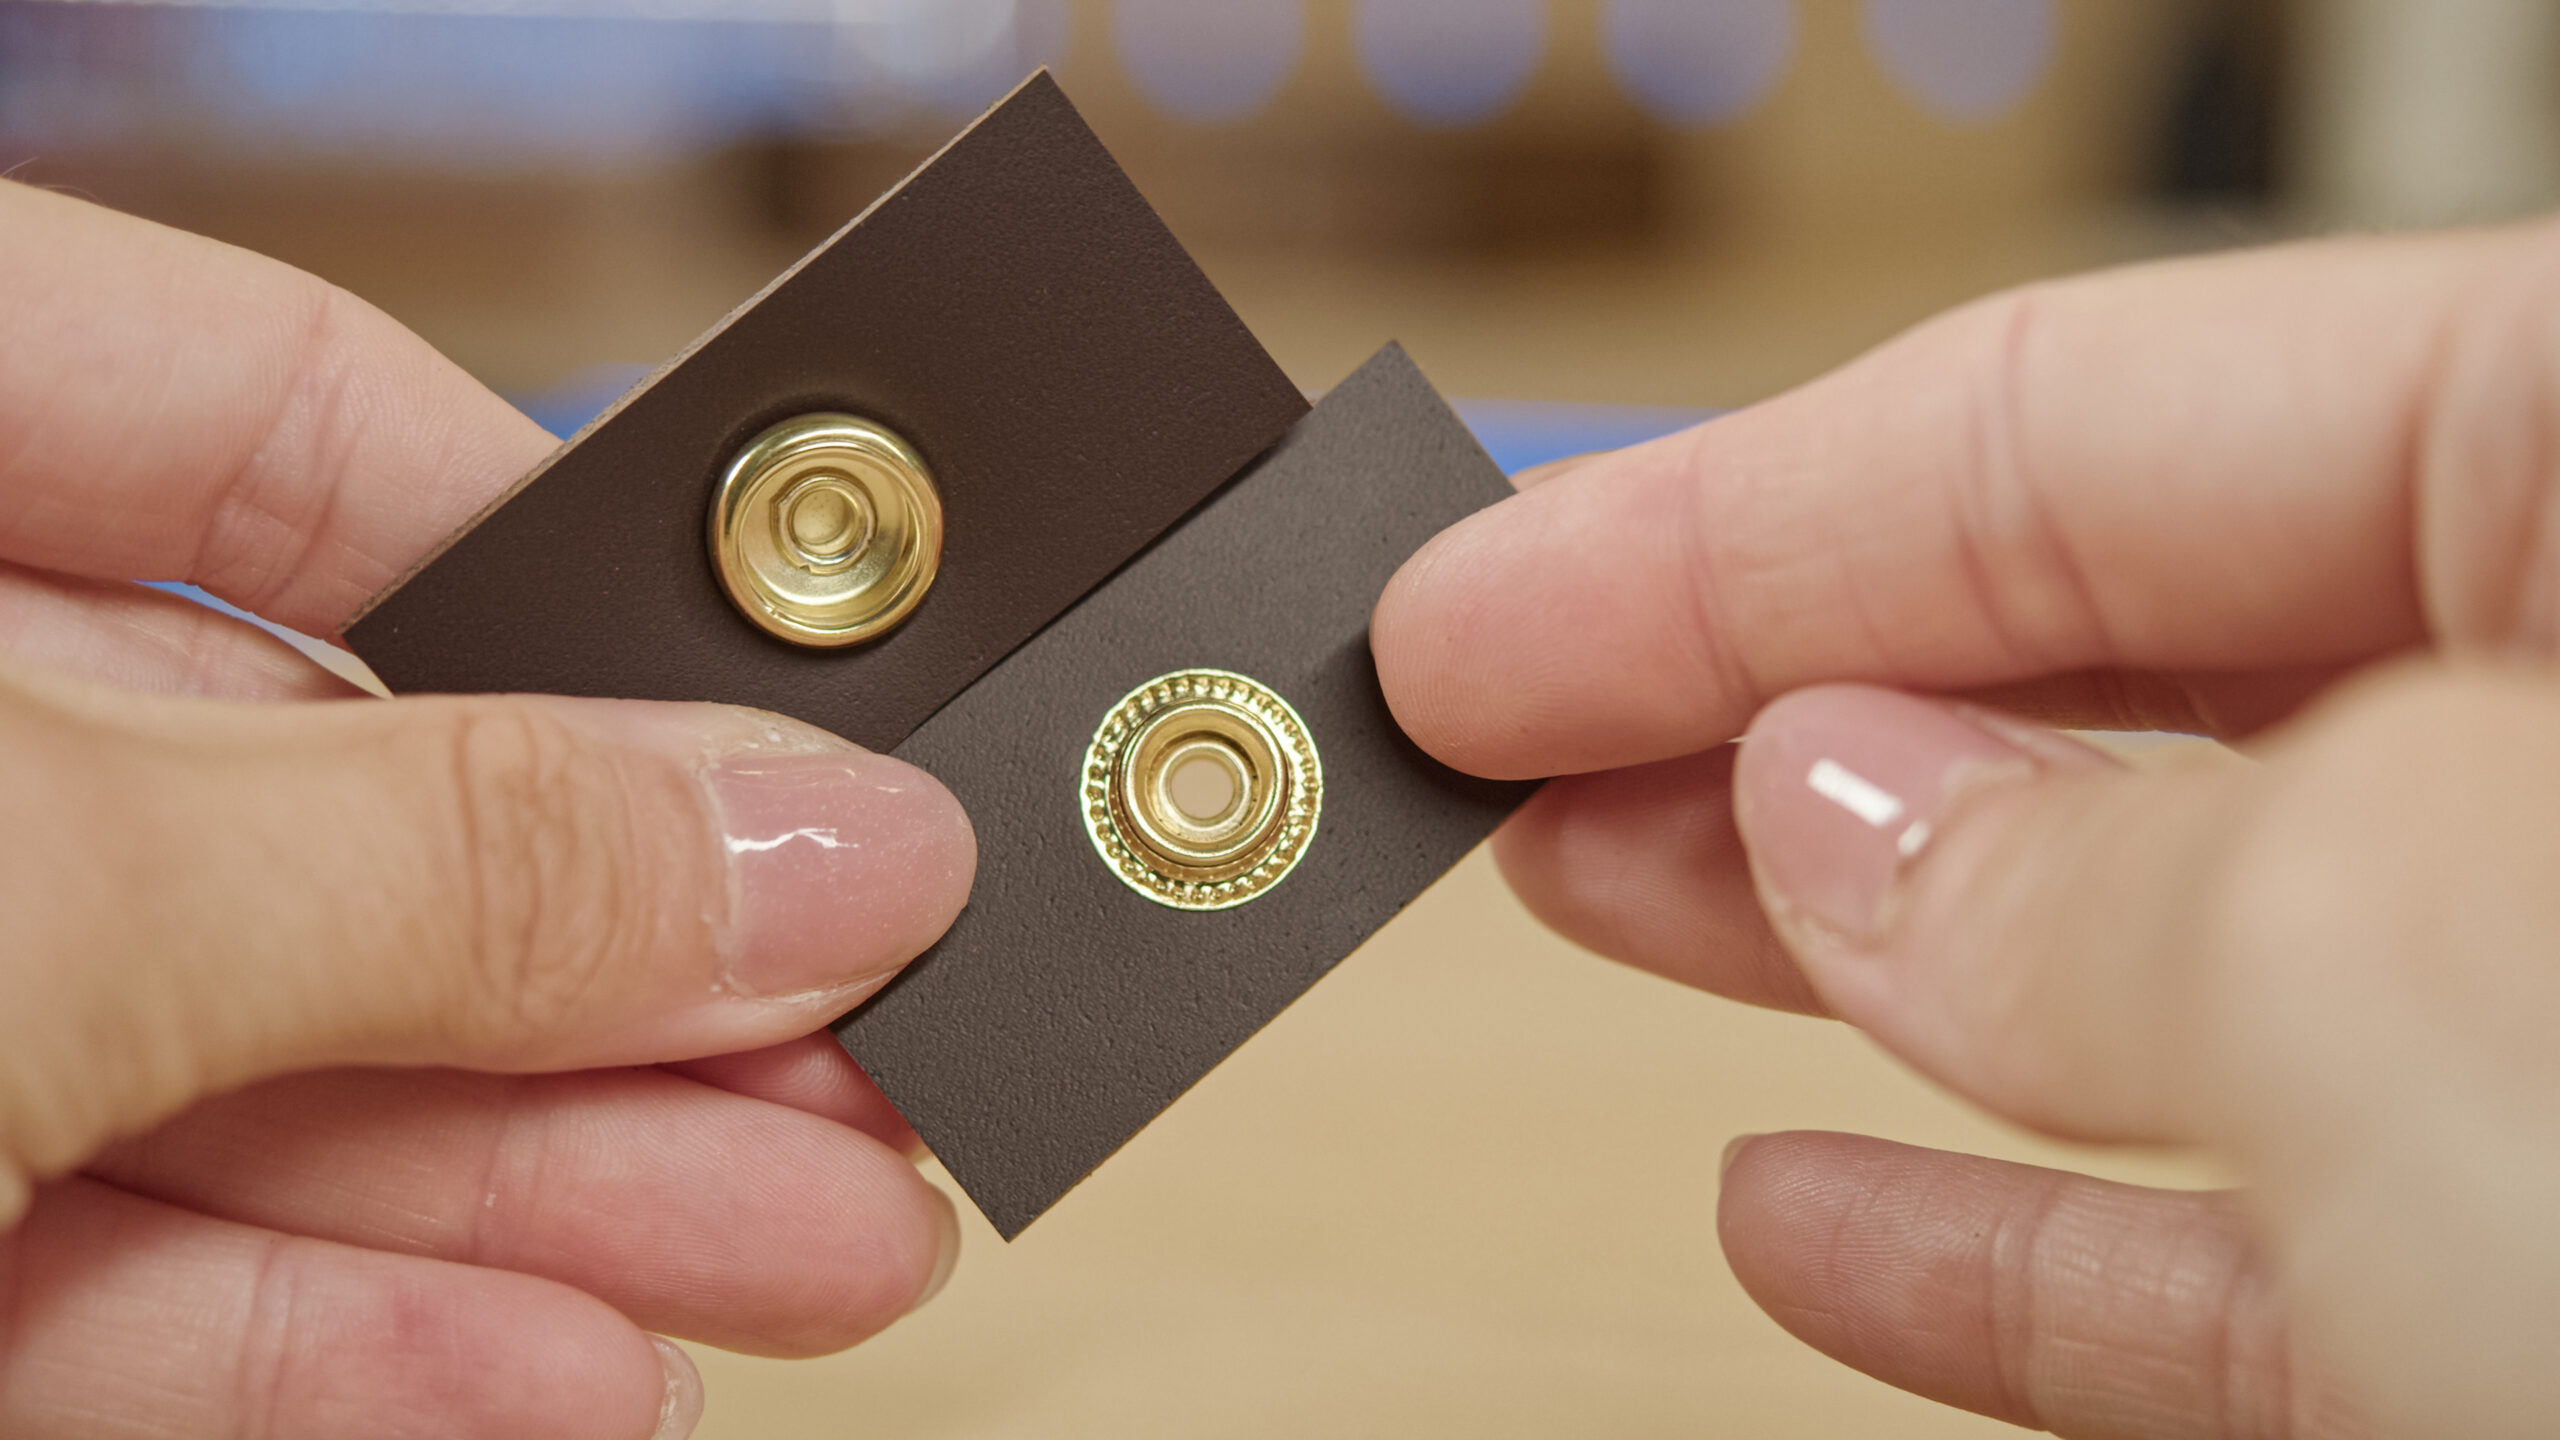
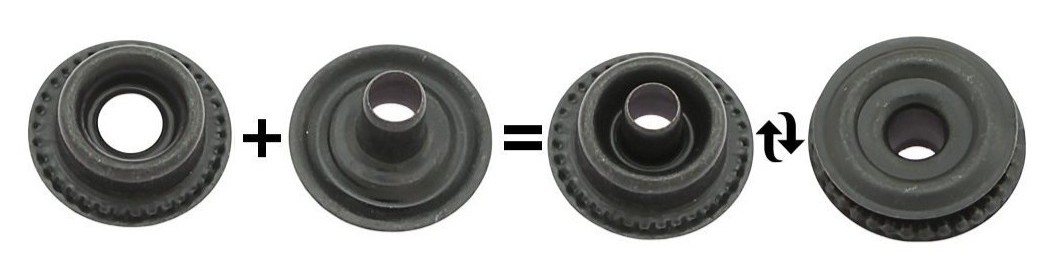
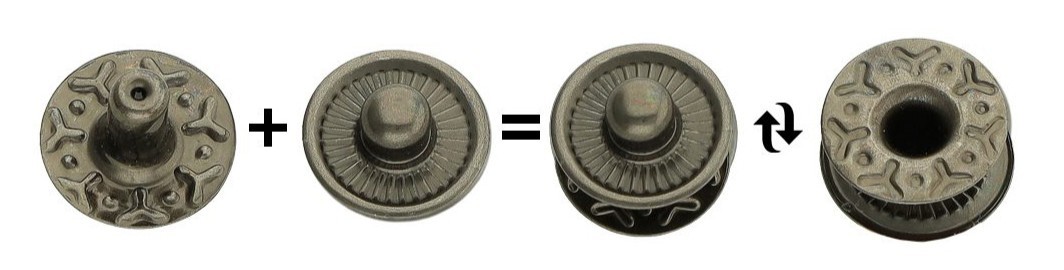
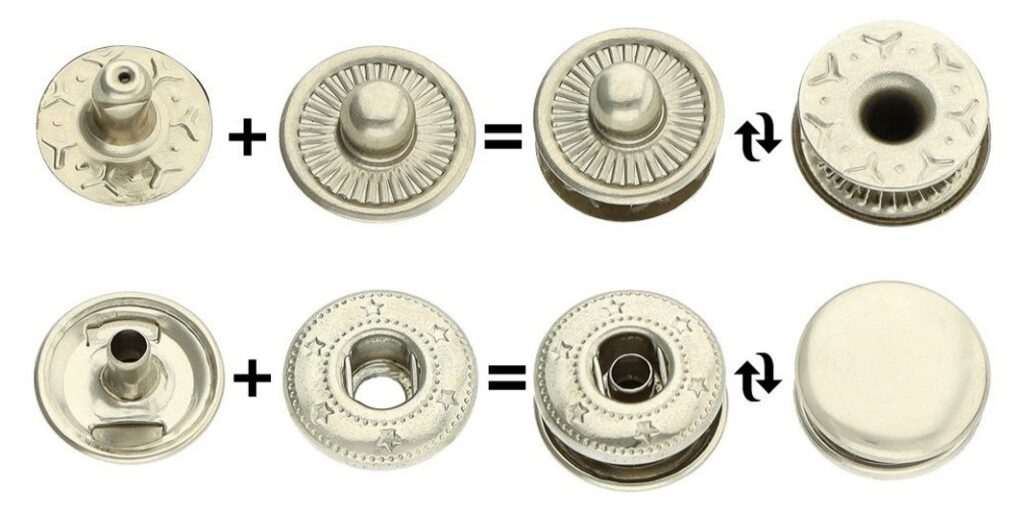
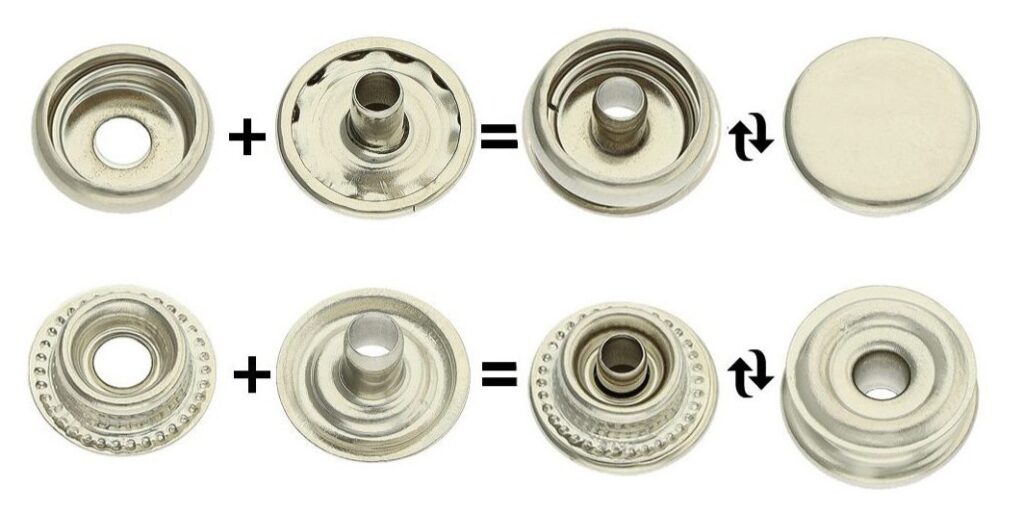
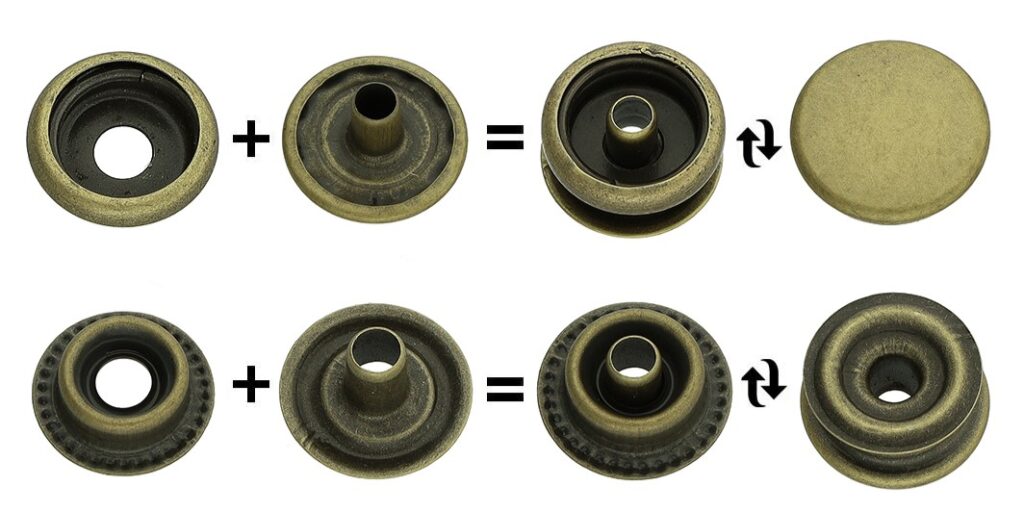
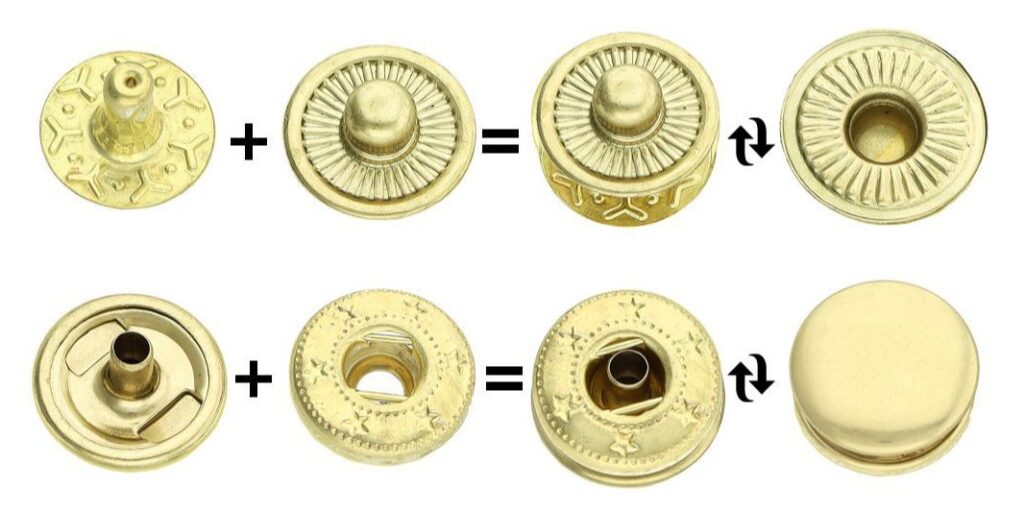
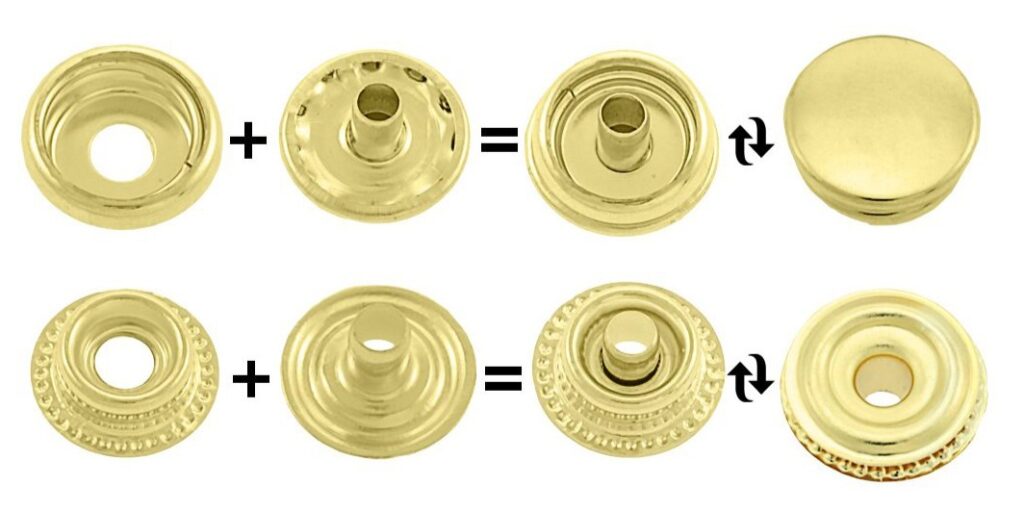
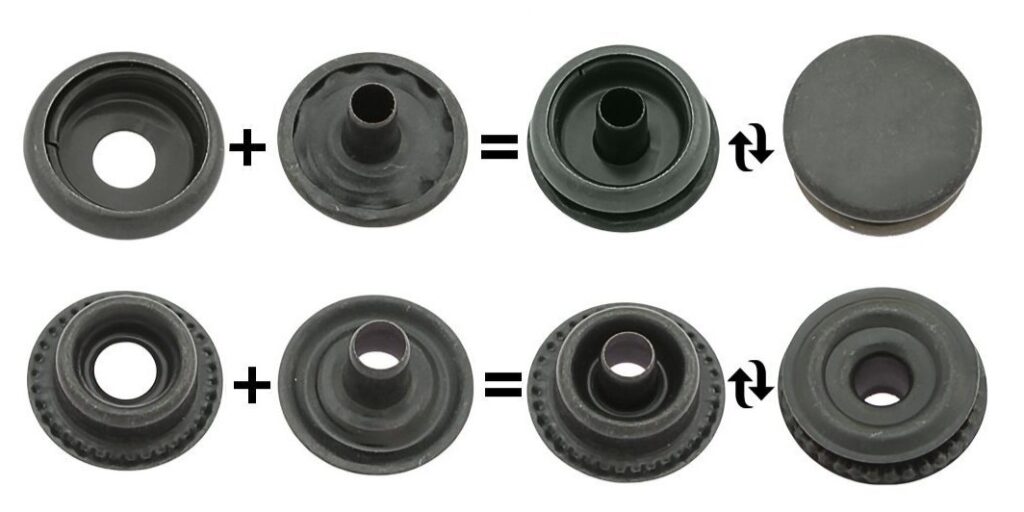
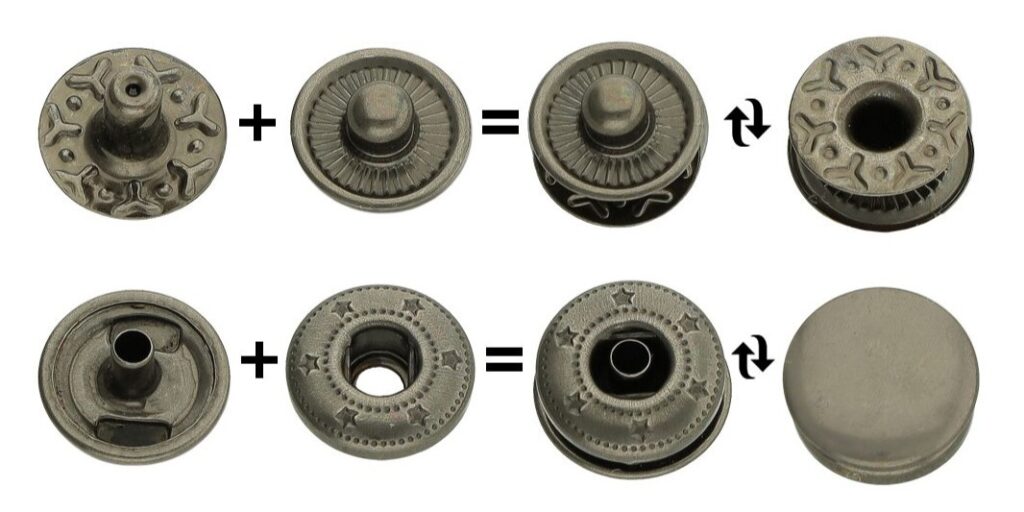
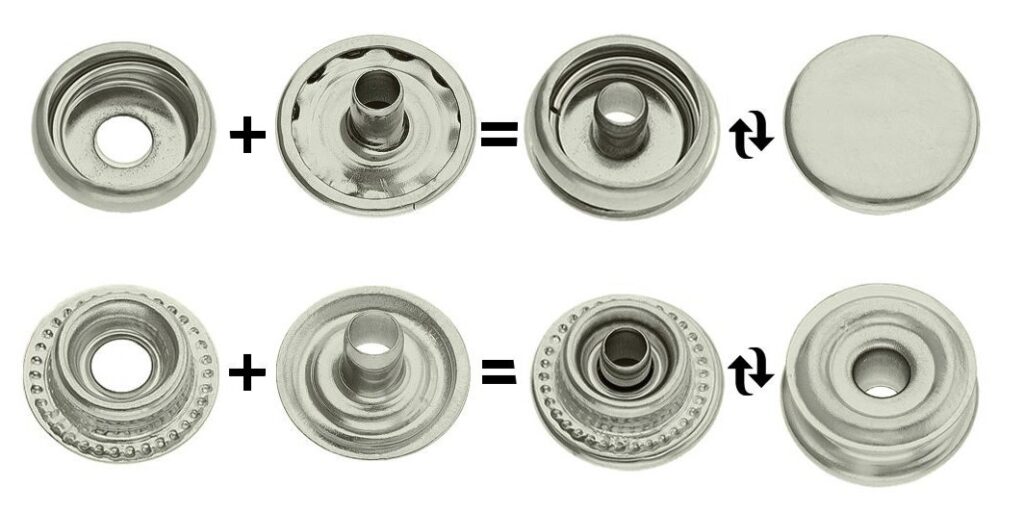
What a snap fastener is made of
Each snap consists of four separate parts — two top parts and two bottom parts.
Joining the two “right” parts creates a functional pair.
Top parts
- Cap — the visible decorative top part.
- Socket — contains a spring ring that provides the “click”.
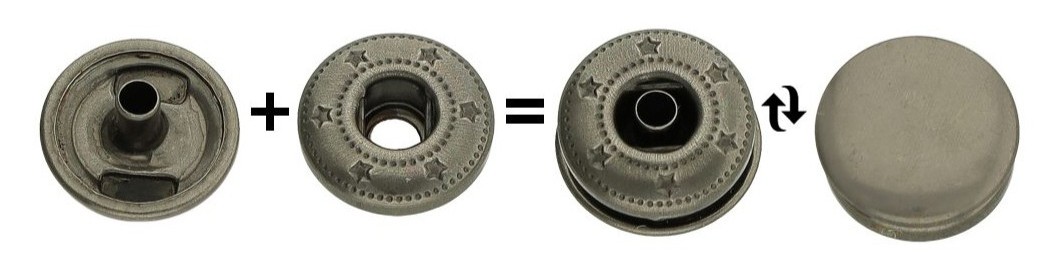
Bottom parts
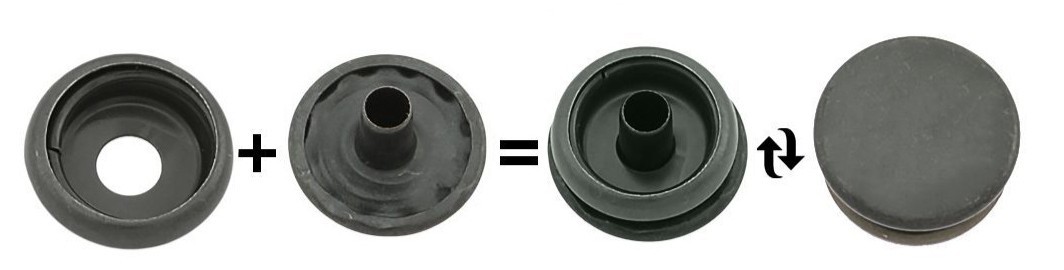
- Stud — the male part that snaps into the socket.
- Post (eyelet) — the hollow shaft that flares to lock the stud firmly to the material.
? Important: don’t mix parts between types. Even if some pieces fit together (e.g., Heavy-Duty vs. Snap Button), the joint won’t be reliable. Always use parts that belong to the same set.
Finishes and sizes
Snaps are made of steel and then surface-finished. This lets you choose not only the size (most commonly 8, 10, 12 or 15 mm) but also the look and durability.
Each finish has its own character:
Nickel
Classic silver look, universal use.
Antique Brass
Elegant patina, perfect for a vintage look.

Brass-Plated (Gold-colored)
Bold and decorative.
Antique Copper
Dark, almost black tone.
Black Nickel
Modern, matte dark finish.
Stainless Steel
Maximum resistance to moisture and corrosion.
Where to use them? Almost anywhere
Snap fasteners have a wide range of uses:
- in garments (jackets, coats, vests),
- in leathercraft (pouches, flaps, pockets),
- in footwear (slippers, boots, accessories),
- and even on dog apparel or carrier bags.
The only place to be cautious is with thin fabrics — without interfacing, they may tear.
How to set snap fasteners correctly
1. Prepare the hole
Use a punch of the right size (usually 2–3 mm, but always matched to the snap post). The hole must be clean and burr-free.
- Too small → the post won’t flare.
- Too large → the snap will loosen.
? For soft materials (fabric, faux leather) we recommend fusing an interfacing so the snap doesn’t pull out over time.
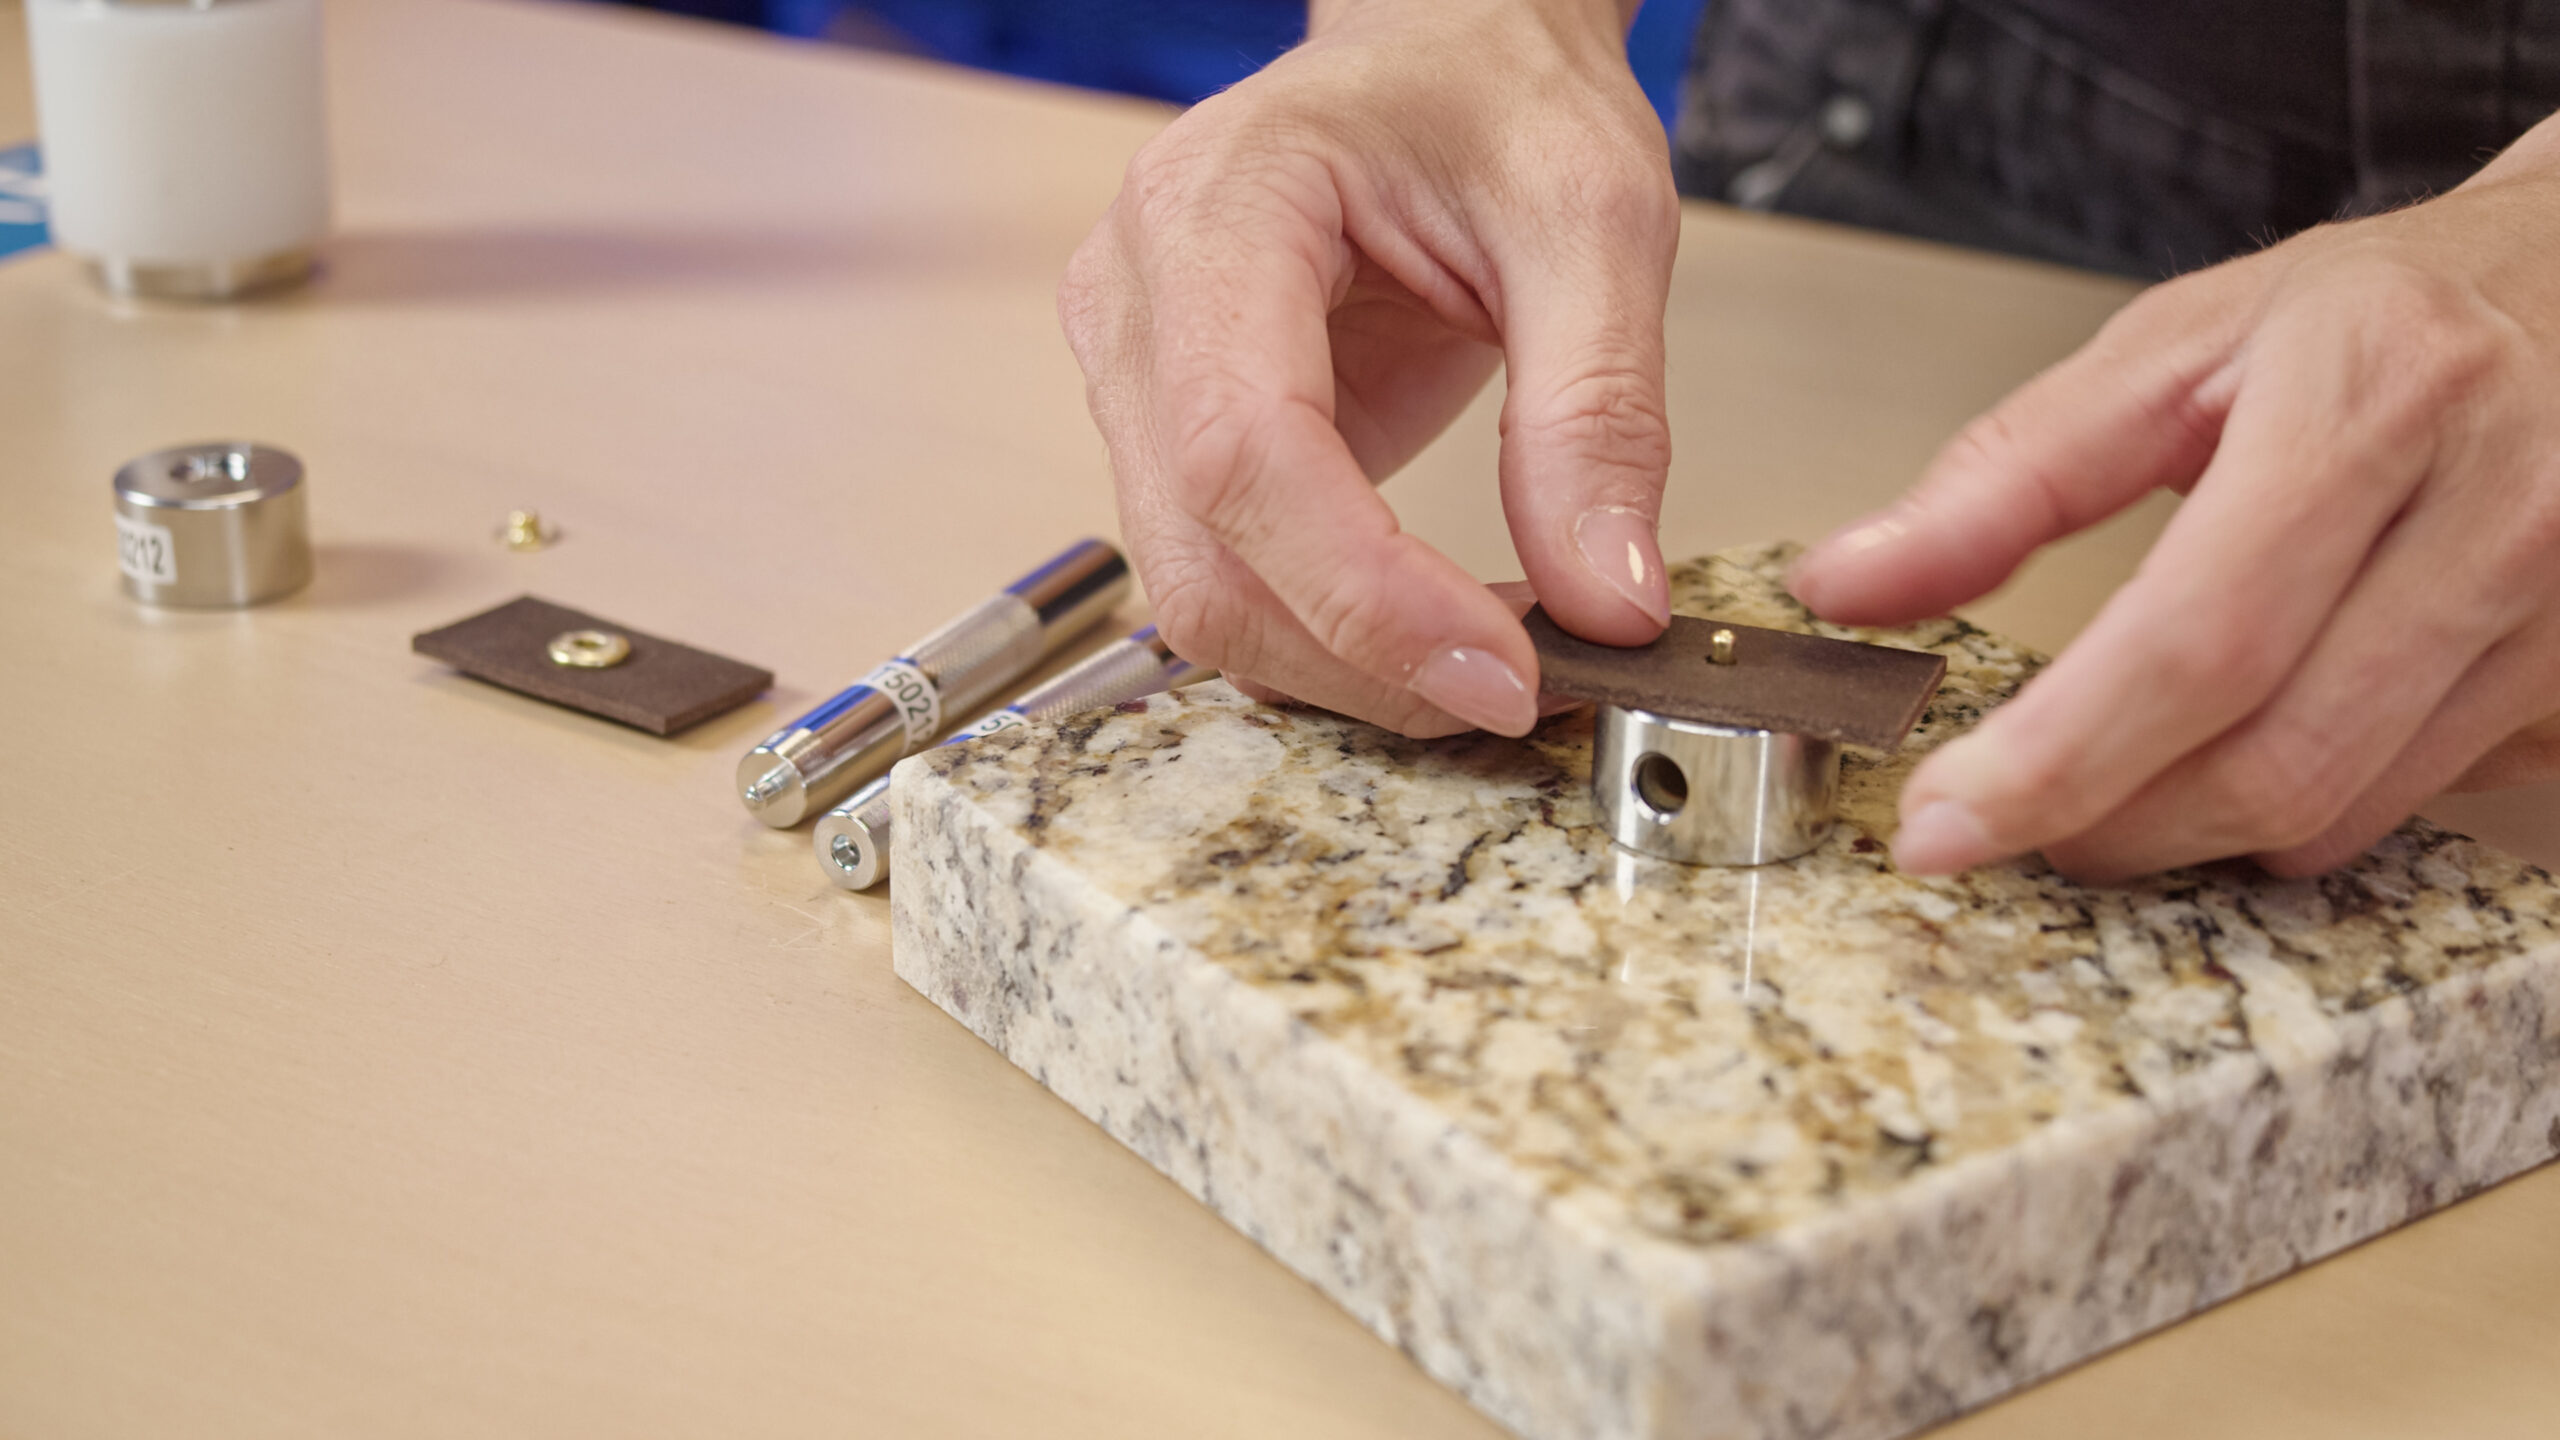
2. Align the parts
From the face side goes the cap or the spring (depending on whether you’re assembling the top or bottom). From the reverse goes the matching part — always exactly the one that belongs. Don’t swap parts!
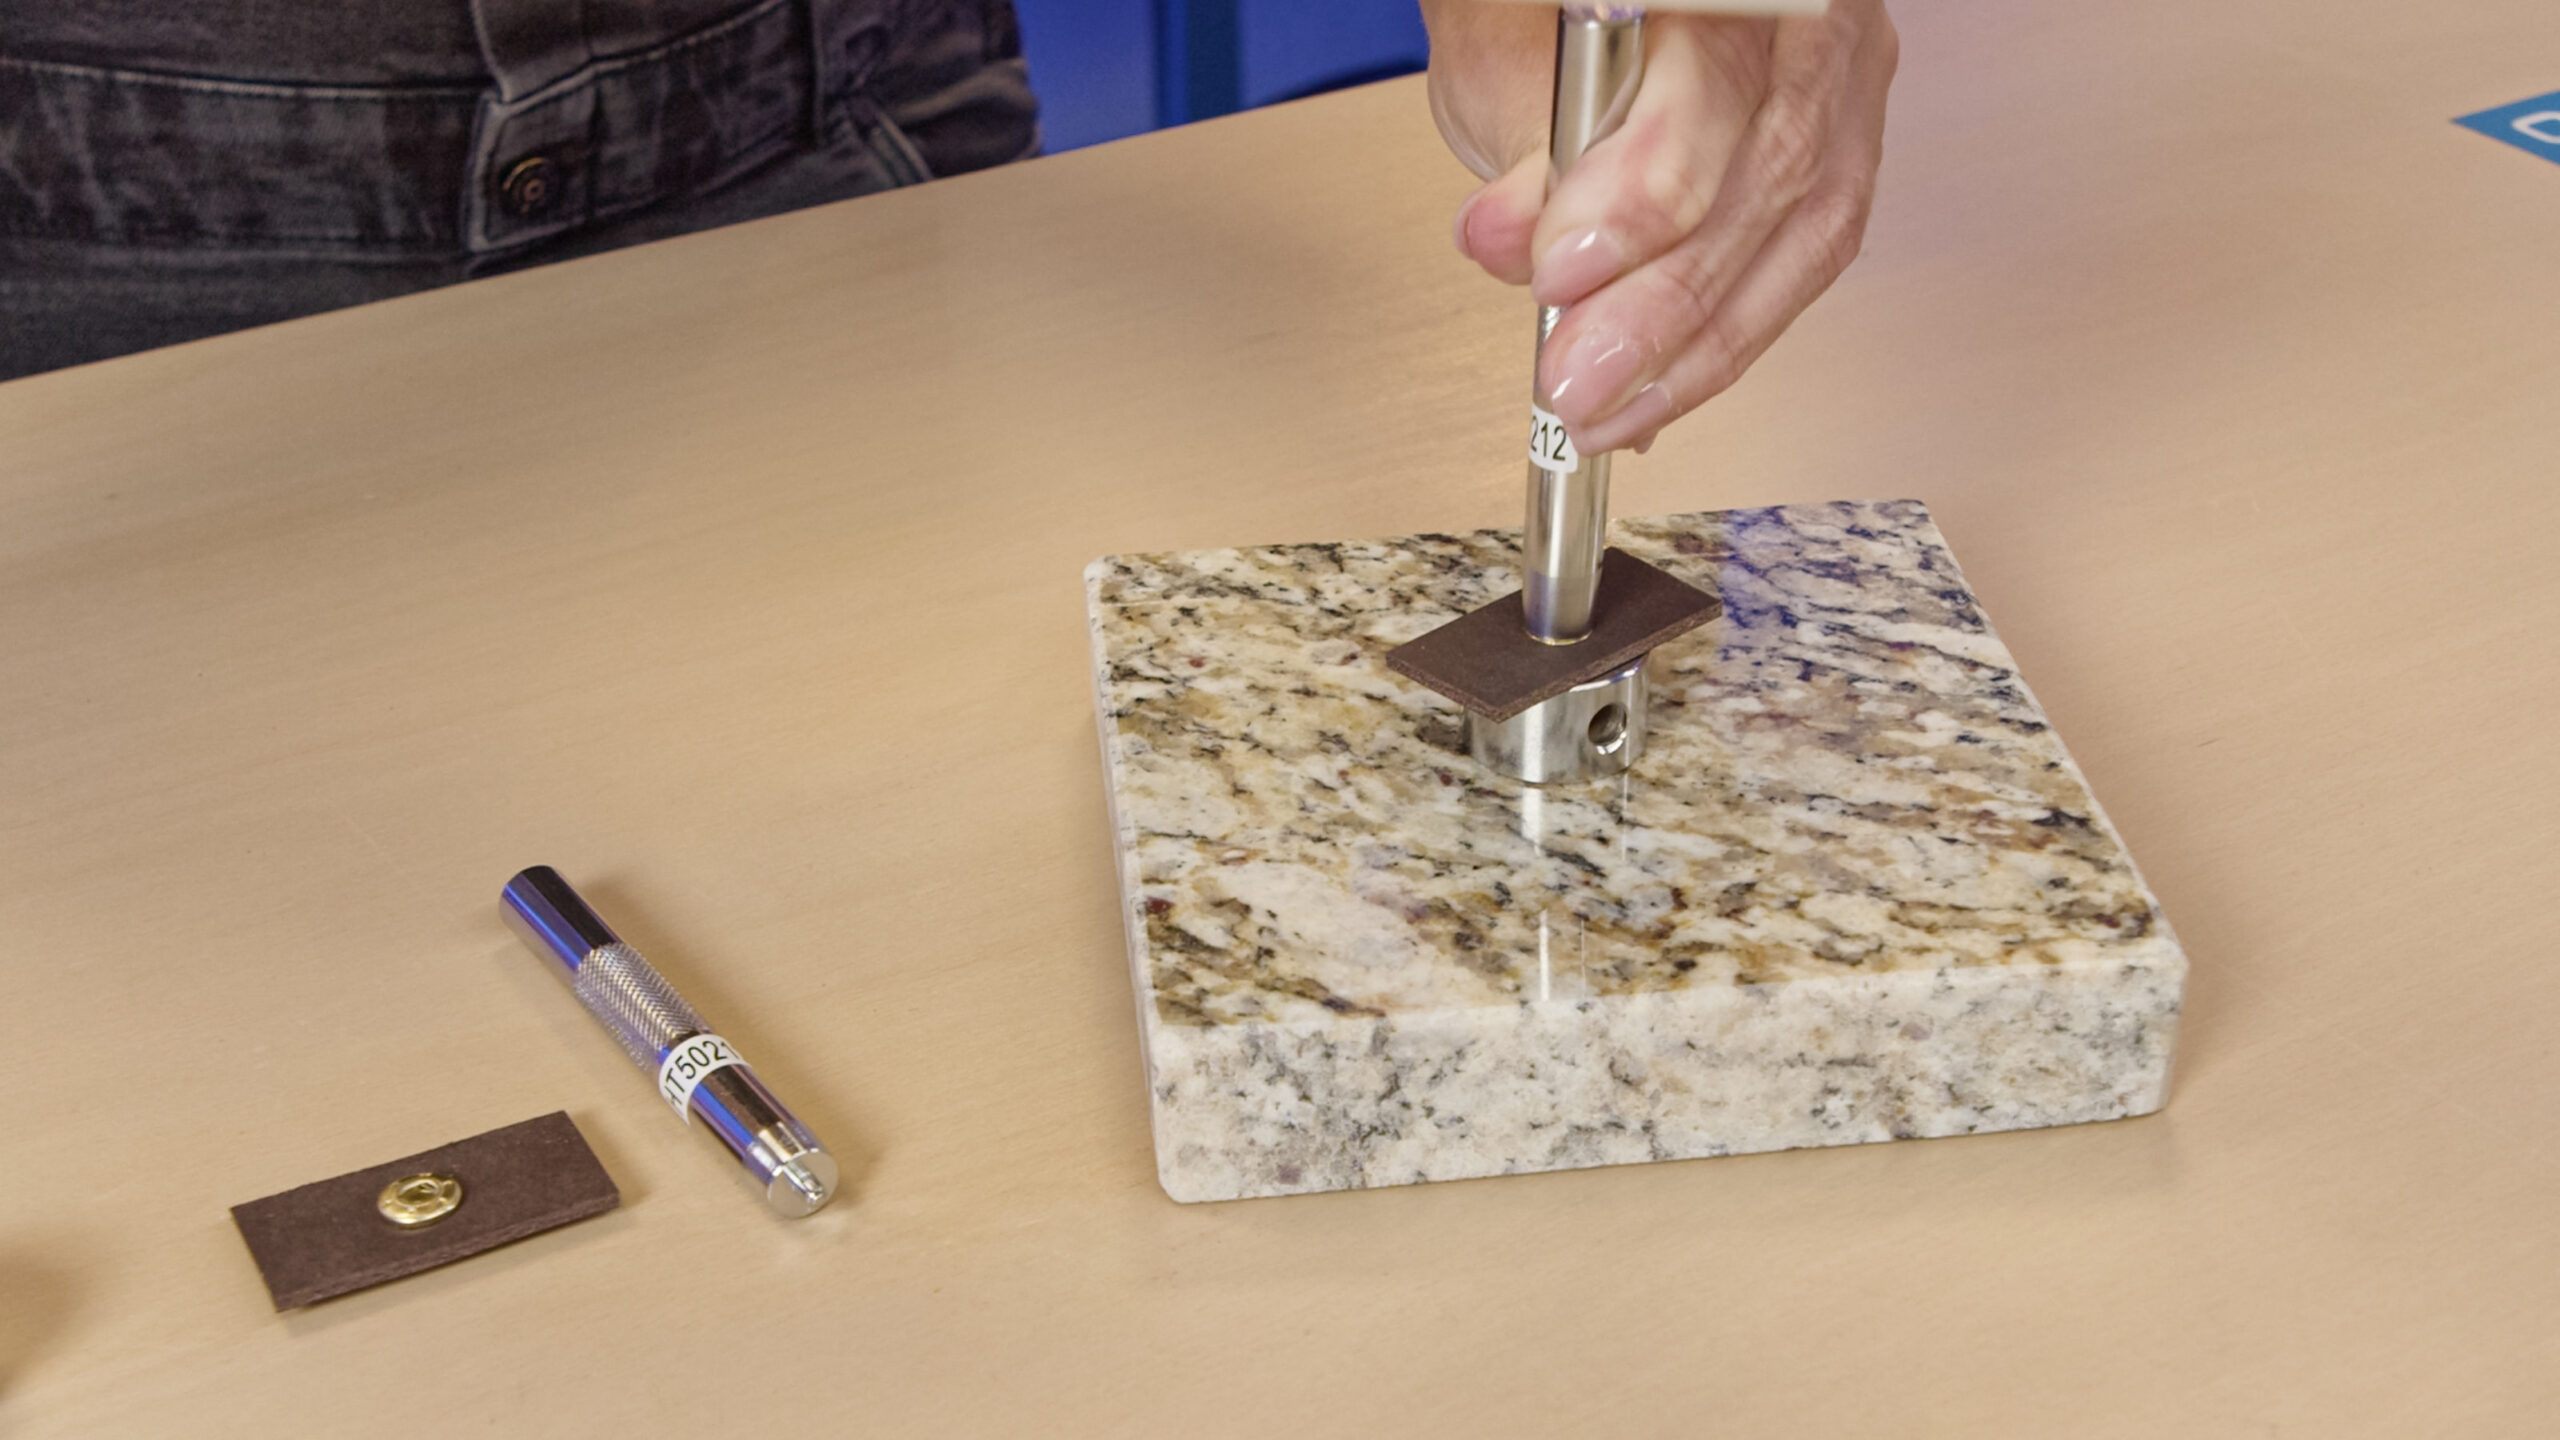
3. Use the right tool
You can use:
- a hand setting kit (metal punch + anvil, sometimes with plastic handle),
- or a manual press with proper dies (the most precise and consistent).
Whatever tool you use, apply even pressure. ➡️ One or two firm, controlled strikes are usually enough. Avoid crushing — snaps are made of thin sheet metal.
Practical tips
- Don’t overdo the force. The snap should be pressed, not crushed.
- Test on a scrap first before the final setting.
- Caps scratch easily — always work on a clean, hard surface (wood or plastic, never directly on metal).
- Snaps hold, but they don’t carry load. Don’t use them to attach a leash or buckle — they’re not designed for that.
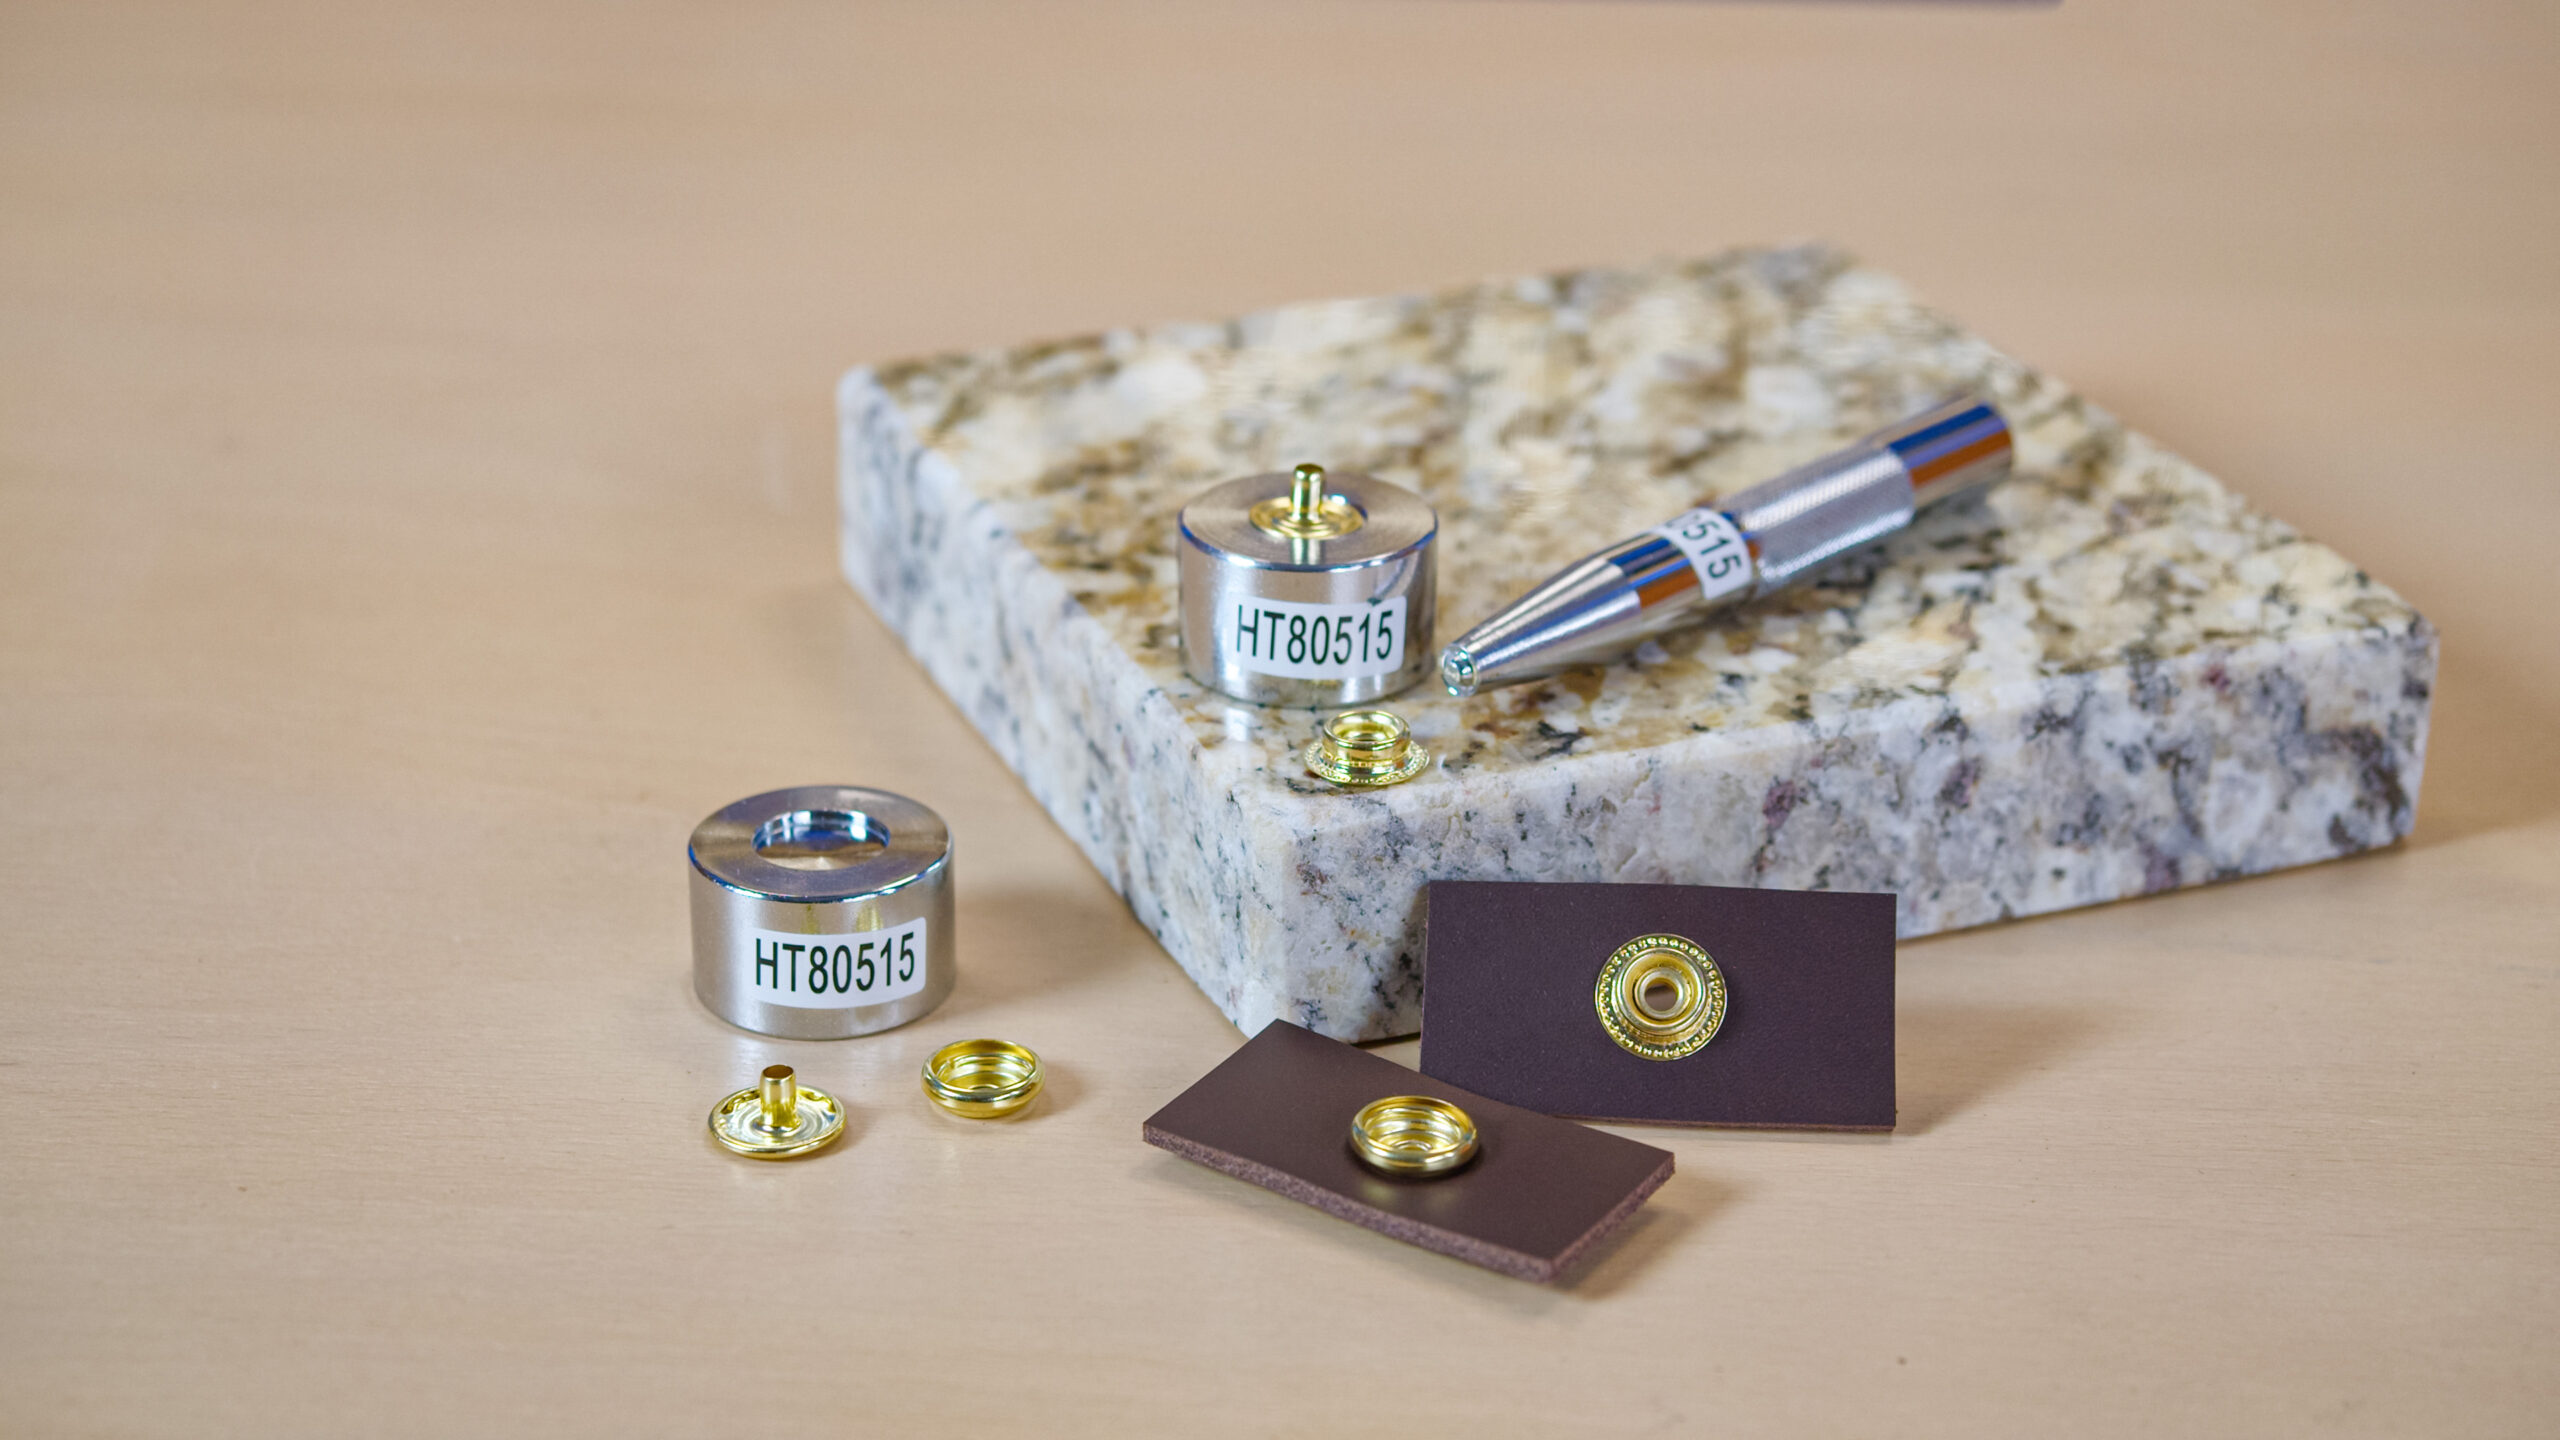
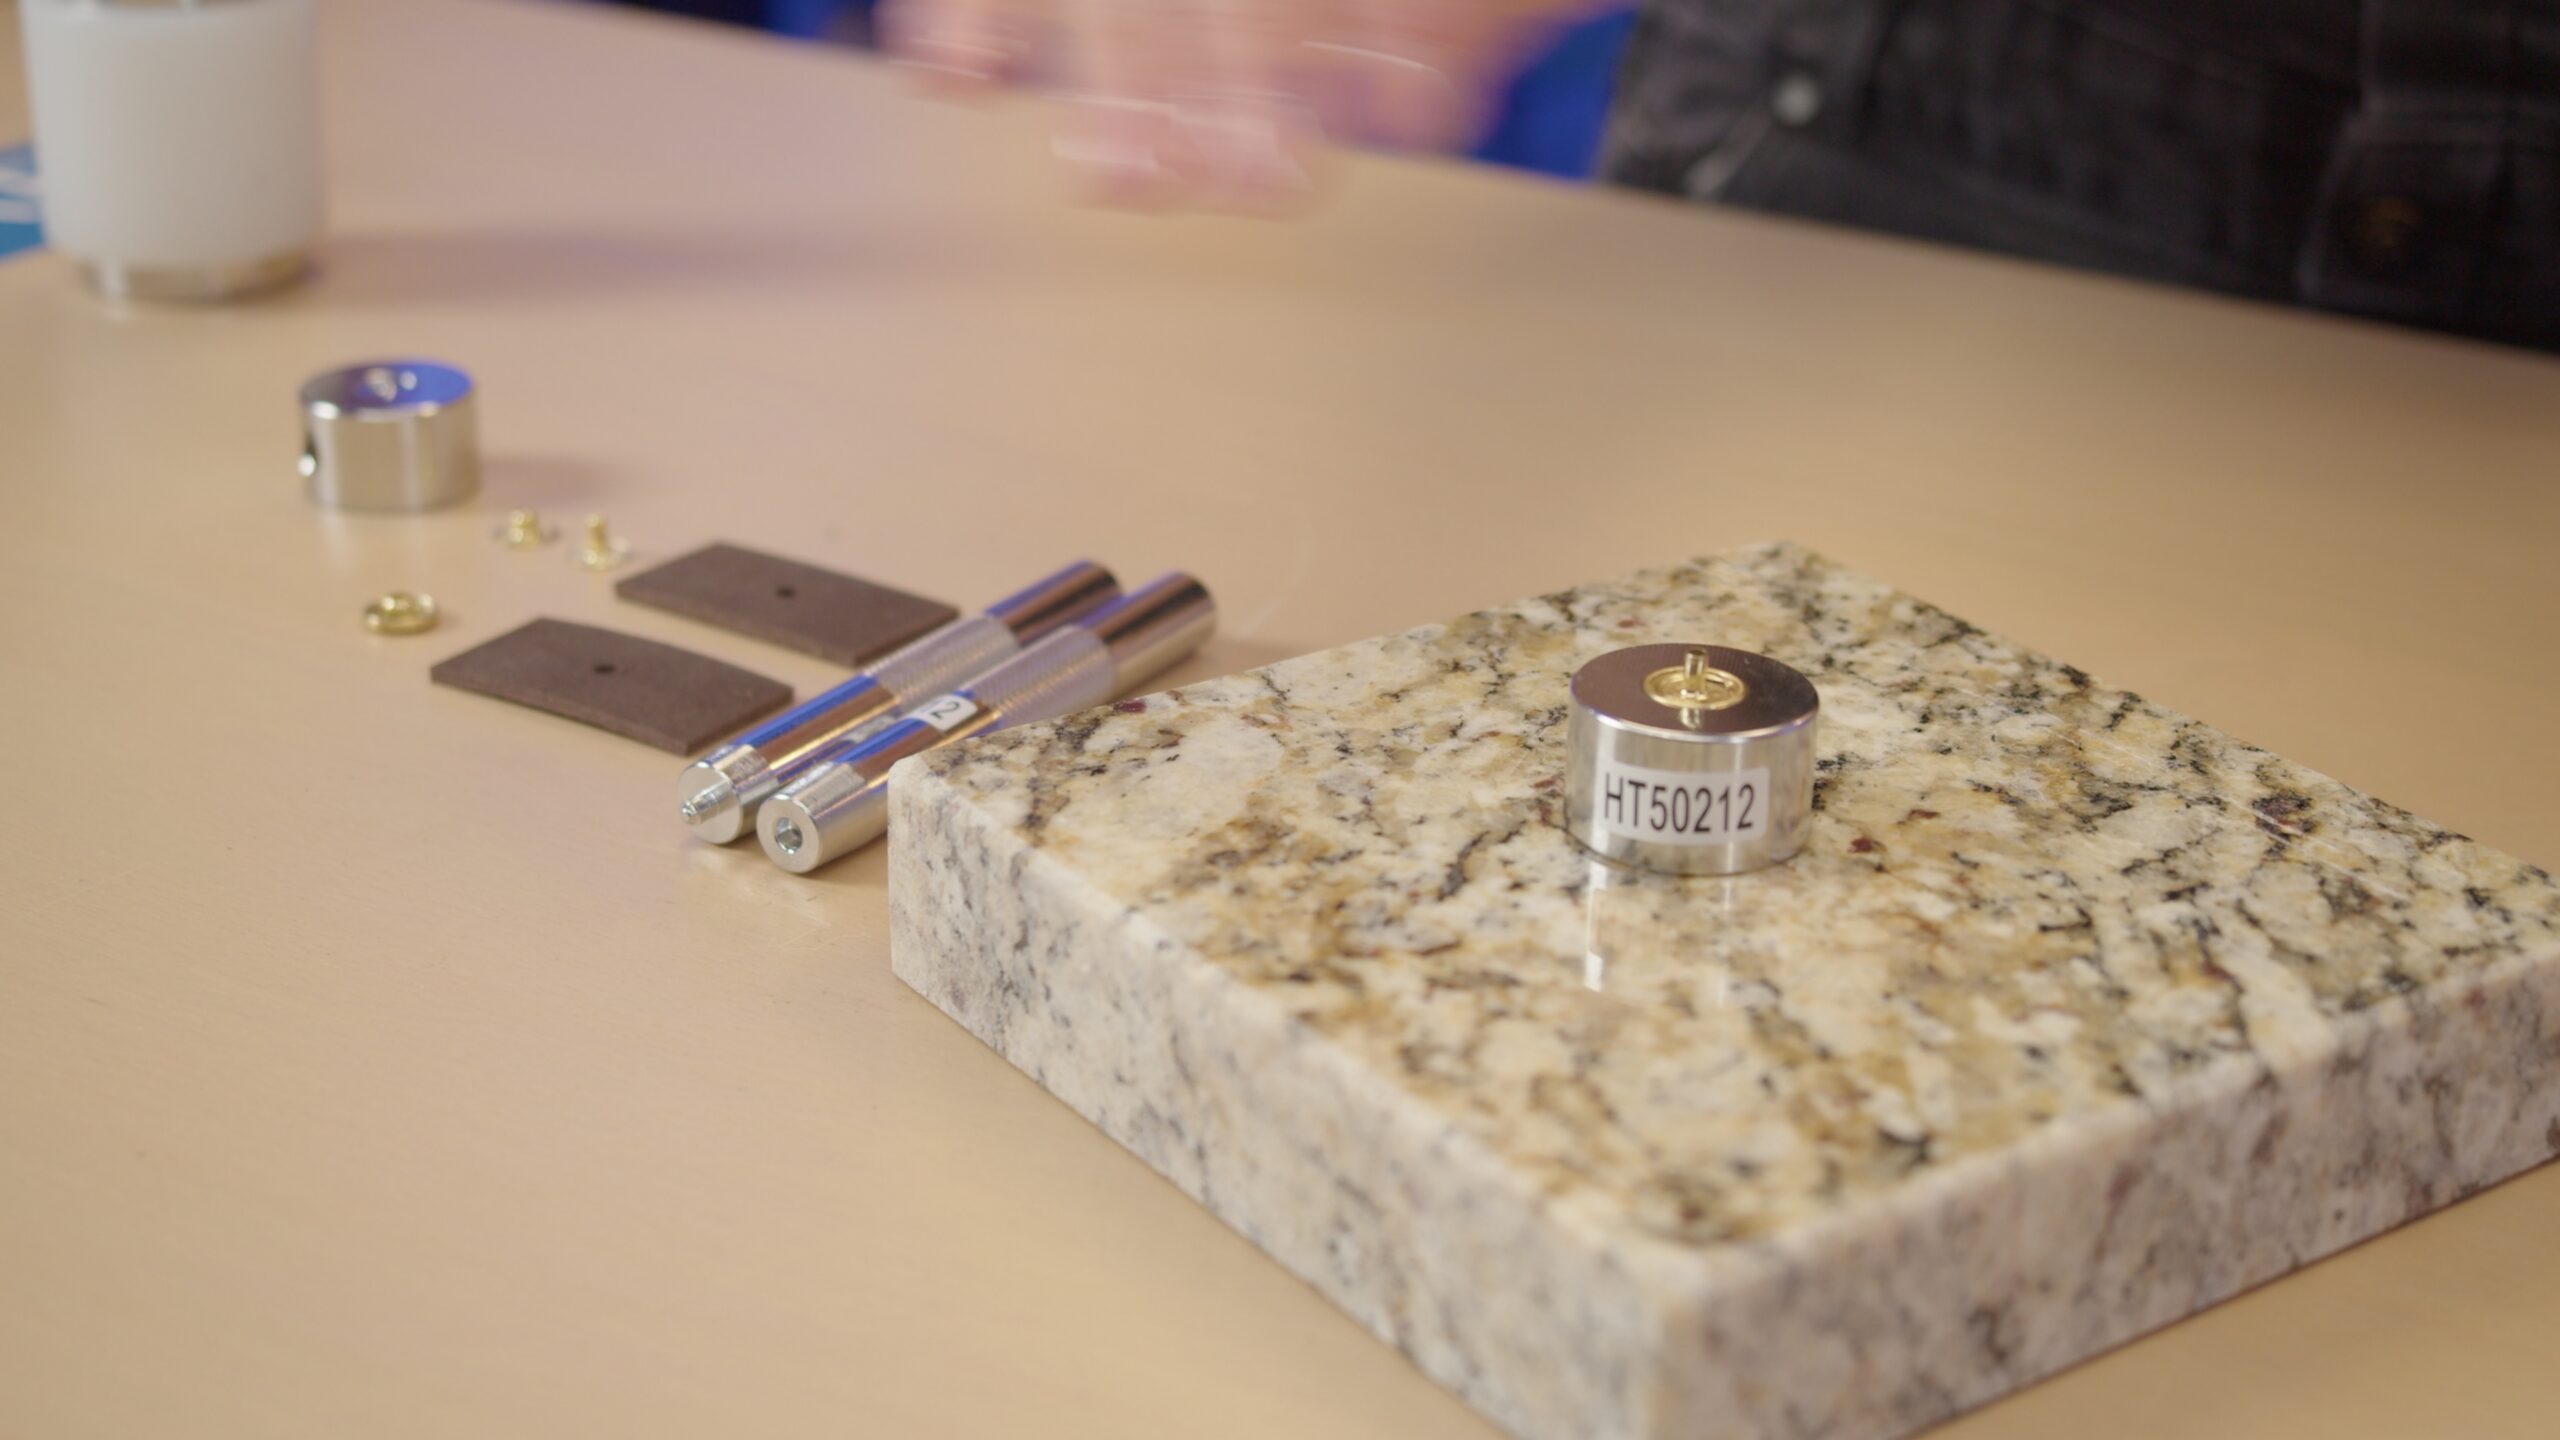
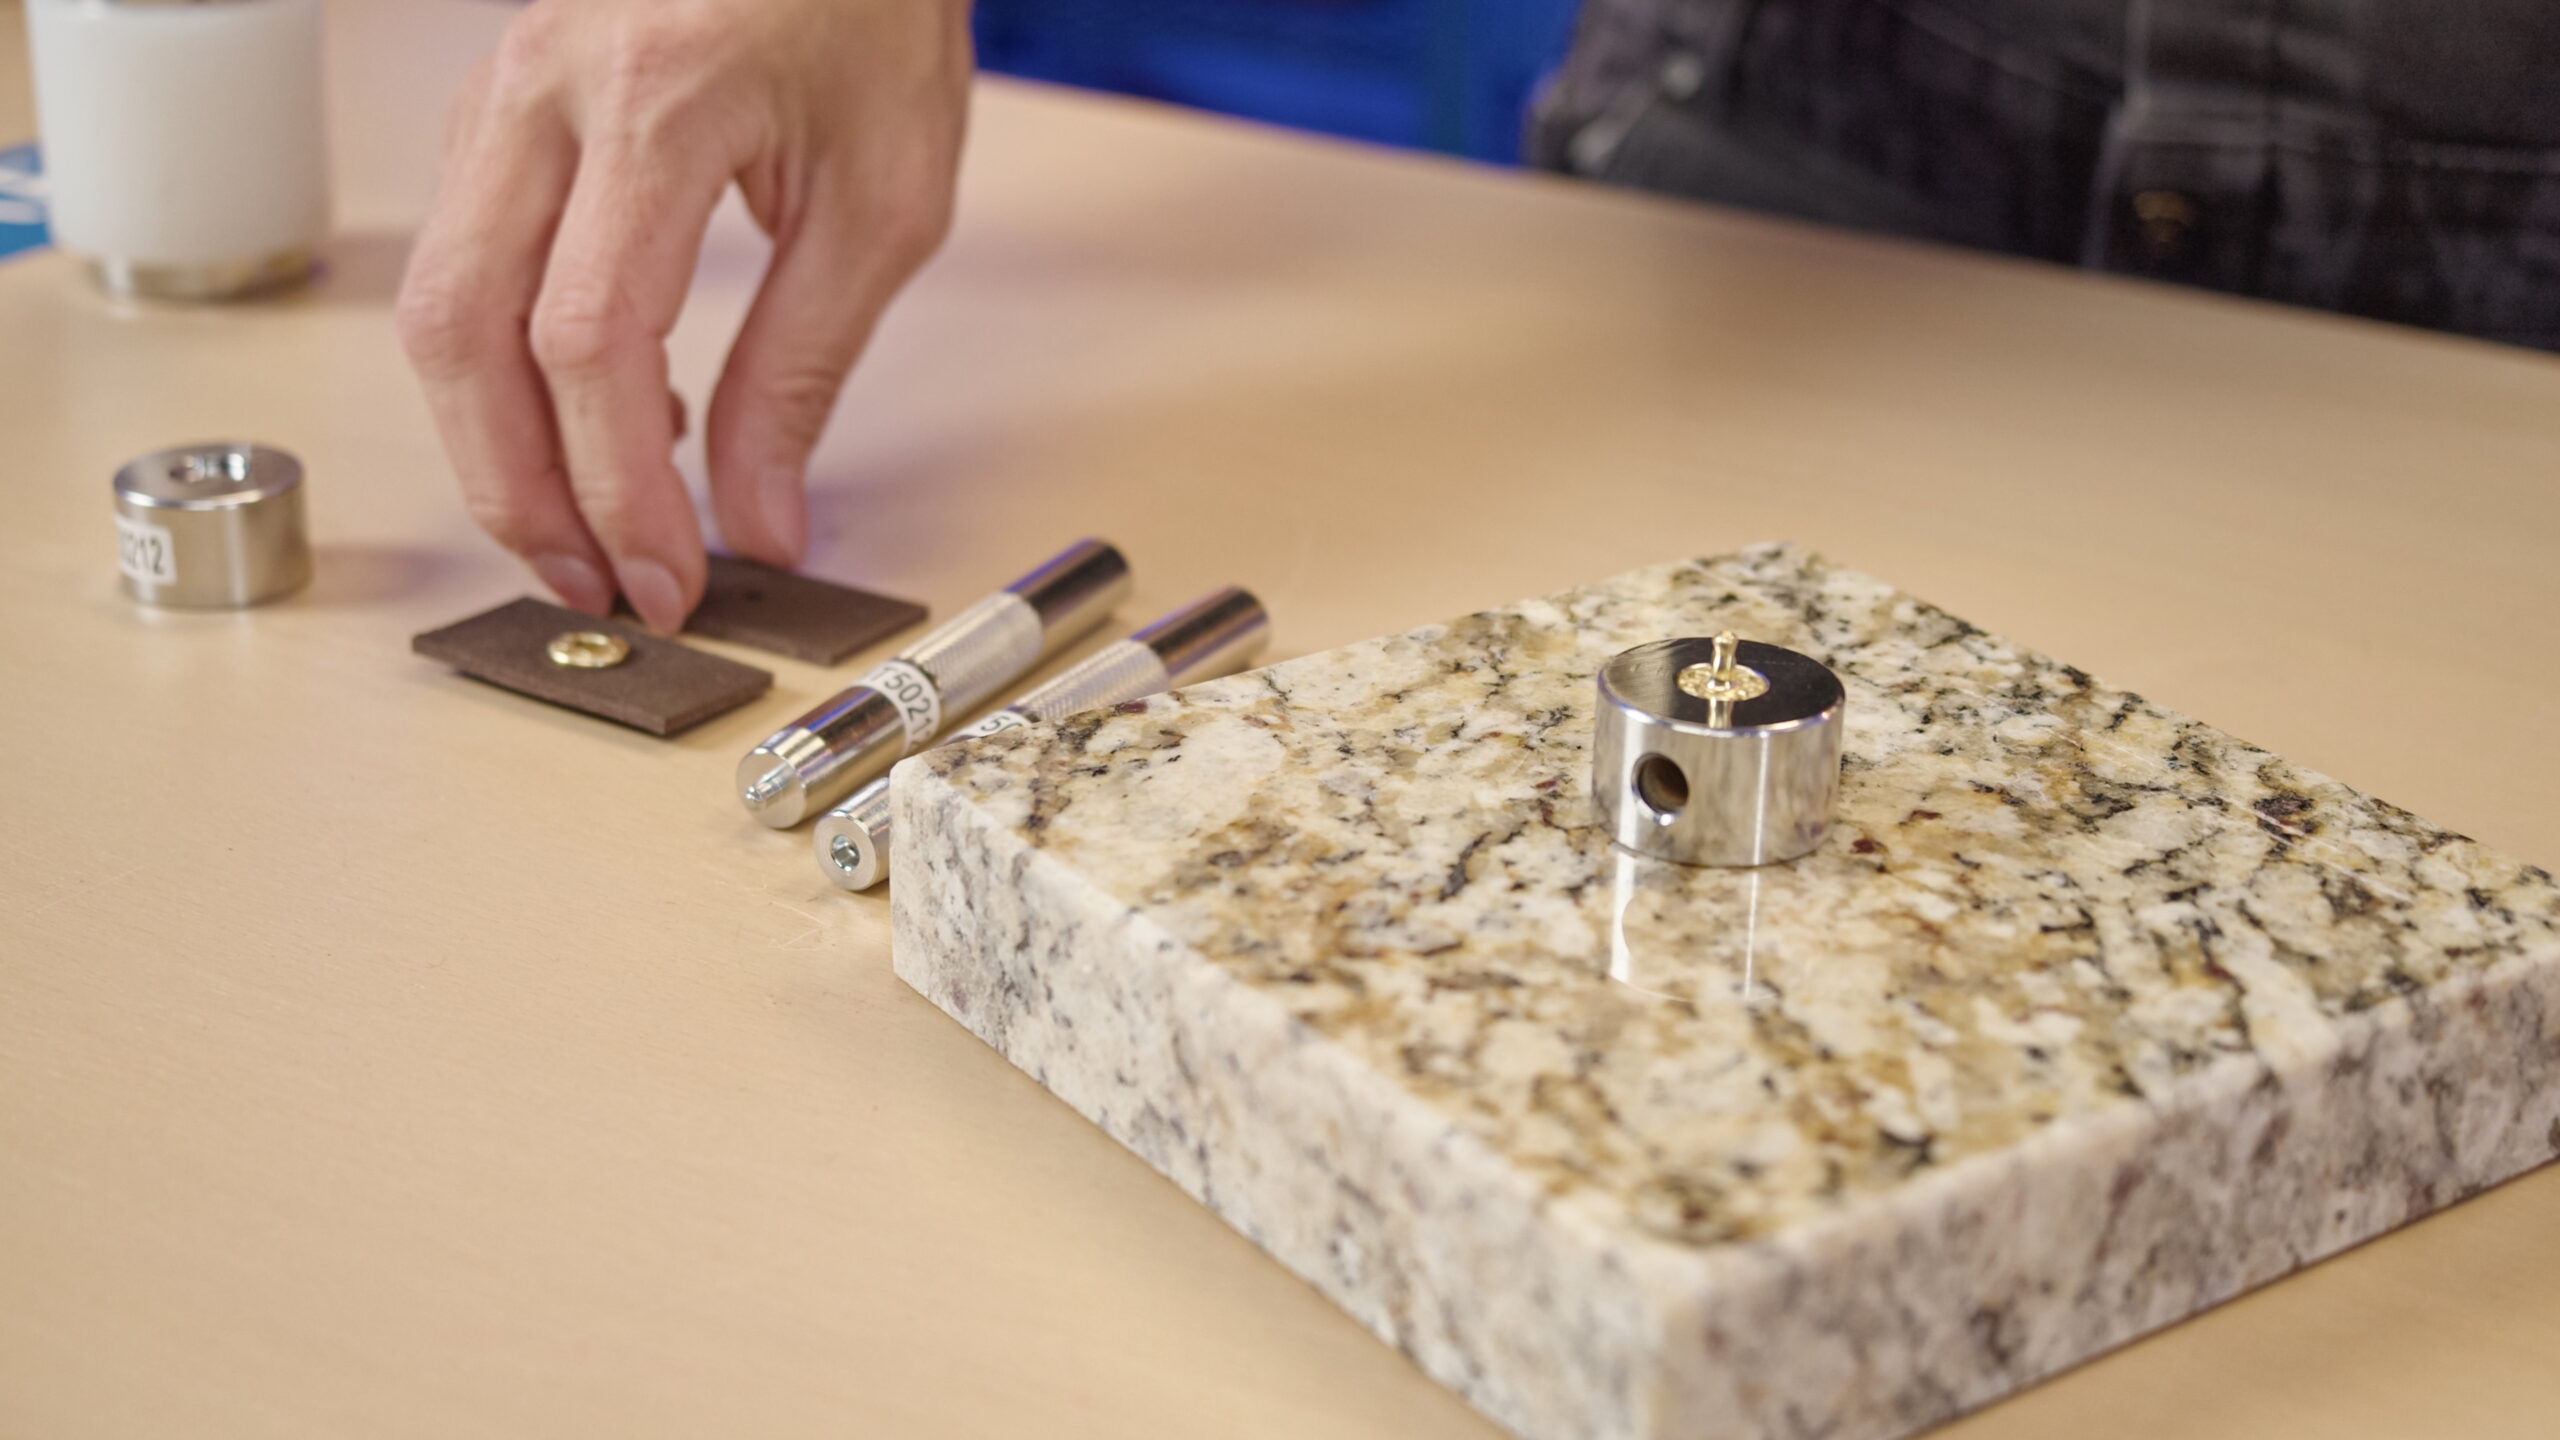
How to set snaps like a pro
What you need:
- Complete snap set (4 parts)
- Punch or punch pliers
- Hand setting kit (setter + anvil)
- Hammer or mallet
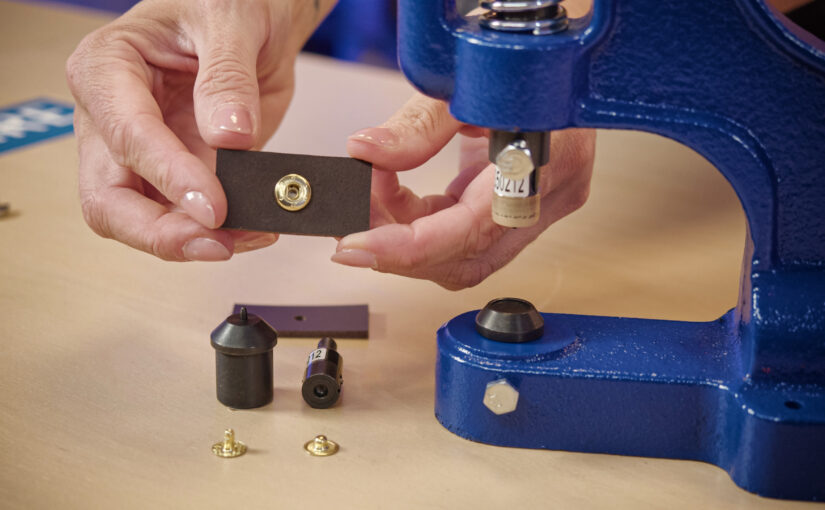
In professional production, presses with dies are also used — they ensure even pressure and reduce errors. Here’s what it looks like.
Setting with a press
Setting a Heavy-Duty Snap Fastener
Setting a Snap Button
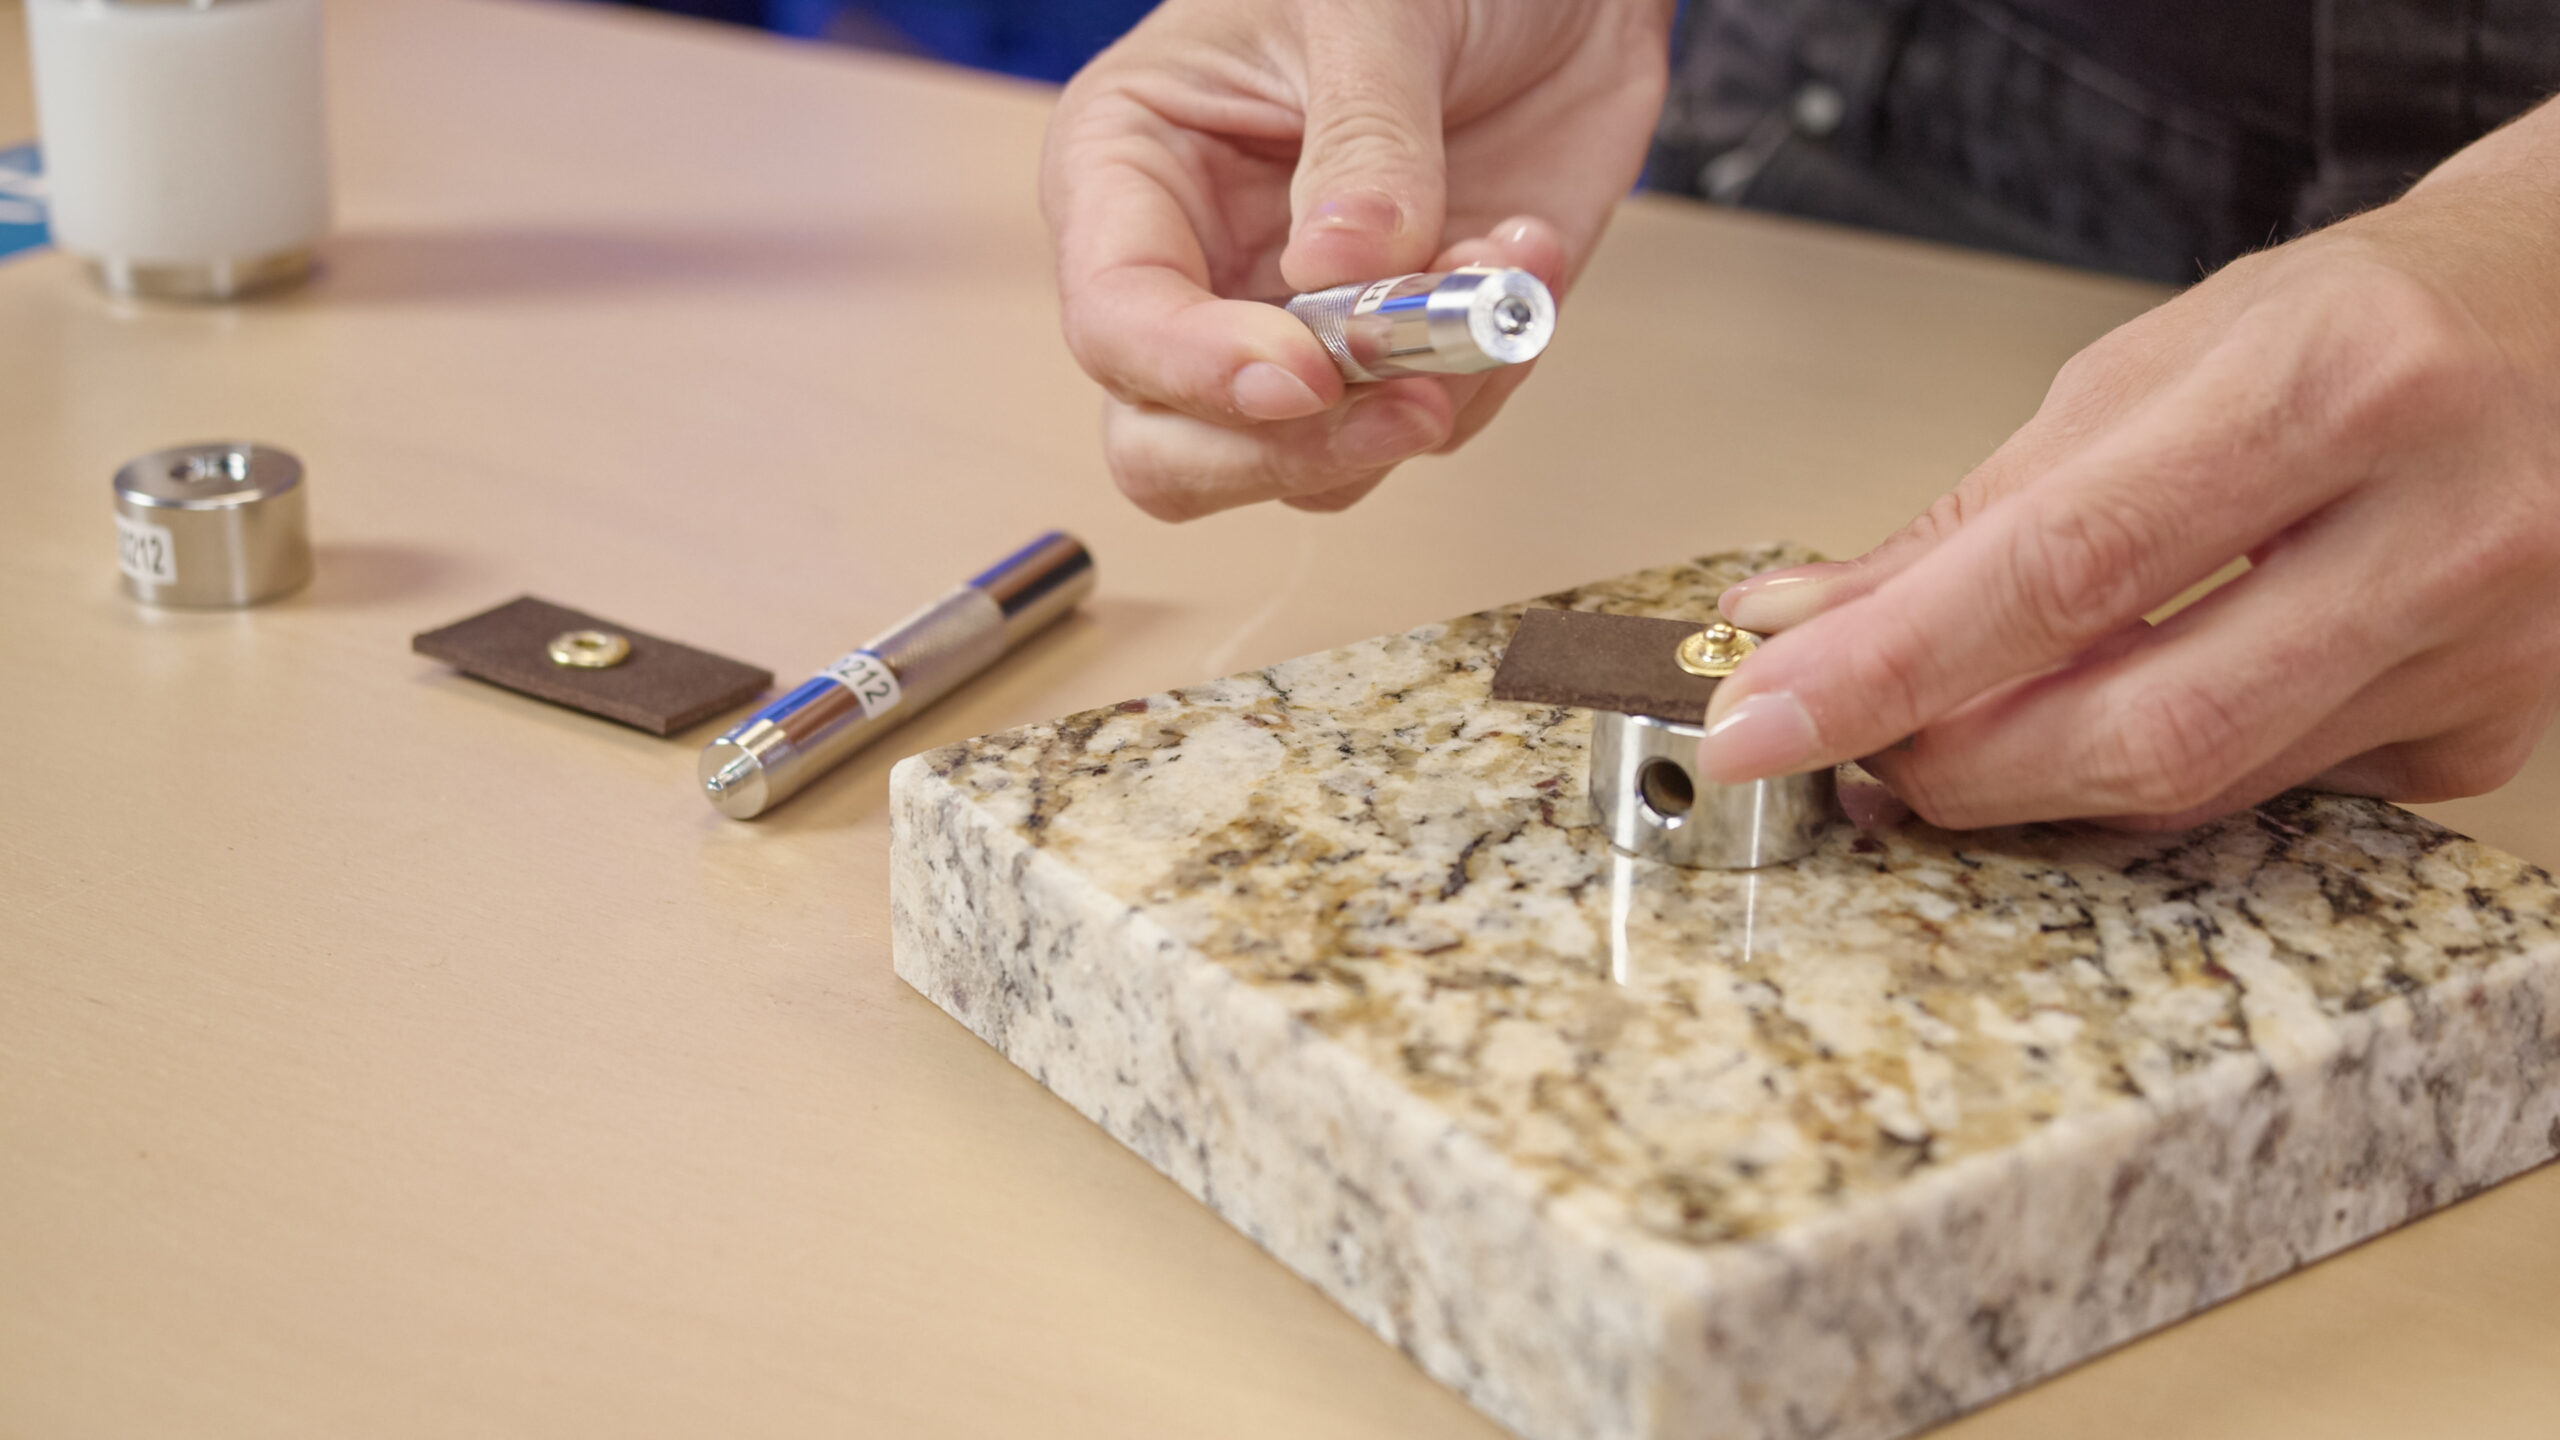
Steps to set the top part
- Place the round part (cap) into the setting tool.
2. Place the material face down onto it.
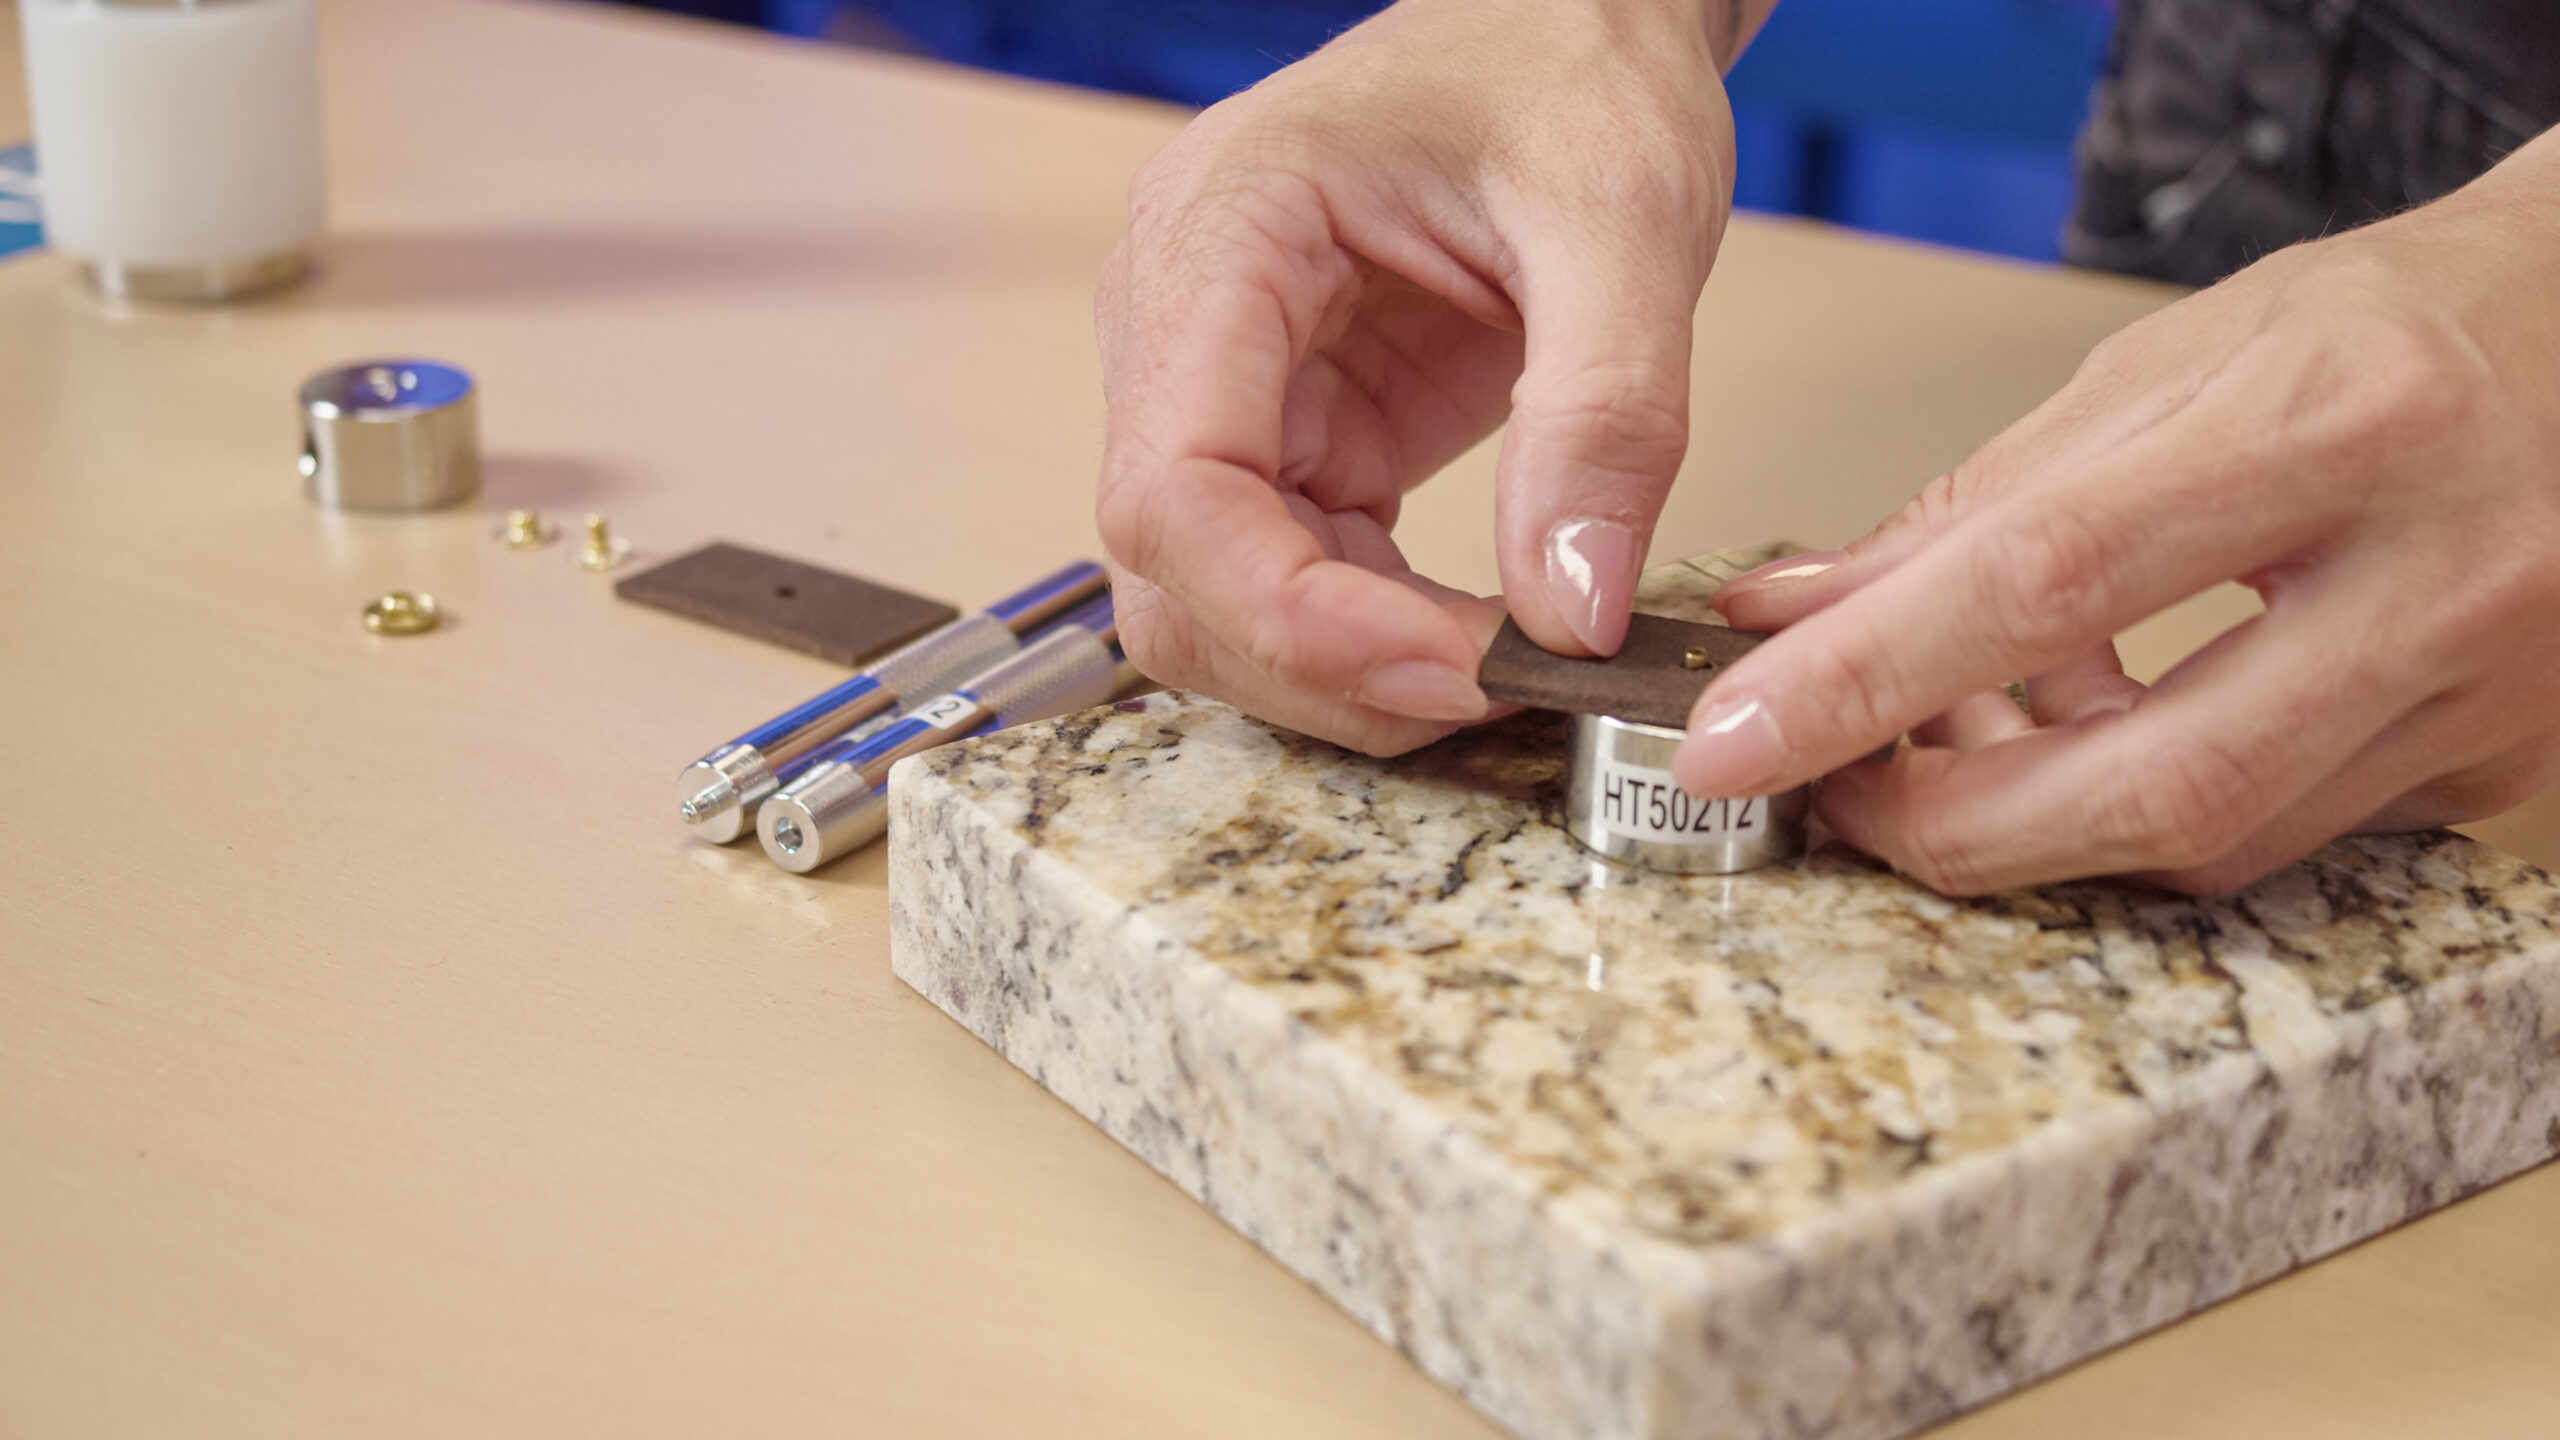
3. Add the second top part (spring).
4. Insert the setter into the hole and make sure it seats correctly.
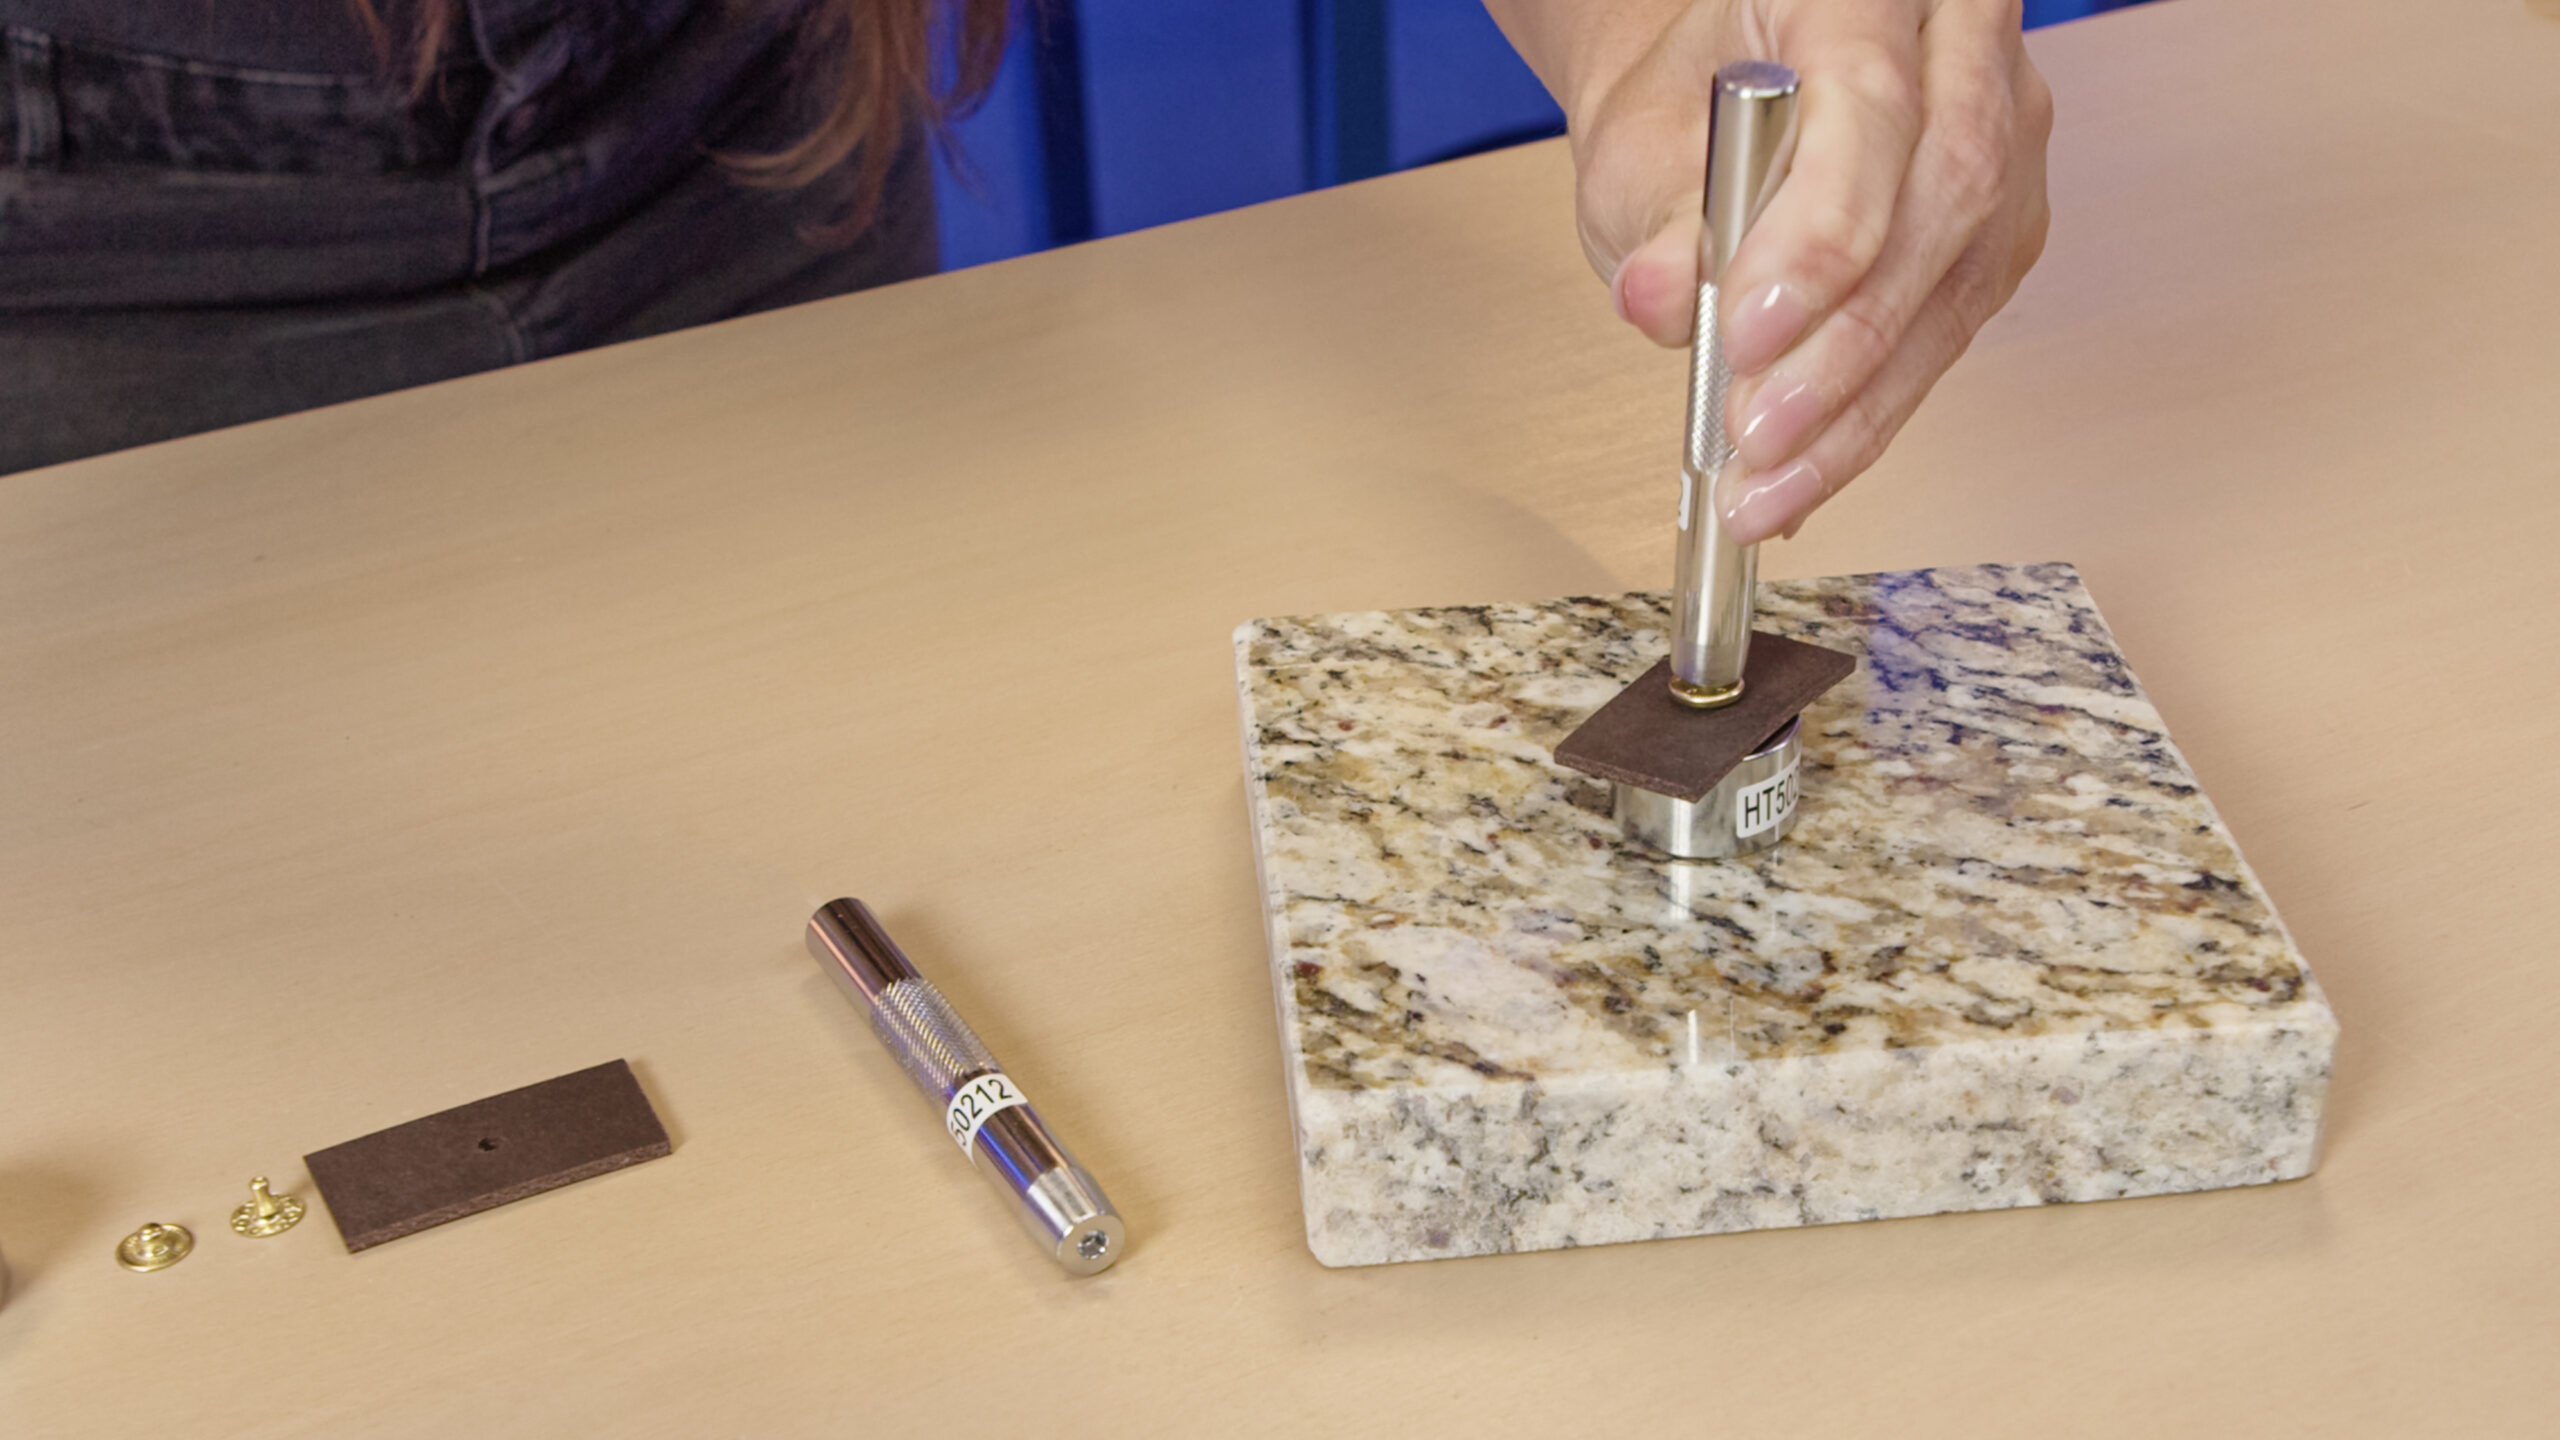
5. Join with a few taps — done.
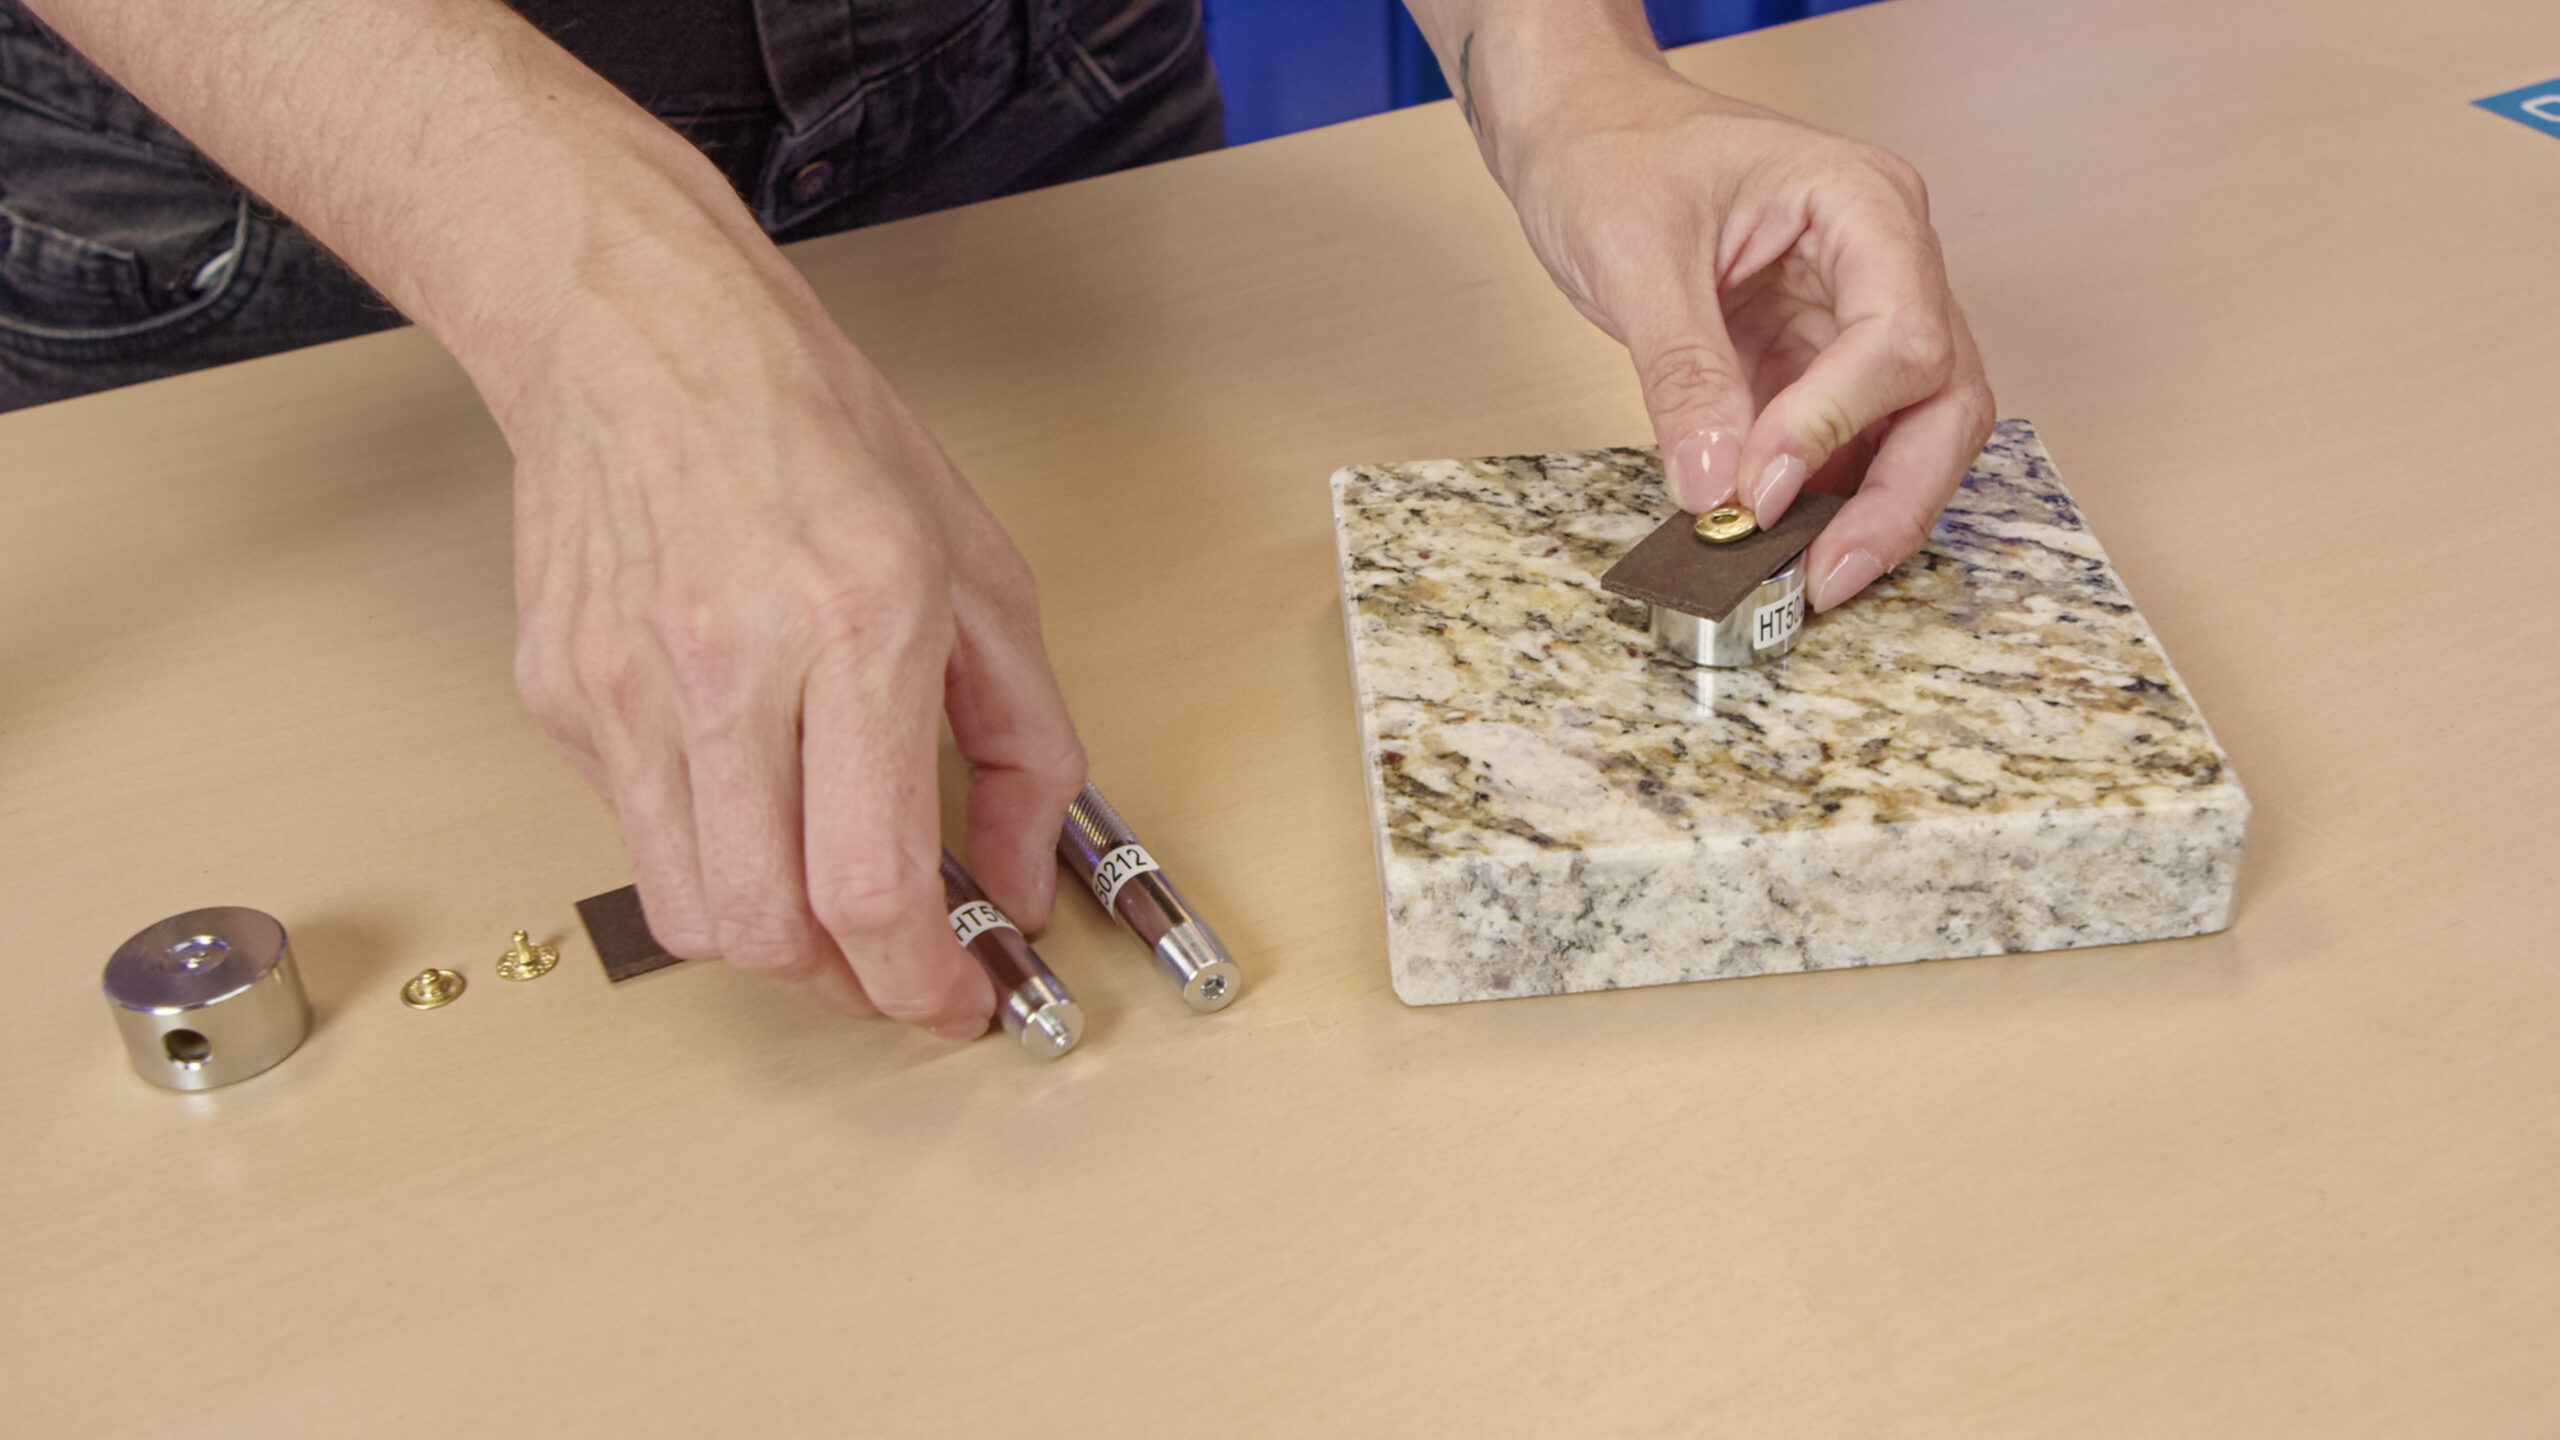
Steps to set the bottom part
The principle is the same, you just swap the order of parts:
- Place the stud into the tool (with the post facing upward).
2. Place the material reverse side down.
3. Add the counterpart (post/eyelet).
4. Press with the setter and a few taps to finish.
See the full process on video
Setting a Heavy-Duty Snap Fastener
Setting a Snap Button
Common mistakes (and how to avoid them)
? Material too soft → reinforce with interfacing or a backing patch
? Hole too large → the snap won’t hold
? Wrong post length → too short = won’t flare, too long = bends and wobbles
? Angled strike → the snap will be skewed or won’t close
? Too strong a blow → dents or damages the cap/metal
When is it time to replace a snap?
Snaps can last a very long time, but like any mechanical joint, they may wear out over time. In Snap Buttons, the spring is a thin wire, so after years it can deform, break, or lose hold. Heavy-Duty Snap Fasteners use a more robust spring design, so this is rare.
Most common types of damage:
- Tired spring — mainly in Snap Buttons; eventually stops holding.
- Poor setting — if the post didn’t flare fully during setting, the snap may wobble and fall out.
- Deformed part — often due to an overly strong strike.
? What to do?
A damaged snap unfortunately can’t be repaired. The simplest solution is to clip it off with pliers and replace it with a new one. If it gets damaged during setting, it’s worth replacing immediately — otherwise it would loosen over time and stop working properly.
Summary
Snaps are small but mighty. When you know what you’re doing, they’ll hold for years. Choose the right type, size, and finish, use the right tools — and click — you’ve got a joint that works and looks the part.
With the right tools and technique, setting snaps is quick, reliable, and durable — click after click.
Pethardware.com
The only shop you’ll ever need for crafting collars and leashes.
Visit Pethardware.com